This article outlines the options available in the Shipping Label Panel. The options shown below are primarily for shipping with USPS whereas options will look different when shipping with other carriers like FedEx or UPS.
- Select Shipping Label
- Presets
- Carrier
- Package Type
- Weight
- Dimensions
- Ship From/ Warehouse
- Profile
- Additional Options
- Notify Bill-To/Notify Ship-To
- Attach Customs Info
- Ship Date
- Packaging Weight
- Delivery Confirmation
- Shipping Methods/Rates
- Add additional insurance
- Create Label
Options not covered in this article
- Return labels: See this support article about return labels. If you are wanting to learn more about RMAs in Ordoro, see this support article.
- Dropshipping: See this support article and this support article to learn more about dropshipping.
- Mailing Post Office Zip Code: See this support article for more details.
- Reference ID: See this support article for more details.
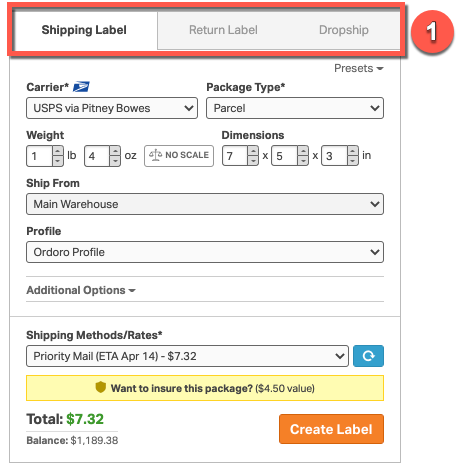
1. Select Shipping Label
Creating shipping labels, return labels, and dropshipping orders are done within the same panel.
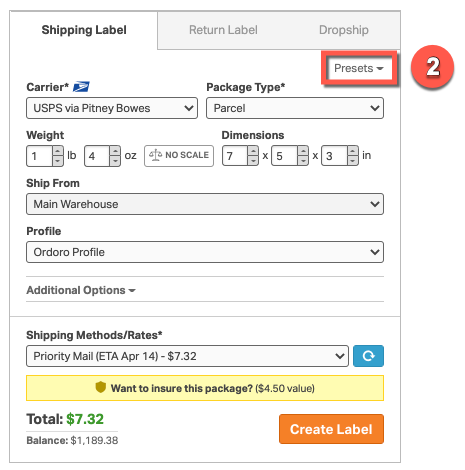
2. Presets
Presets can be added in this panel. See this support article to learn about presets.
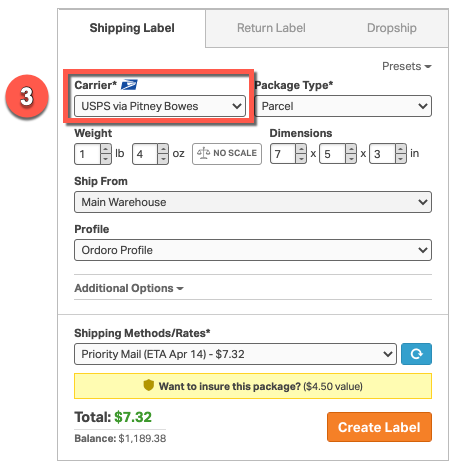
3. Carrier
Before setting any other package settings, select which shipper you’d like to use to create the label. See this support article to learn more about setting up your Shippers/Carriers.
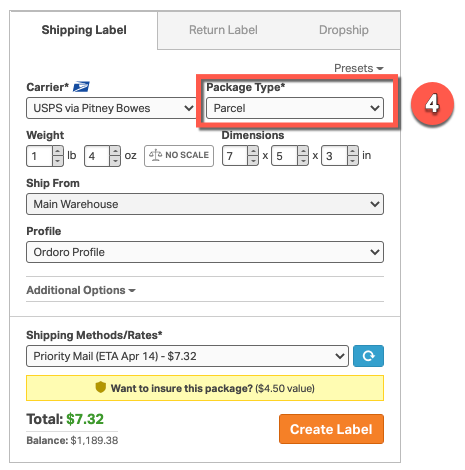
4. Package Type
This is where you will select which type of box you are using for your package. See this support article to learn more about USPS box types and definitions.
Note: If you are using your own packaging for USPS, select Parcel.
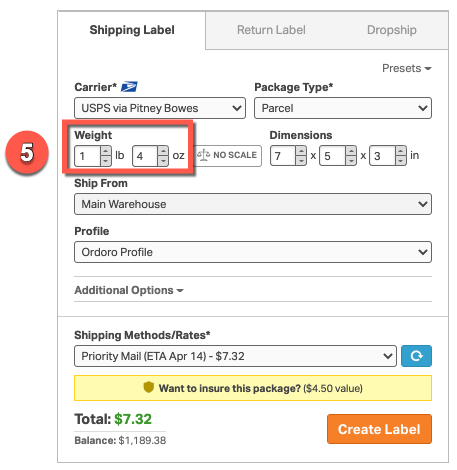
5. Weight
This is where you can enter the weight of the package. The weight of your package is used to determine the price of the label.
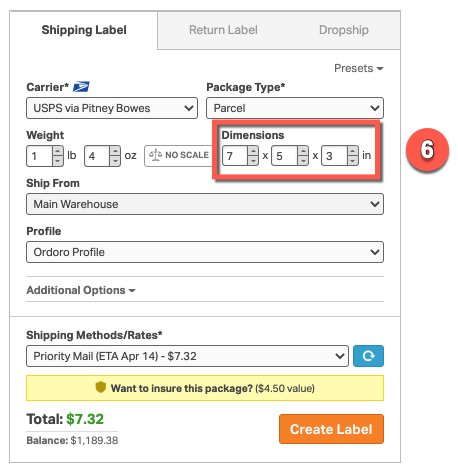
6. Dimensions
This is where you can enter the dimensions of the package.
Note: Ensure your dimensions, weight, and package type are accurate as there can be additional charges if they are incorrect. See this support article to learn more about USPS APVs.
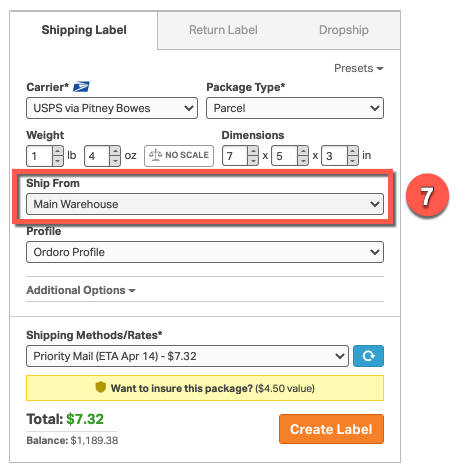
7. Ship From / Warehouse
You will be able to pick the warehouse from which the package is shipping in this dropdown menu. See this support article to learn more about warehouses.
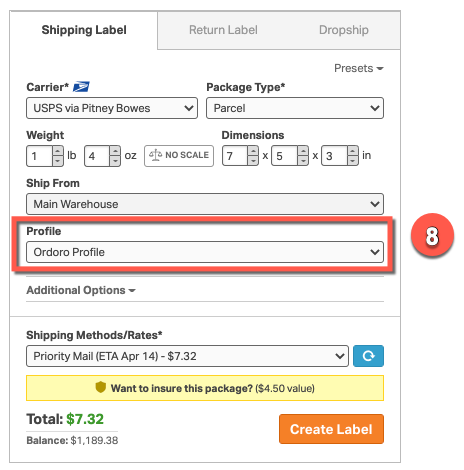
8. Profile
You can select a profile to be used when printing the packing list and pick list for the order. See this support article to learn more about profiles.
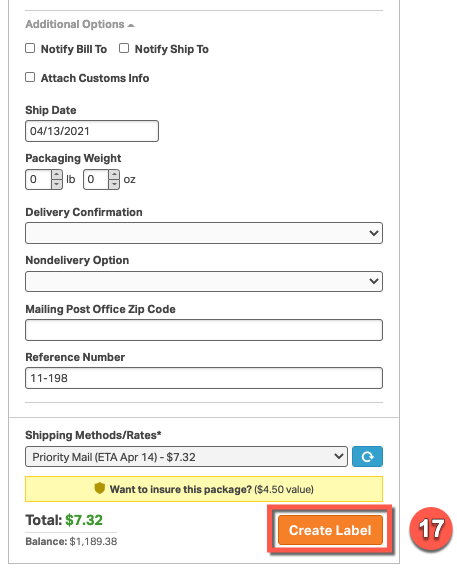
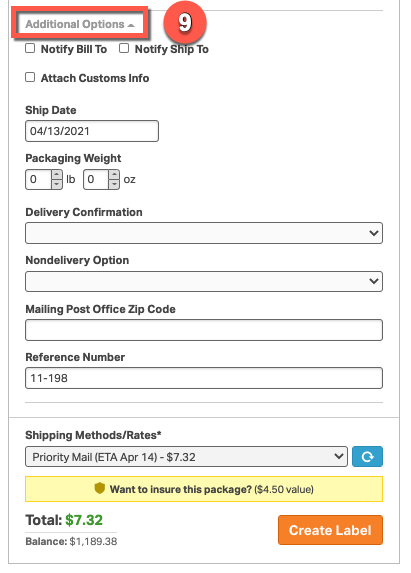
9. Additional Options
When you select Additional Options, the panel will extend.
Note: These options under Additional Options will vary depending on what carrier is selected.
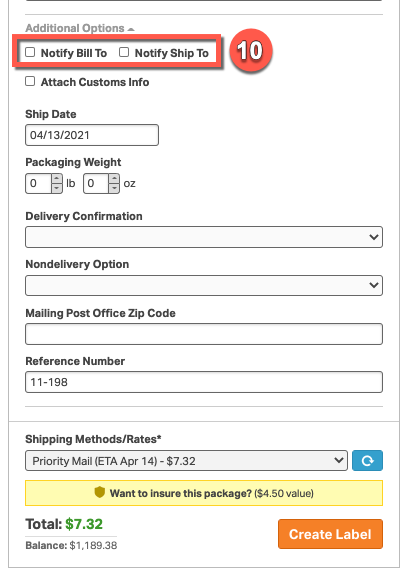
10. Notify Bill To/Notify Ship To
Ordoro will email the customer directly when you select these options. See this support article to understand when these options can be used.
11. Attach Customs Info
Select this checkbox when shipping to a non-US address. To edit the declarations form, click Edit. See this support article to learn more about the customs form.

12. Ship Date
If you’re creating labels in advance of when they will enter the mail stream, you can enter a future Ship Date.

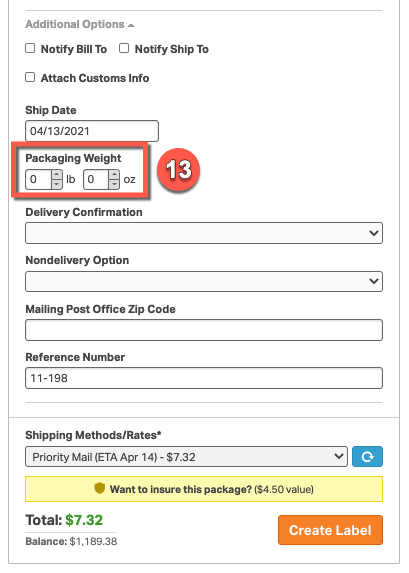
13. Packaging Weight
If you weigh your packaging materials separately, you can add the weight in this field.
Note: The Packaging Weight will be automatically added to the value in the Weight field when you create the label.
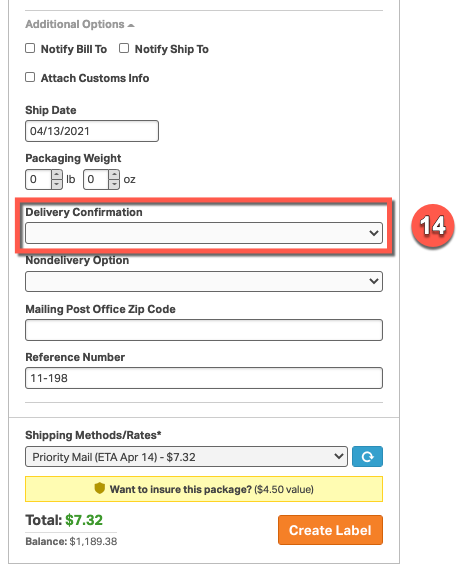
14. Delivery Confirmation
You’ll be able to add Delivery Confirmation from this dropdown. See this support article to learn about these options.
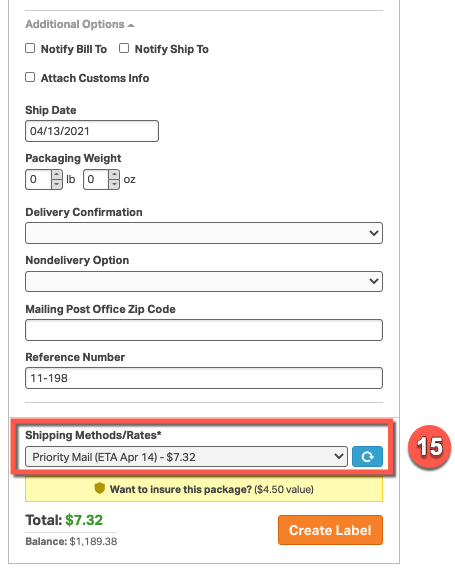
15. Shipping Methods/Rates
This is where you will select the shipping method and see the corresponding rates. If you’ve made a change (like increased the package dimensions), you can refresh the Shipping Methods/Rates by clicking on the blue button with the white circular arrow to see the most accurate rates for this order.
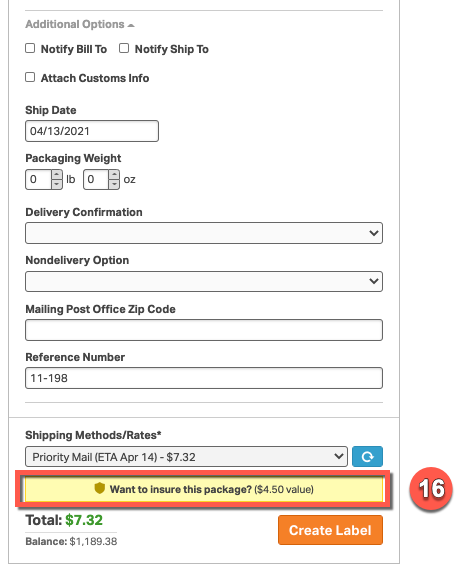
16. Add additional insurance
Check this box to add shipping insurance. See this support article to learn about this insurance.
17. Create Label
When you click Create Label, your shipping label will be created. From here, you will select your printer type and print the label or chose to print it later. See this support article to learn more about when you are charged for the label.