Ordoro’s shipping presets allow you to quickly process your orders by applying shipping parameters in one click.
Presets can be configured with a variety of criteria such as shipping carrier, method, ship date, delivery confirmation, product dimensions, weight, and more.
When orders are ready to go out the door, simply select them in bulk and apply your unique presets, whether tailored to heavy orders that need FedEx’s power or small parcels that use USPS First Class.
Topics:
- How to create presets
- How to search for a preset
- How to edit presets
- How to assign presets
- How to delete presets
- Preset FAQ
How to create presets
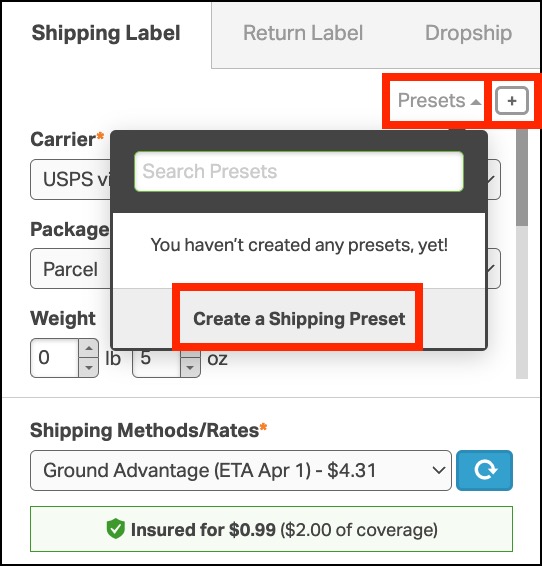
1. On the Orders page, you can create a preset in two ways:
- Select Create a Shipping Preset.
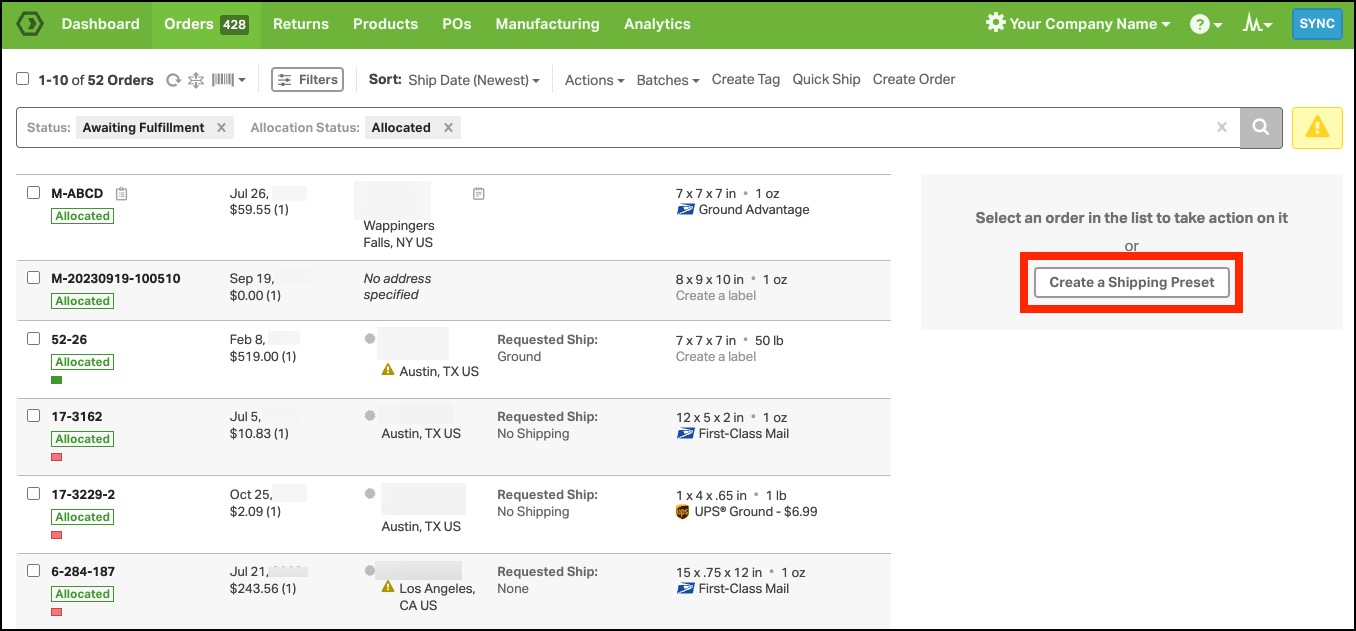
- Choose an Order and select your desired shipping options. Then, click on either:
- Presets -> Create a Shipping Preset.
- Plus sign
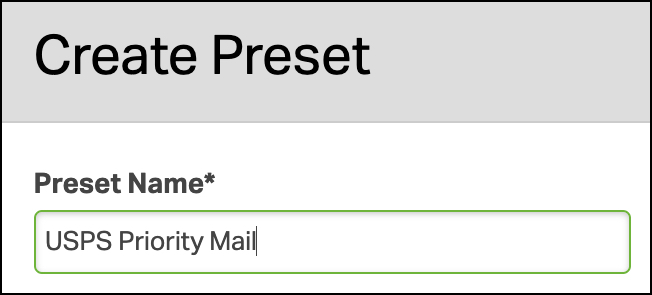
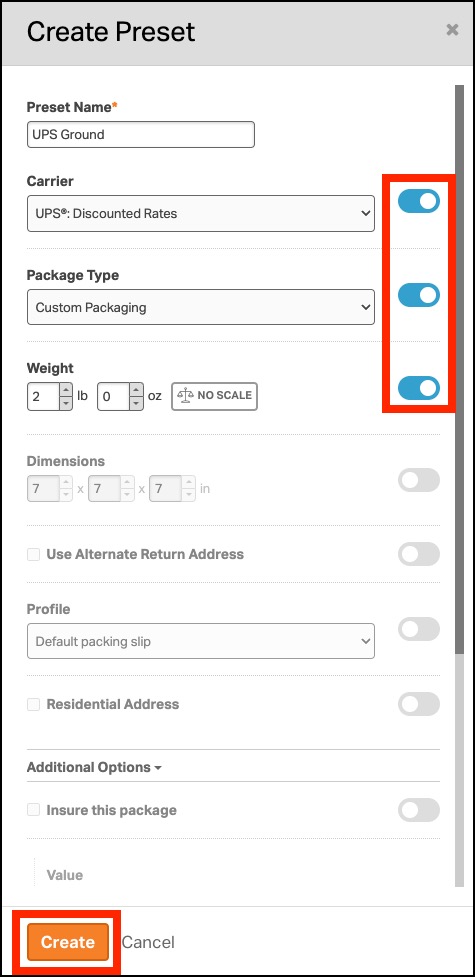
2. Assign a Preset Name.
3. Choose which preset options you’d like to enable.
- Turn on/off options: The preset will only apply the option if the toggle is set to blue.
- Additional Options: These change based on the carrier chosen.
- For example, you must enable Carrier: UPS before turning on Dry Ice Weight (oz).
4. Click Save to finalize the preset.
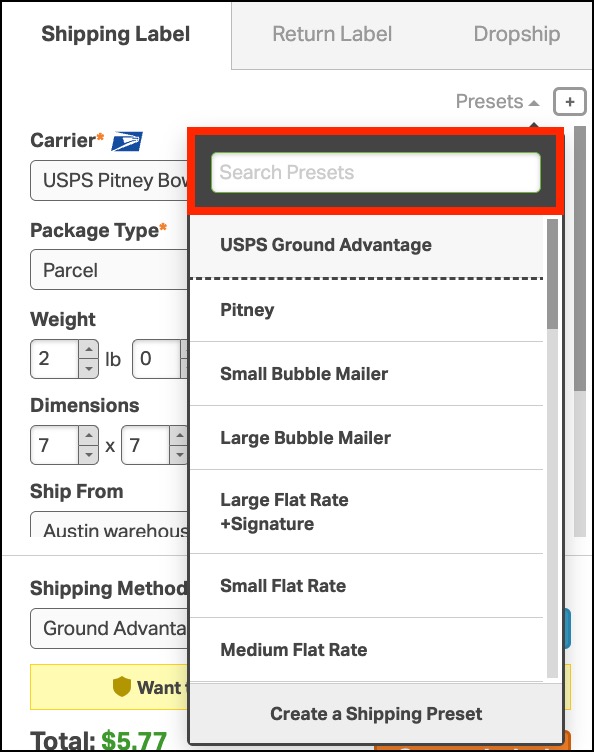
How to search for a preset
If you’ve created multiple presets, it may be difficult to find them in the list. To help, you can search your presets.
- Select an unshipped order to open the Label Panel.
- Click Presets at the top right of the Label Panel.
- In Search Presets, enter the preset name. As you start typing, presets that match will appear.
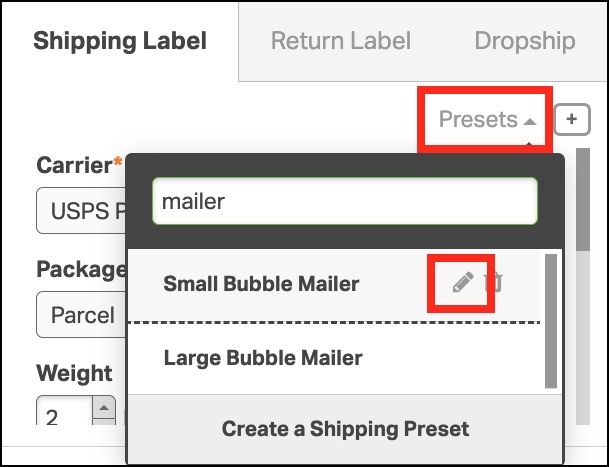
How to edit presets
Here’s how to edit:
- Select an unshipped order to see the Label Panel on the right.
- Click on Presets on the top right corner of the Label Panel.
- Select the Pencil icon next to the preset you’d like to edit.
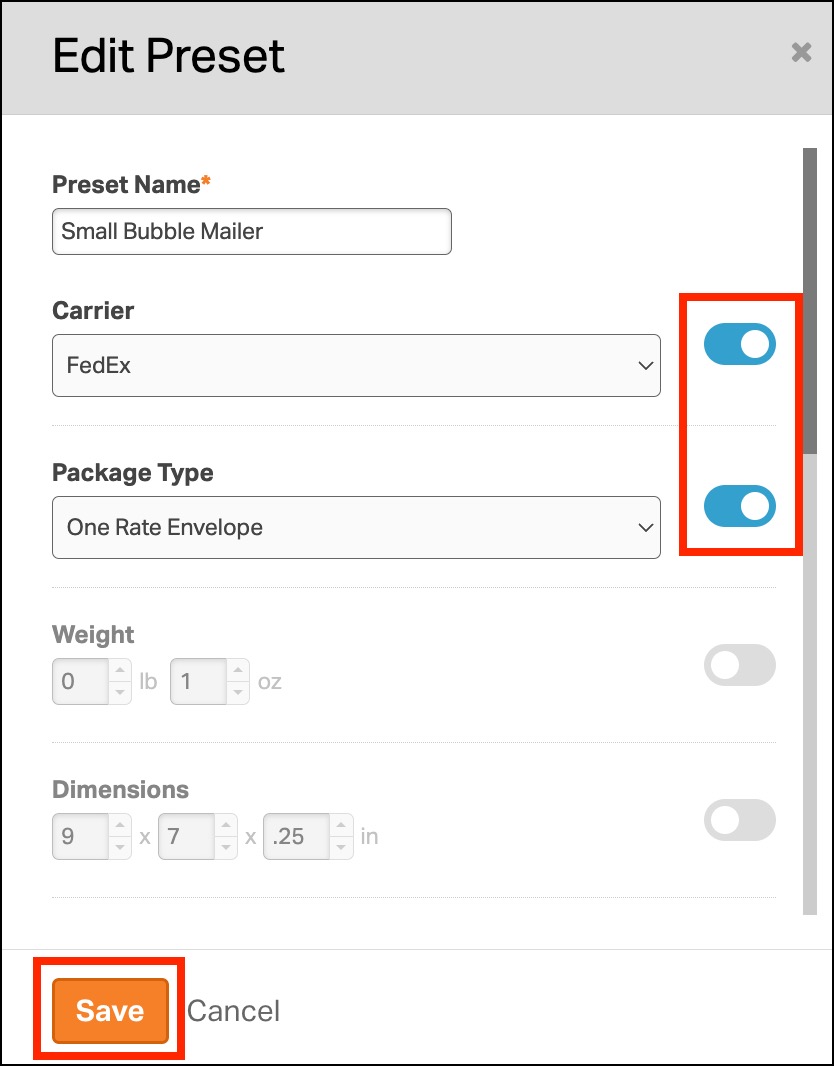
- Edit the options as needed. Example: change the carrier from USPS to FedEx or update the package dimensions.
- Toggle the options on the right. Blue means enabled, grey means it’s off.
- Click Save to finalize the preset.
How to delete presets
You can delete a preset as long as it’s not linked with a rule.
- Select an unshipped order to see the Label Panel on the right.
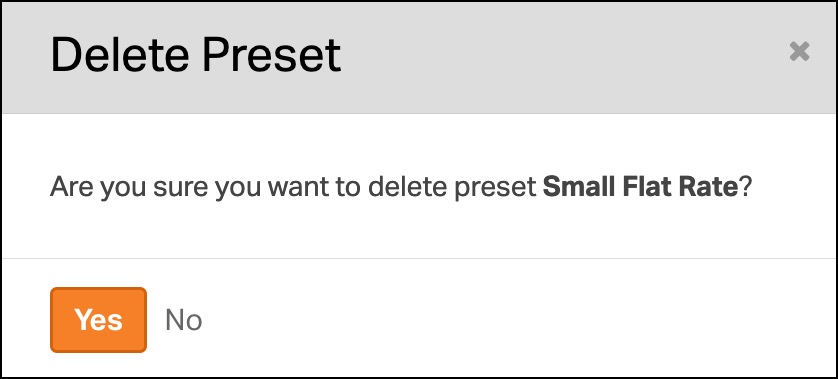
- Click on Presets -> Trash can icon next to the preset to delete.
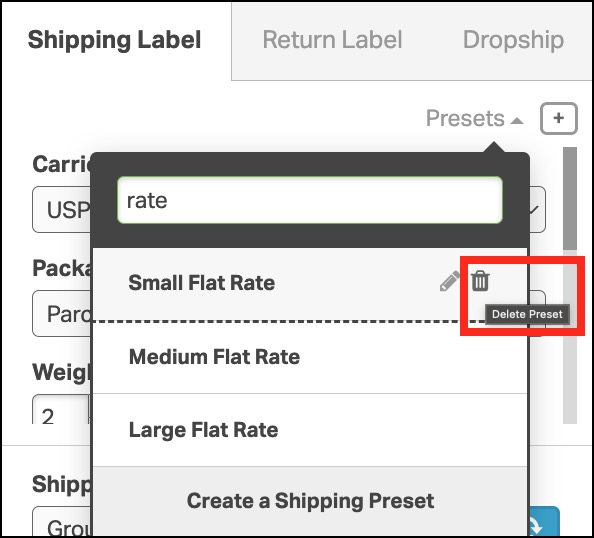
- A pop-up will appear to confirm this action.
- You will see an error message if the preset is linked to a rule.
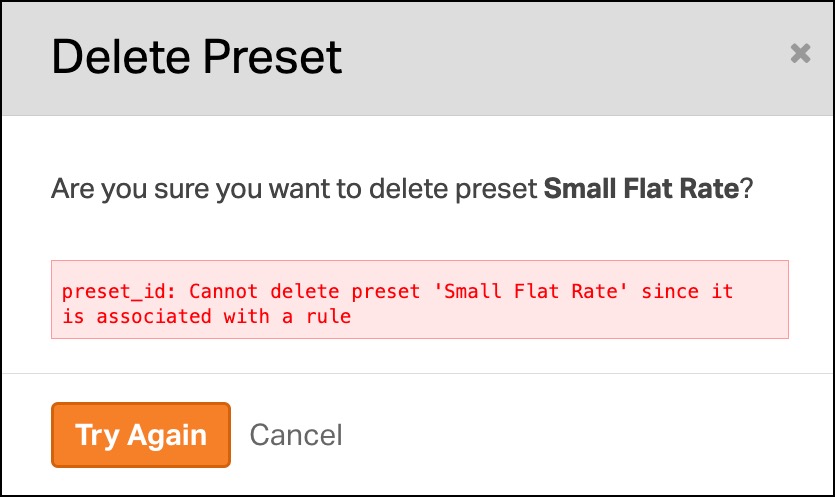
- To fix this, go to your Rules and find where the preset is used.
- Then you’ll either want to: 1) disable the rule or 2) use a different preset on the rule.

How to apply presets
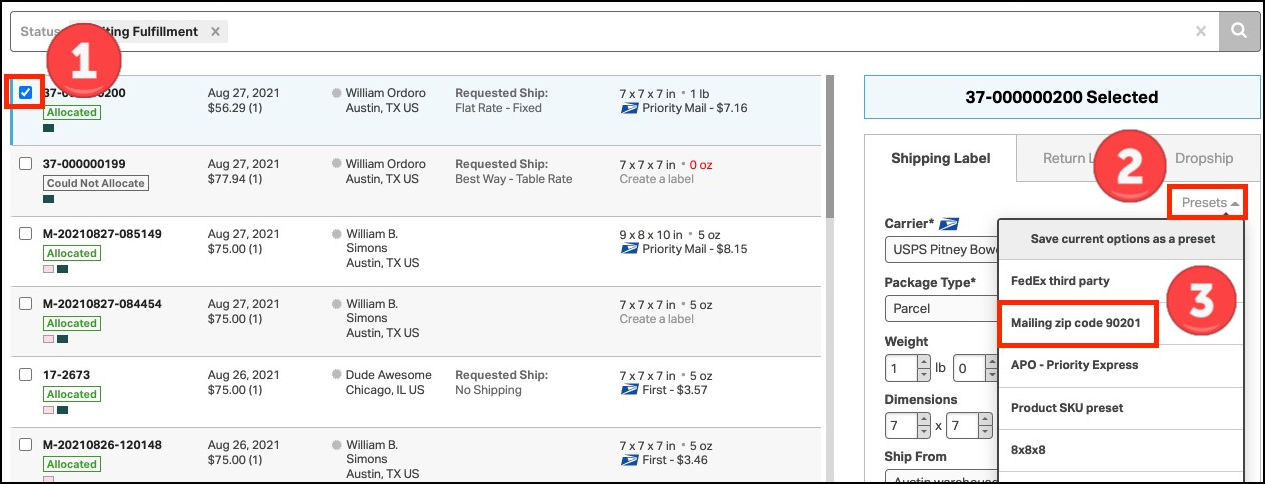
Apply preset to a single order:
- Select an unshipped order to see the Label Panel on the right.
- Click on Presets on the top right corner of the Label Panel.
- Select the preset you want to apply to the order.
- Once the preset is selected, its values are immediately applied to the order.
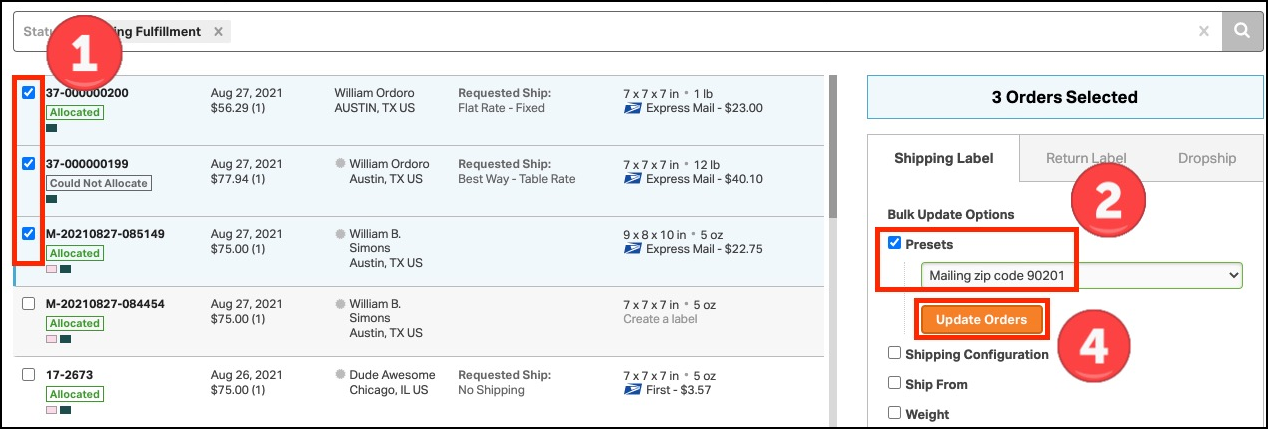
Apply preset to multiple orders:
- Select multiple unshipped orders to see the Label Panel on the right.
- In the Bulk Update Options Label Panel, select Presets.
- Choose the desired preset from the dropdown.
- Click on Update Orders.
- Once the preset is selected, its values are immediately applied to the order.
To assign presets via rules:
Ordoro’s rules allow you to apply presets to orders upon import. If an order meets the rule criteria, the preset will automatically be applied.
- Create your preset first.
- Create an automation rule with the preset following the steps provided here.

Presets FAQ
- Is there a limit on the number of presets you can have?
- No, you can create as many presets as needed.
- Can I apply multiple presets to the same orders?
- Yes. However, if multiple presets have the same value, then the one applied last will save.
- For example, you may have a FedEx and a UPS preset. If you apply the UPS preset last, then UPS will be used, not FedEx.