Yes! Need to restock multiple products at once? Ordoro makes it easy to create purchase orders (POs) in bulk, whether you prefer doing it in-app or using a CSV file. This guide covers both methods for bulk PO creation to help streamline your inventory workflow.
Topics
Create POs using the Order More button
Use the Order More tool to quickly create POs for multiple products at once or to add items to existing POs. Here’s how:
- Go to the Products tab in Ordoro.
- Check the boxes next to the products you’d like to reorder.
- Click the Order More button above the search bar.

- In the popup window:
- Select the supplier for each product.
- Choose the warehouse to receive the items.
- Enter the quantity to order.
- The Physical On Hand value is specific to the selected warehouse.
- Committed and Reordered values are totaled across all warehouses.
- If a product has a minimum order quantity, you can set that default in the product’s settings. Learn how →
- Click Order More to finish.

If you already have an open purchase order (PO) for the selected supplier, Ordoro will add the new items to it. Otherwise, it’ll create a brand new PO.
Create POs via Data Import (CSV)
For larger PO creation, the Data Import tool allows you to upload a CSV file to generate purchase orders in bulk.
Step-by-step:
- Click on your Company Name -> Data Import.
- In the Import Type dropdown, select Create Purchase Orders.

- Download the example CSV template provided.

- The required columns are:
- Supplier Name
- SKU
- Optional fields include:
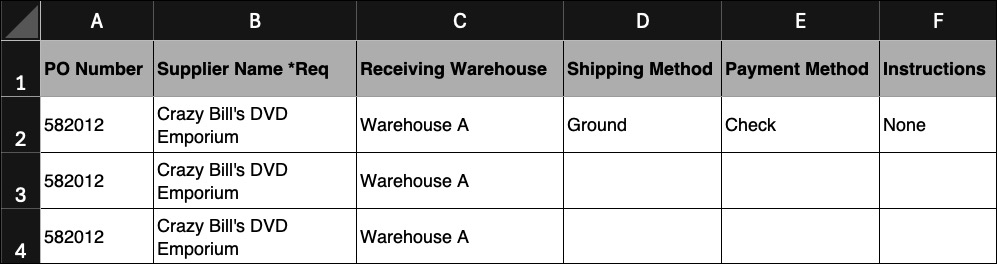
- Quantity, Warehouse Name, Shipping Method, Payment Method, Instructions, Discount, Shipping & Handling, and Tax.
- If optional fields are left blank, Ordoro will use a default value of None specified or zero.
- Fields like Shipping Method or Payment Method:
- Only need to be filled in once per PO (on the first row for that PO number).
- The values will carry down to other rows with the same PO number.
- Save your edited file as a .csv format.
- Drag and drop your CSV into the Data Import window, or use the file selector to upload it.
- Match the Column Titles in your file to the correct Ordoro fields.
- Click Verify Columns to continue.
- Follow the prompts to complete the upload.

- Stay on the page while the import processes. You’ll see a confirmation message: “Your data has been saved!” once it’s done.
