Ordoro provides a user-friendly interface for creating or updating orders, products, tracking numbers, and more. However, in cases where bulk updates are required, our Data Import feature is the perfect solution. By uploading CSV files, users can quickly and efficiently make large-scale changes to orders and products, streamlining their workflow and saving valuable time.
Related support articles:
- How do I import orders via a CSV file?
- How do I update products in bulk?
- How do I bulk update inventory quantities?
- Can I create Purchase Orders in bulk in Ordoro?
How to use Data Import
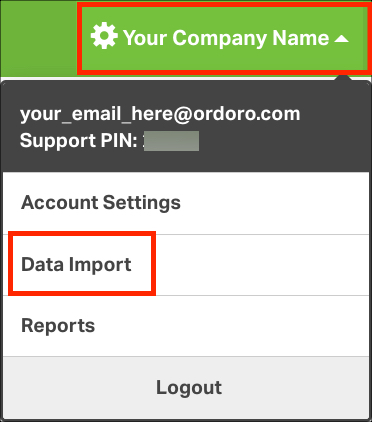
1. Go to Account Settings -> Data Import.
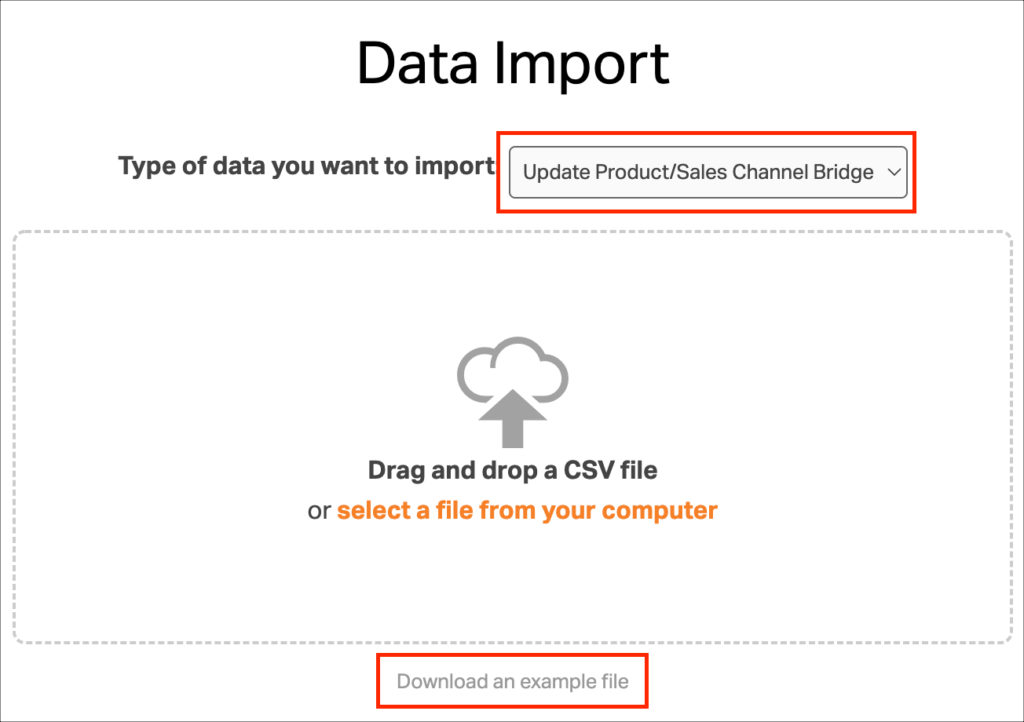
2. In the dropdown menu, select the type of data to import. Options below with more details in this support article.
- Archive Products
- Create Addresses
- Create Orders
- Create Products
- Create Purchase Orders
- Create Suppliers
- Create Tracking Numbers
- Create/Update Supplier SKUs
- Manage BOMs
- Manage Kits
- Manage Product Tags
- Remove Supplier SKUs
- Unarchive Products
- Update Inventory
- Update Product Fulfillment
- Update Product Image
- Update Product/Sales Channel Bridge
- Update Products
3. Download the example file for the data type. This will download a CSV file to your computer.
4. Open the example file and edit it to bulk update the information in Ordoro.
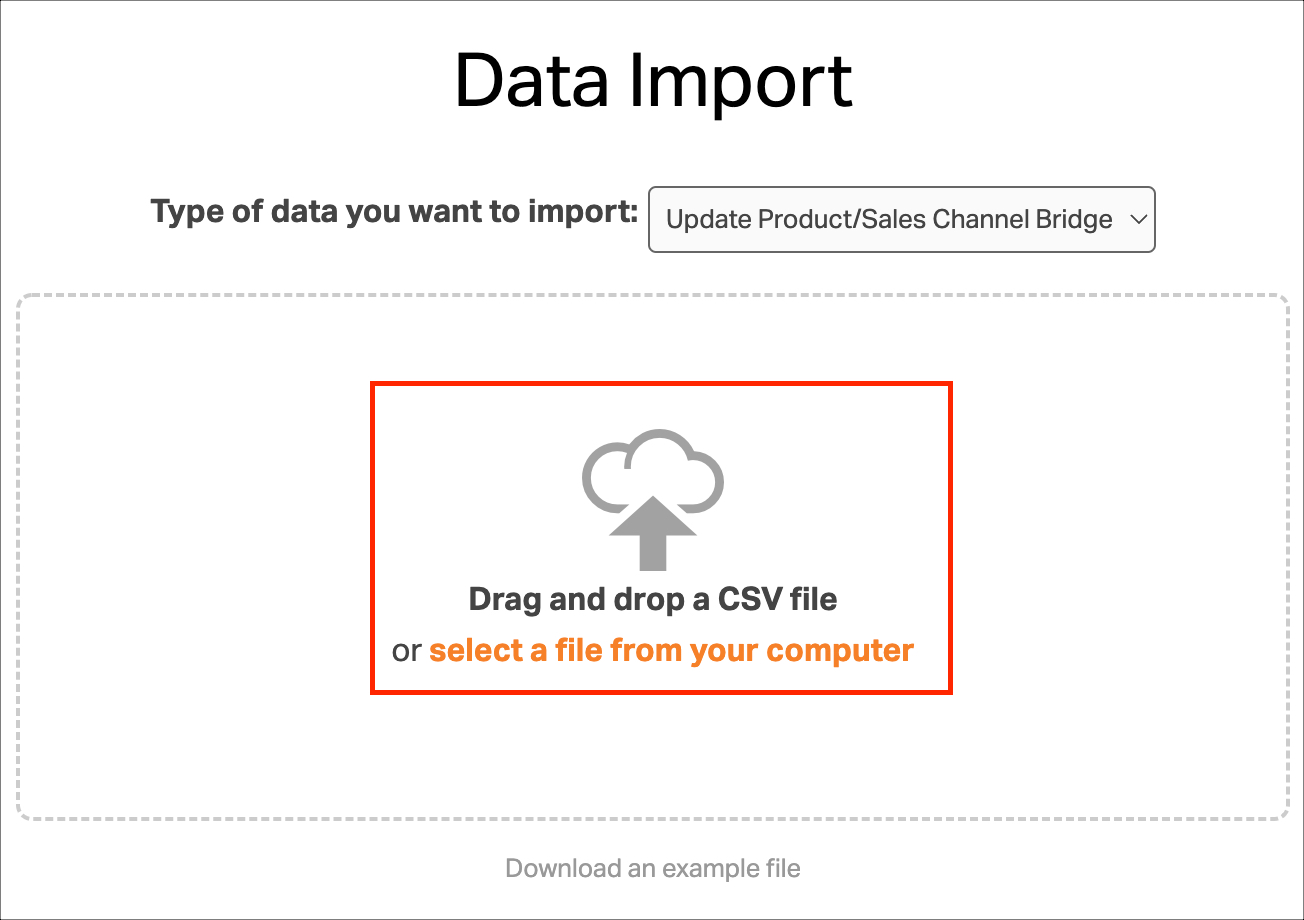
5. Upload the file using the drag-and-drop feature or select the file from your computer.
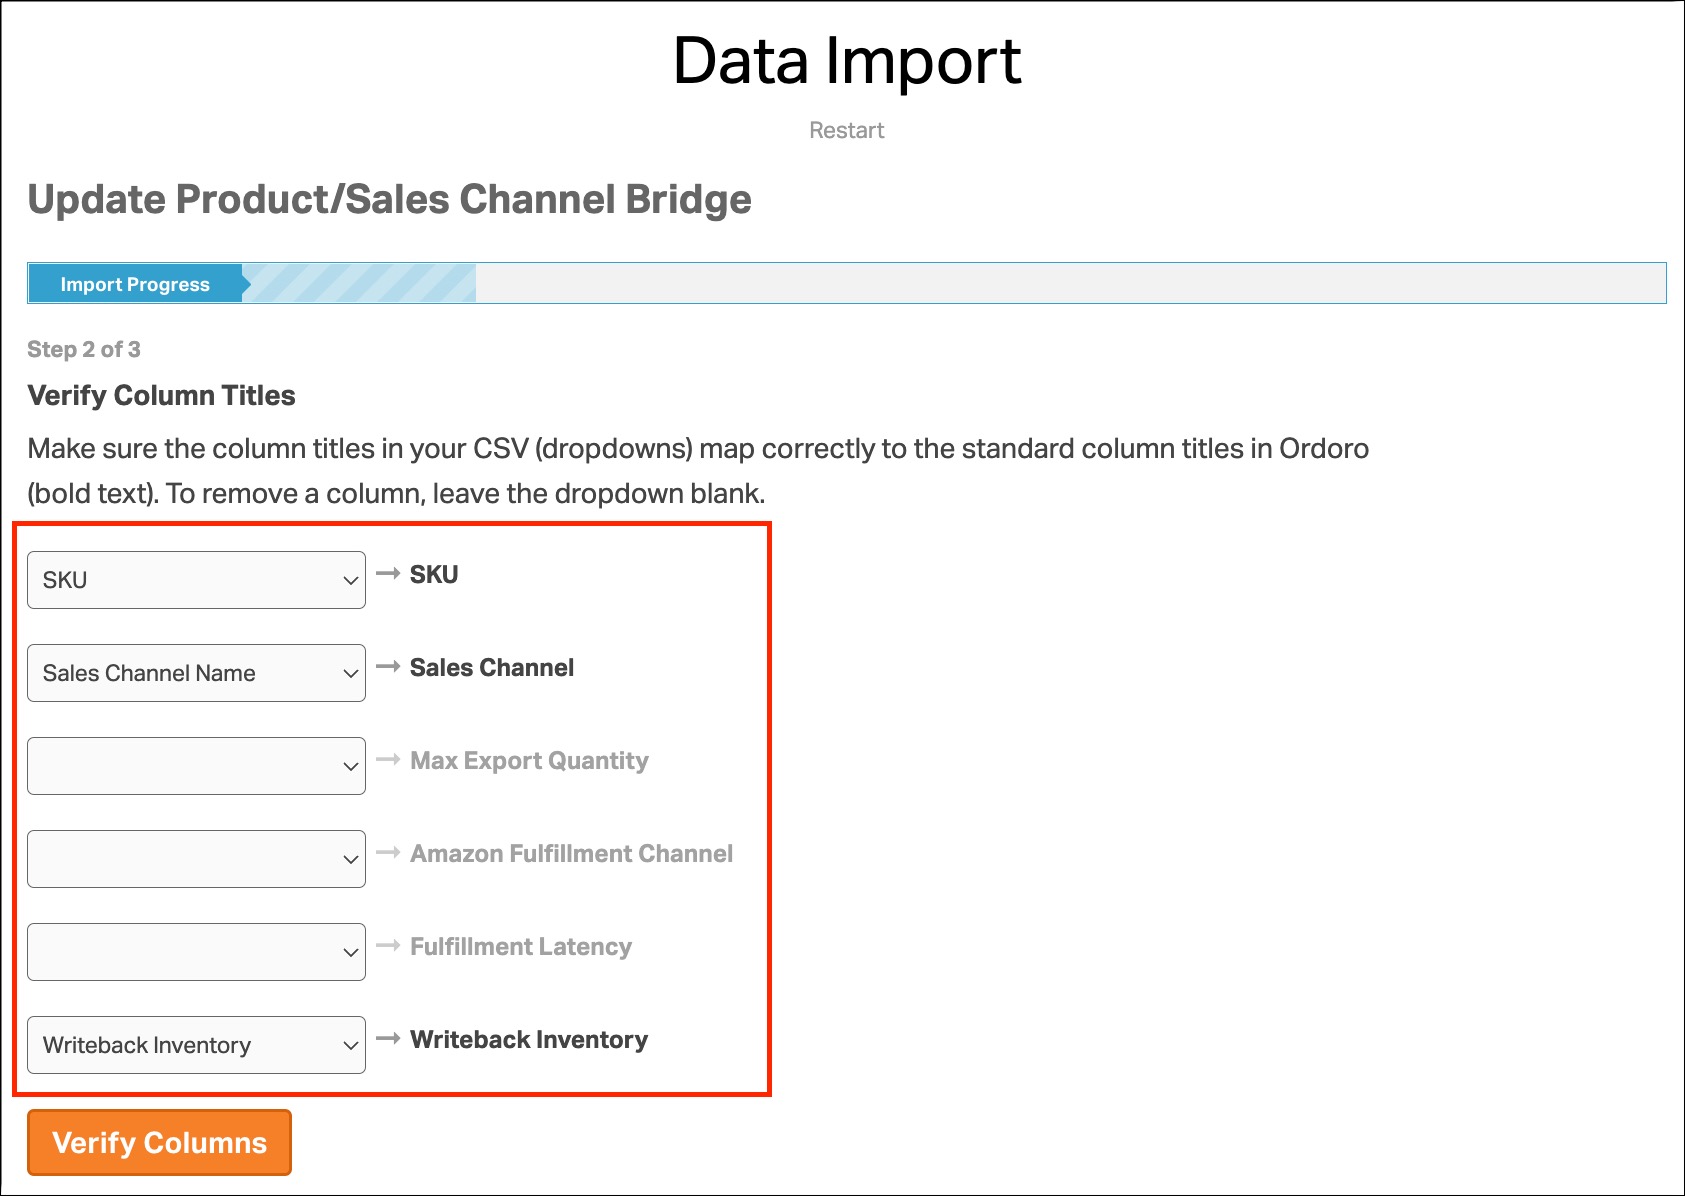
6. Validate that the CSV data is mapped correctly to upload to Ordoro. Click Verify Columns once ready.
- If there’s a column you don’t want to import, set the mapping to the blank value.
- In the screenshot below, see how Max Export Quantity is not mapped.
- Update any column mapping, as needed.
7. Next, we’ll save the file. Before starting the import, you have two options.
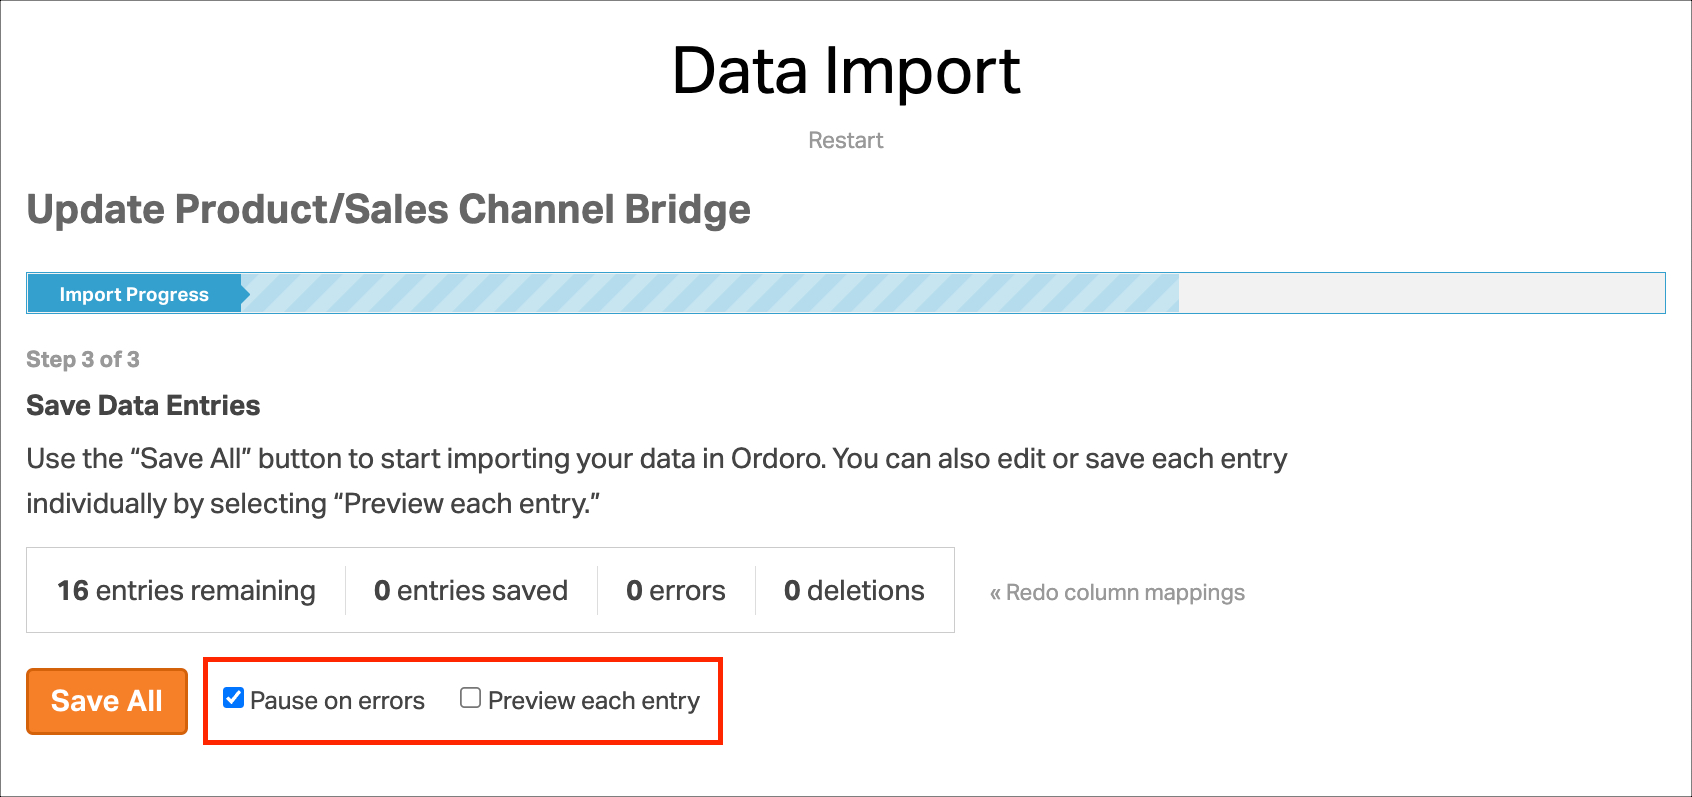
- Pause on errors
- If selected, any bad data will stop the import and require you to review before continuing.
- If not selected, any bad data will be skipped to review at the end.
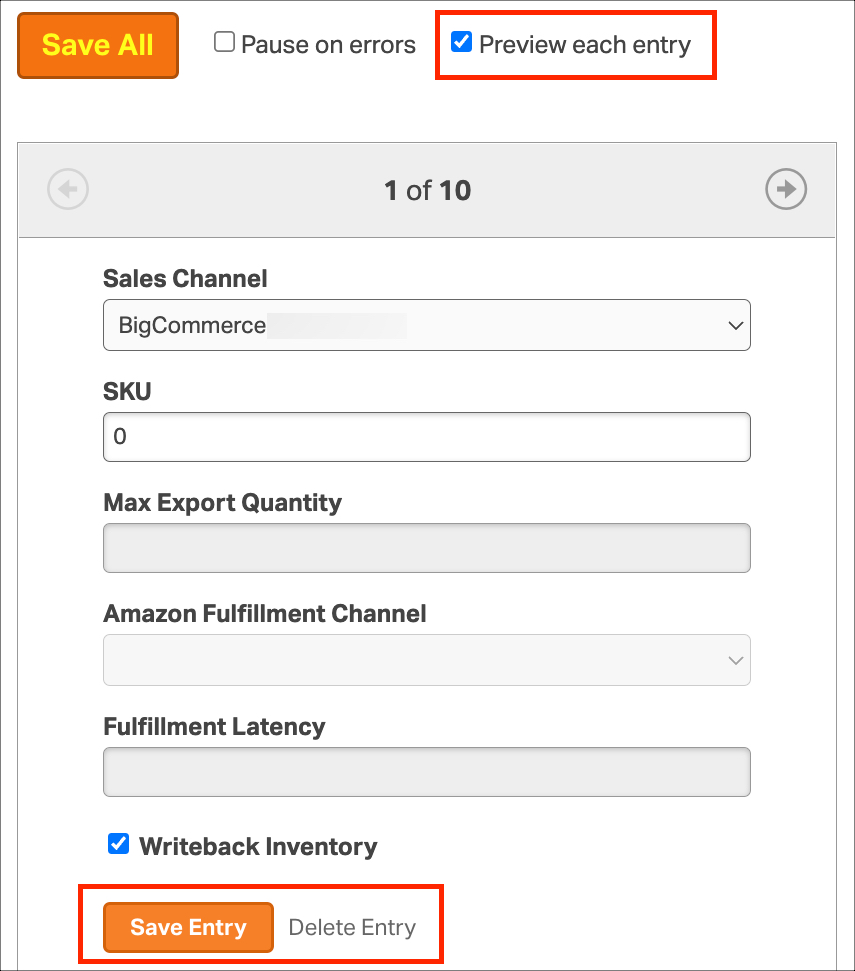
- Preview each entry
- If selected, you can preview each row from the spreadsheet. Then you can decide whether to save or delete the entry from the upload.
- If not selected, then all info will be uploaded as-is.
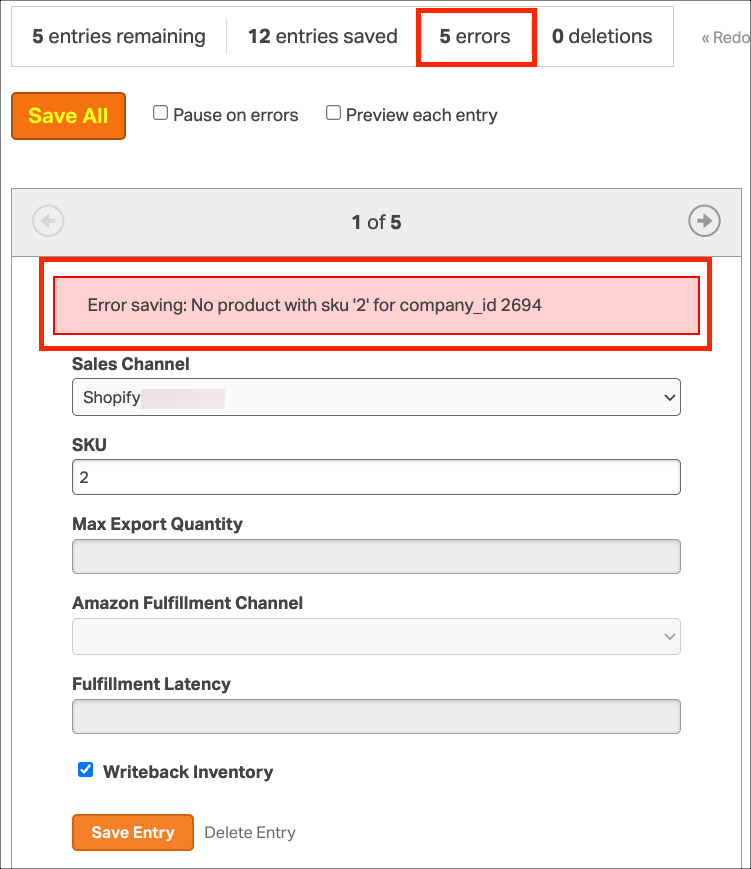
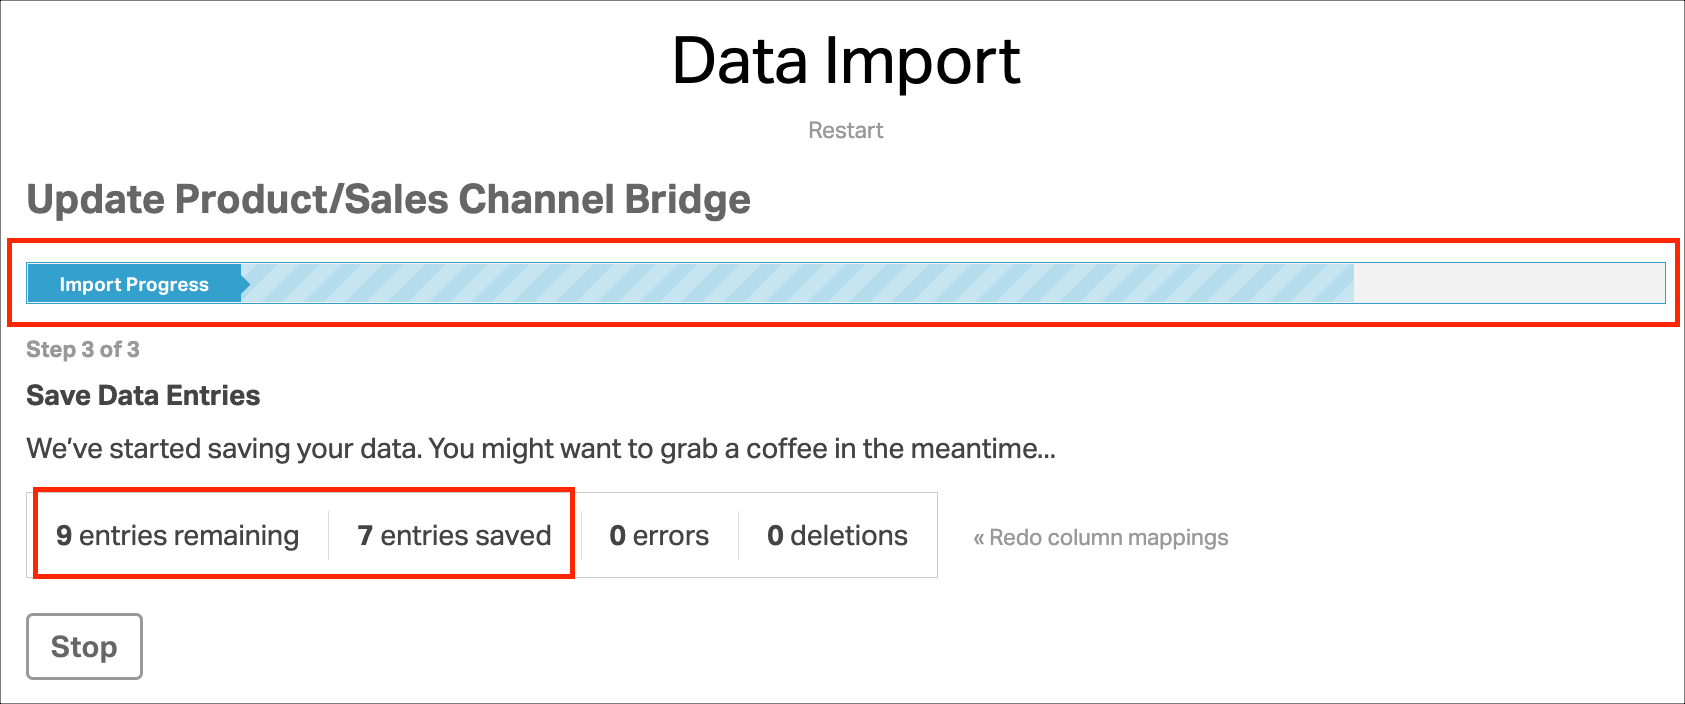
8. Once you start saving the data, especially if you click Save All, Ordoro will show how many entries have been successfully uploaded and how many are left to go.
9. If all entries were saved successfully, you’ll see a green bar.

10. If there are errors, each entry will be shown with the error message.
- You can fix each entry by updating the information or deleting it.
- If none of the data is imported successfully, you may need to update your file or column mappings.