Getting your Pitney Bowes account ready and integrating it with Ordoro doesn’t have to be complicated. We’ve made it super simple with this guide!
Just follow these steps to create your Pitney Bowes Merchant account, set up ACH payments, and connect everything to your Ordoro account.
What is ACH, you may ask? An ACH (Automated Clearing House) payment is an electronic method for transferring funds directly between banks. This system facilitates the movement of money without the use of physical checks, cash, credit card networks, or wire transfers. It provides an alternative, often more efficient way of conducting bank-to-bank transactions.
Ready to get started? Awesome, let’s dive in!
Notes:
- If you notice an existing USPS Pitney carrier in your Ordoro account, that’s normal. It’s your older account linked to credit card payments.
- We need to create a NEW Pitney Bowes account to work with ACH.
Topics
- Create Your NEW Pitney Bowes Merchant Account
- Contacting Pitney Bowes for ACH Setup
- ACH Setup in the Pitney Portal
- Choose Your ACH Connection Method
- Add Postage and Set Your Refill Preferences
- Connect Your Pitney Bowes Account to Ordoro
- Contact Ordoro Support to migrate your presets and rules
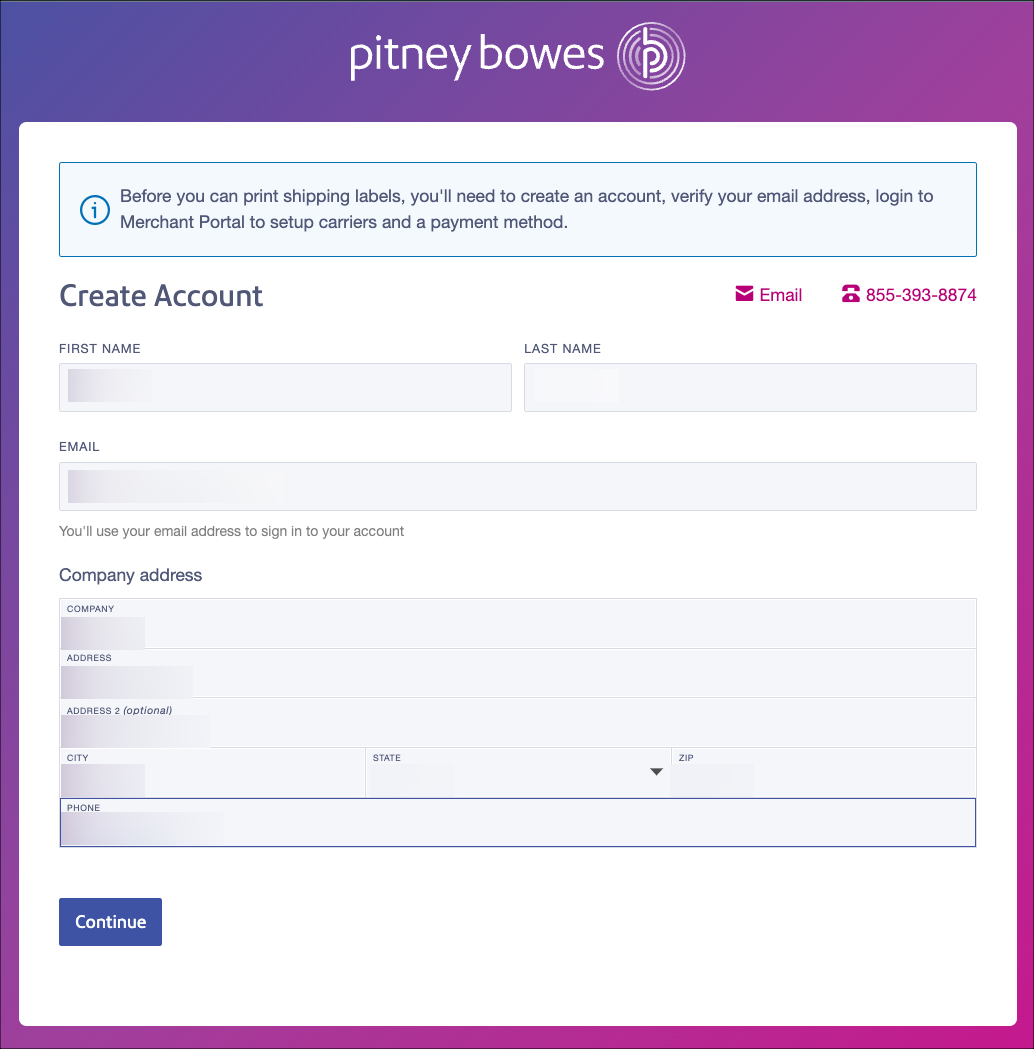
Create Your NEW Pitney Bowes Merchant Account
1. Start by Creating a New Merchant: Click on this special link to set up your new Pitney Bowes Merchant account.
- Use an Accessible Email:
- Use an email address with an inbox you can access when creating your account.
- You’ll receive a confirmation code and follow-up instructions via this email.
- Email Exclusivity:
- Once an email is associated with this account, it cannot be reused in the future.
- Consider using departmental email addresses, e.g., shipping@yourcompany.com, to ensure accessibility even if personnel changes.
- Handling Email Already in Use:
- If you receive an error indicating the email is already in use, it may be linked to your existing USPS Pitney Bowes account in Ordoro.
- In these cases, enter a different email address for your new account, as it cannot be changed later.
2. Choose if you want to activate multi-factor authentication for your new Pitney Merchant account
- Multi-factor authentication (MFA) requires users to provide multiple verification methods for added security. It ensures that a password alone isn’t enough to access an account.
- If selected, Pitney Bowes will send you a verification code each time you log into the account.
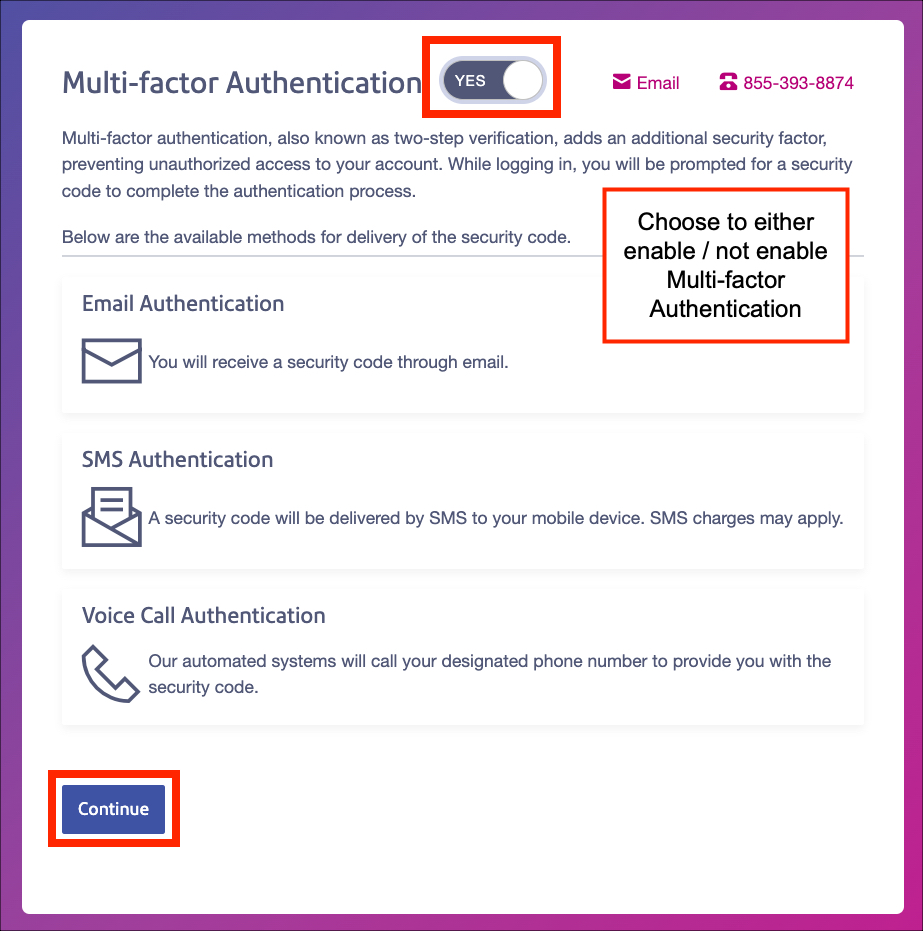
3. Click Submit after Pitney Bowes confirms your Company Address and Multi-Factor Authentication preferences.
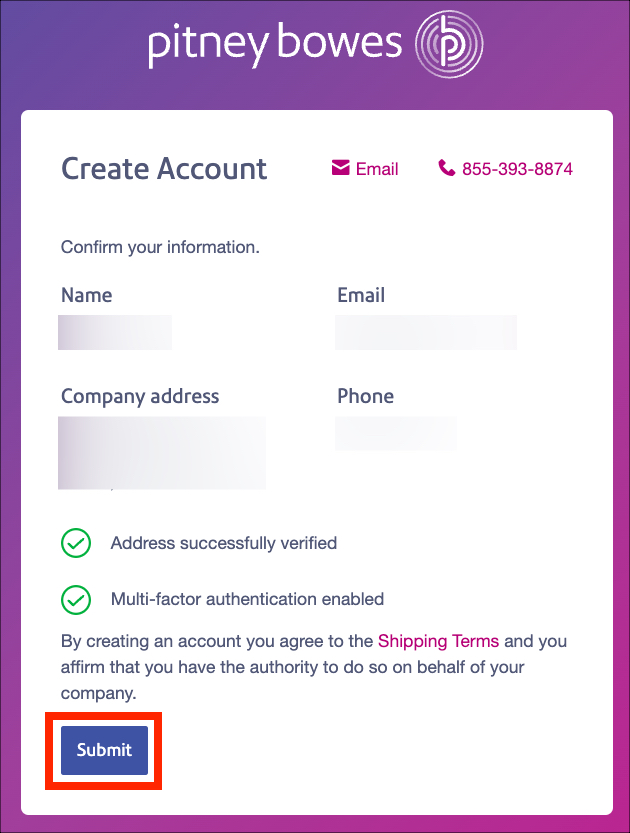
4. Pitney Bowes will send you a confirmation email verifying the account.
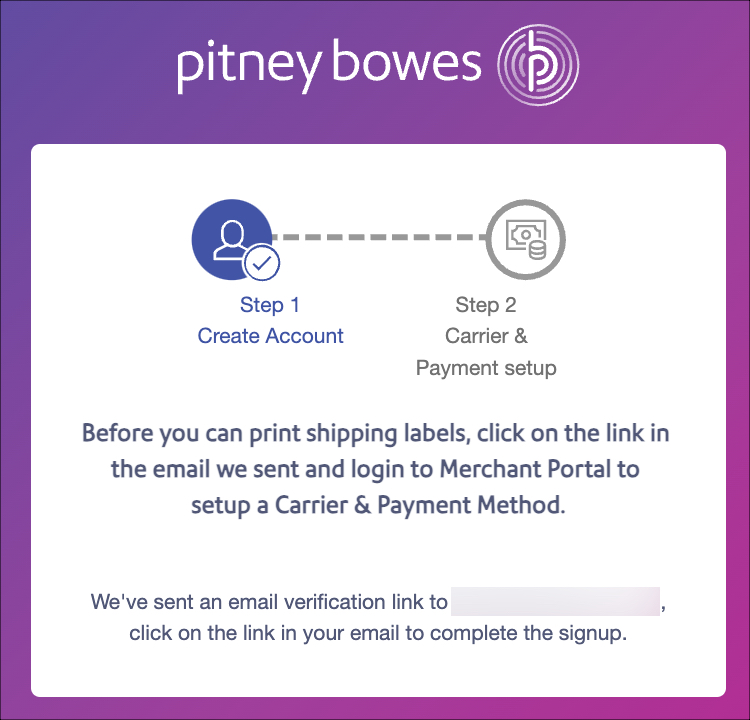
5. Find an email titled “Pitney Bowes Email Verification.” Click the Complete Registration Now button.
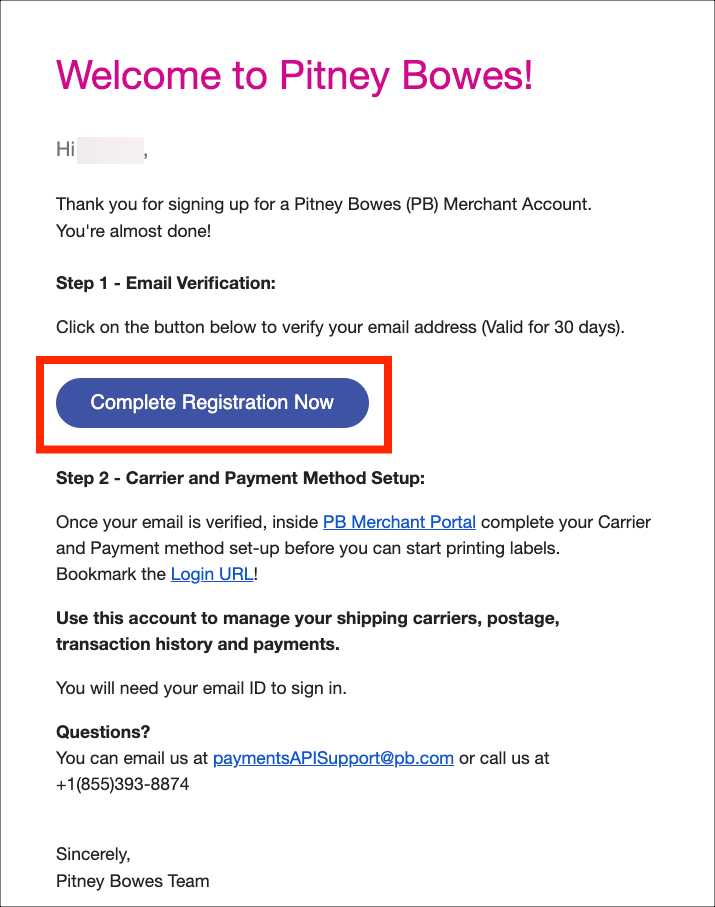
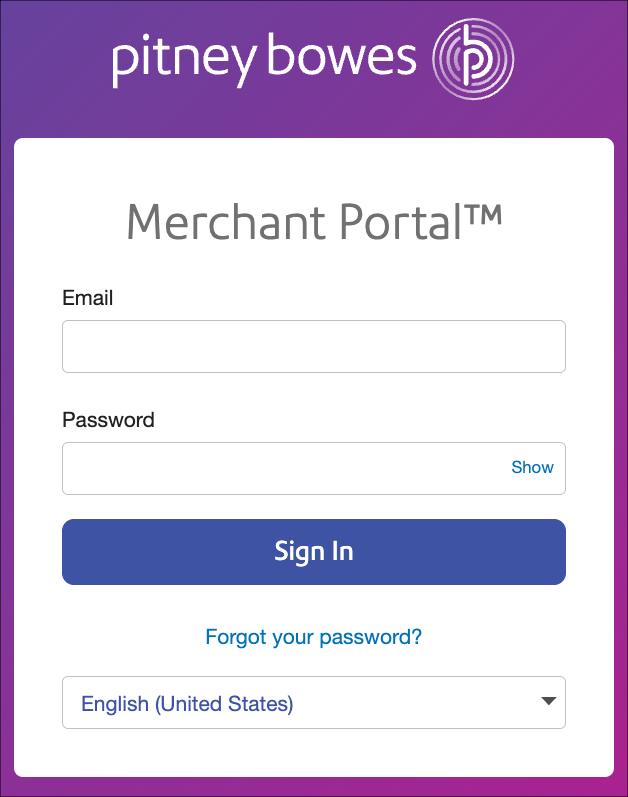
6. Once confirmed, log into your Pitney Bowes Merchant account to complete the following steps.
Contacting Pitney Bowes for ACH Setup
Once your Pitney Bowes Merchant account is created, contact the Pitney Bowes Payment Services Support Team at PaymentsAPISupport@pb.com. They will guide you through the process of adding ACH as a payment method.
When reaching out, please provide them with the following information:
- The email address used to set up the Pitney Bowes account
- Your Federal tax information (TIN or EIN)
- Your USPS shipping volume in dollars per week
- If your shipping volume varies during peak seasons, mention the highest weekly amount.
- Example:
- In March, my weekly shipping spend was $500.
- However, during the holiday season, I use $2,000 per week.
- Therefore, I would tell Pitney Bowes my shipping volume is $2,000.
Here’s a sample email to send to PaymentsAPISupport@pb.com.
Subject: ACH setup for an Ordoro customer
Hello Pitney Bowes Team,
I have a new Pitney Bowes Merchant account via Ordoro. I need help with setting up an ACH payment method.
Below are the necessary details for setup:
- Company name: [Your Company Name]
- Pitney Bowes user email for the shipping account: [Your Email Address]
- Federal tax information: [TIN or EIN]
- USPS shipping volume in dollars per week: [$XYZ]
Thank you for your help!
Feel free to use this email template, and remember to replace the bracketed information with your own details.
ACH Setup in the Pitney Portal
After Pitney Bowes adds ACH as an option, follow these steps to link your ACH account in their system.
1. Log into your Pitney Bowes Merchant account.
2. Select Add a Payment Method.
3. Choose USPS and then Continue.
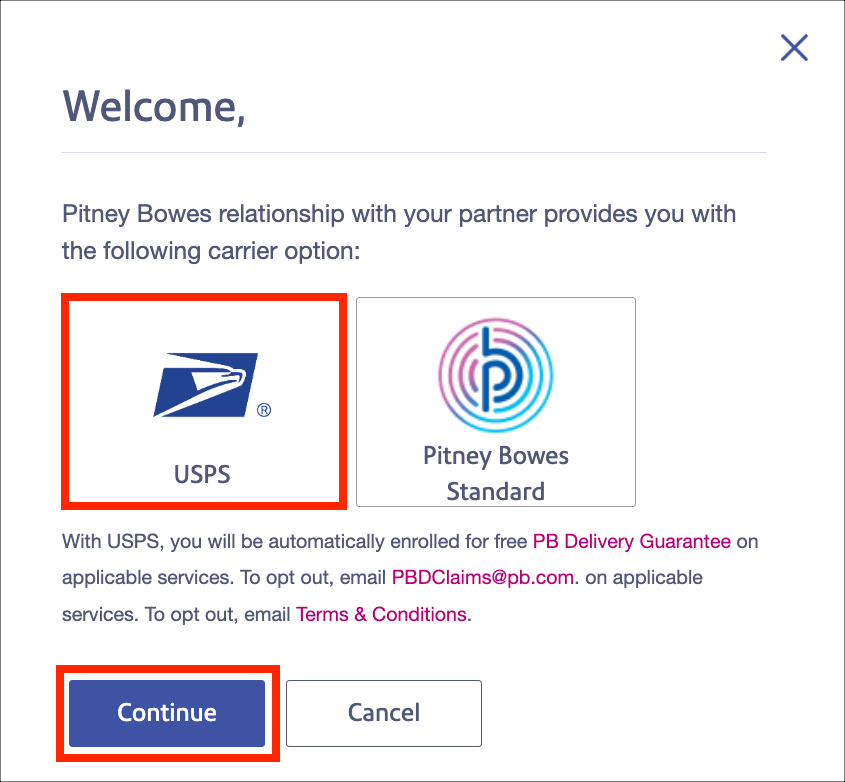
4. Select ACH Electronic bank account transfer and then Continue.
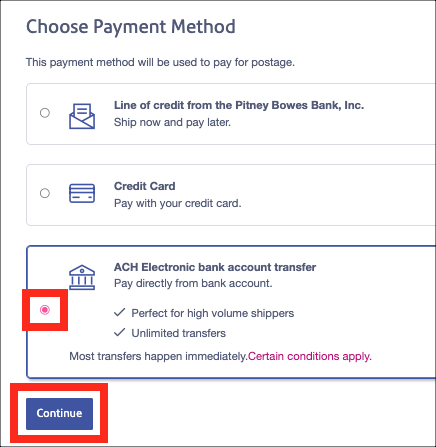
5. Read through and accept the terms in the next modal.
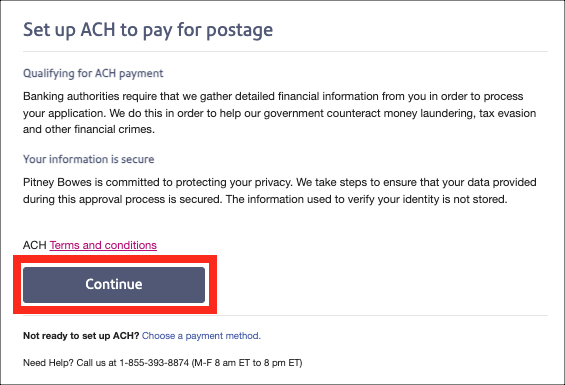
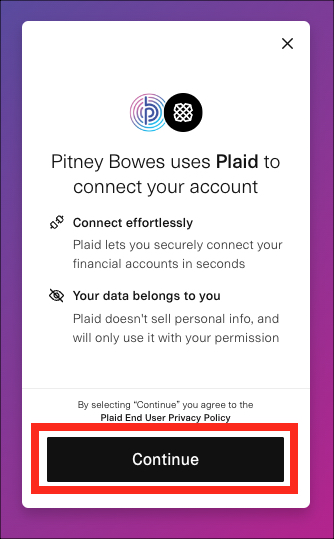
6. A heads-up will appear about the integration happening through Plaid.
Choose Your ACH Connection Method

You can link your bank account in one of two ways:
1. Connect Instantly: Log into your bank via OAuth and select the desired account.
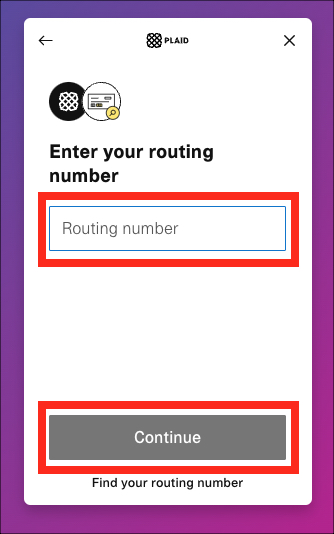
2. Connect Manually: For this option, you’ll need to:
- Key in your routing number and account number.
- After this, you’ll be informed to check back the next day to verify the deposit amount. This extra step ensures that it’s genuinely your account.
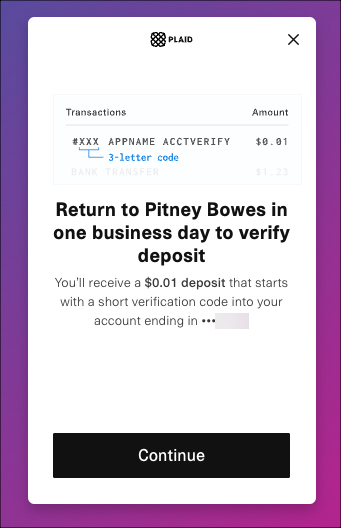
- Look out for the transaction on your bank statement—it’ll have both an amount and a unique code.
- Enter this code in the provided space.
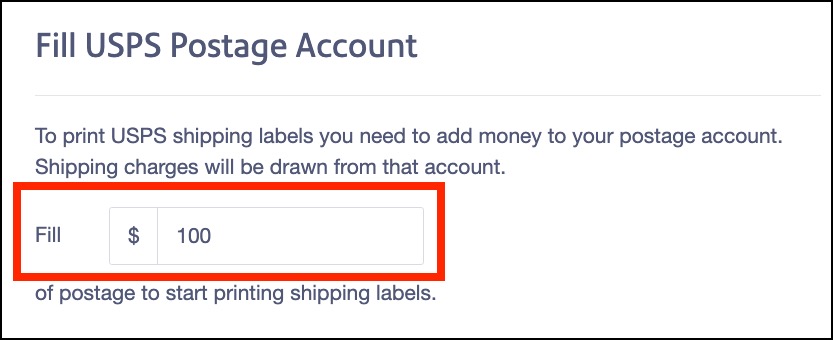
Add Postage and Set Your Refill Preferences
After either of the above steps, you’ll need to add postage and set up your refill preferences.
To add postage, enter the Fill amount.
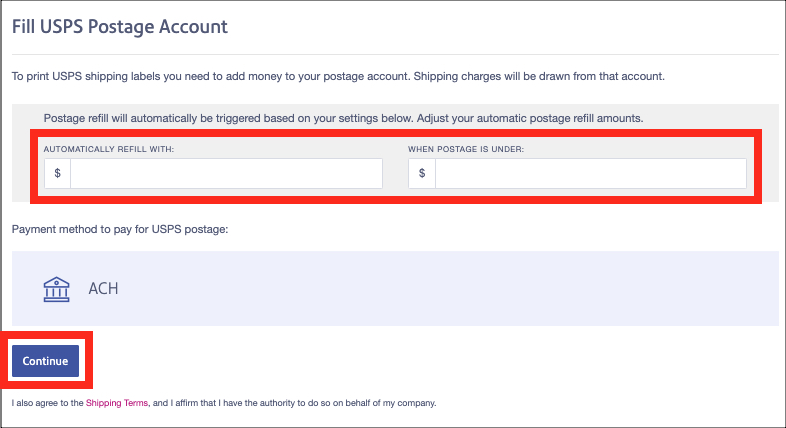
Then set up your Refill Preferences:
- Automatic Refill Amount: The balance Pitney Bowes will auto-replenish your account with.
- Refill Threshold: The point at which you want the auto-refill to kick in.
Connect Your Pitney Bowes Account to Ordoro
Now that you’ve successfully set up your Pitney Bowes account with ACH billing, it’s time to connect it to Ordoro.
NOTE: Once you’ve completed these steps, please contact Ordoro Support so we can migrate any existing USPS presets and rules to use your new Pitney Bowes Merchant account.
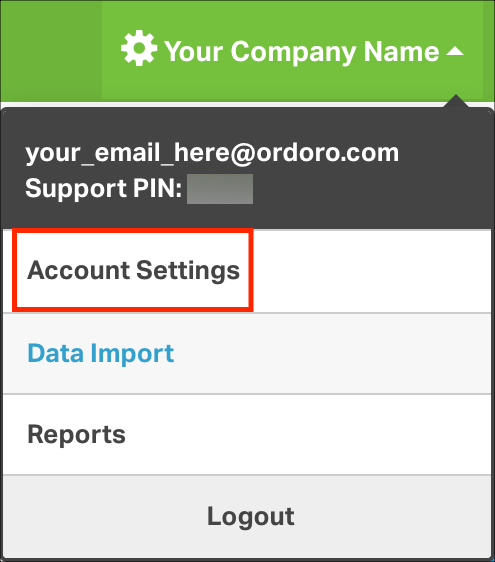
1. Click on your Company Name -> Account Settings.
2. Select Shippers/Carriers from the menu on the left. Then choose Add a shipper -> USPS.
- If you notice an existing USPS Pitney account, that’s normal. It’s your older account linked to credit card payments.
- We are now connecting your NEW Pitney Bowes account that works with your ACH setup.
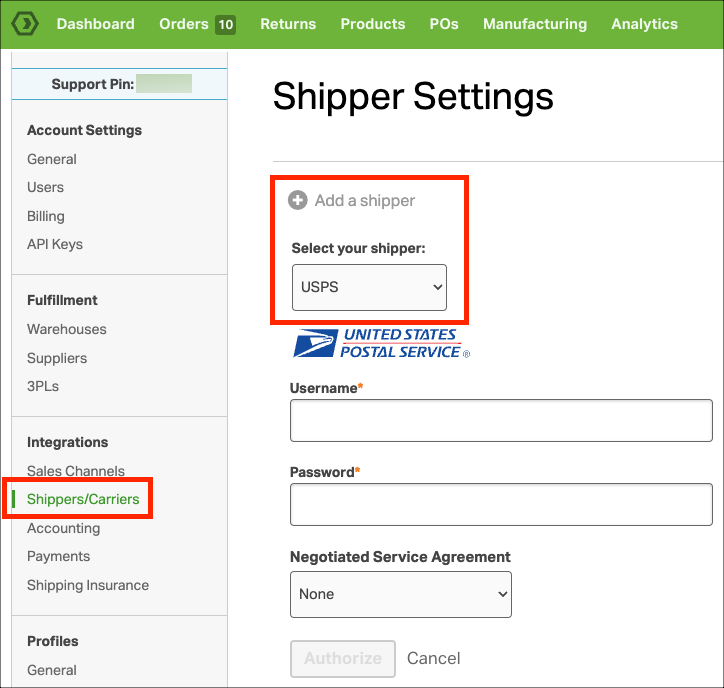
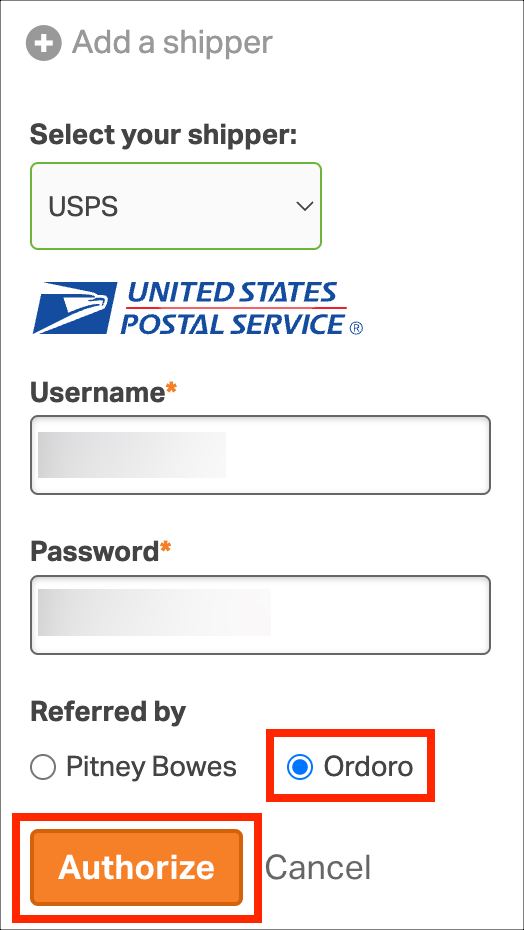
3. Enter the requested information and click Authorize to save.
- Your Pitney Bowes username and password for logging into their system
- IMPORTANT: select Ordoro as the referral source ***
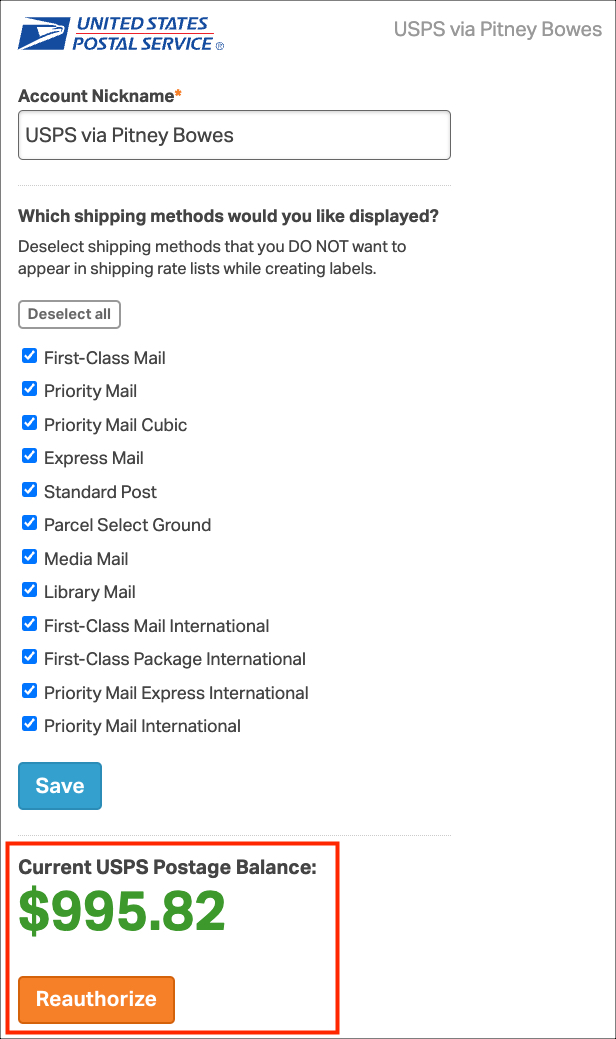
4. Your Pitney Merchant account will be added in Ordoro. See the sample screenshot below.
- If you need to add postage, you’ll do so through Pitney directly.
- Ordoro does not support postage auto-fill for Pitney Merchant accounts.
Contact Ordoro Support to migrate your presets and rules
Once your new Pitney Bowes account is connected, get in touch with our Support team at support@ordoro.com. We will migrate your USPS presets and rules to the new account and close your old Pitney Bowes account after 30 days.
The remaining postage on the old account cannot be transferred to the new account but it will be refunded within 30 days.
To make things even easier for you, we’ve prepared a sample email to copy and paste:
Subject: Help with USPS Preset Migration and Pitney Bowes Account Closure
Hello Ordoro Support Team,
I set up my new Pitney Bowes Merchant account and linked it to Ordoro. I need help migrating my existing USPS presets and rules to the new account and, after 30 days, initiating the process to refund any remaining USPS postage on my old Pitney Bowes account and closing it out.
Here are my Ordoro account details:
- Company Name: [Your Company Name]
- Ordoro Account Email: [Your Email Address]
- Ordoro Support Pin: [Your Ordoro Support Pin. See help article on how to find this.]
Thank you for your help!
Feel free to use this email template, and remember to replace the bracketed information with your own details.
After contacting Ordoro Support, our team will transfer your existing USPS presets and rules to the new Pitney Bowes Merchant account. We’ll also refund any remaining USPS postage on your old account and close it after the 30-day period.