If you’re using reports to track and analyze data, you know how important it is to have the right features to get the job done. That’s why we’re excited to announce our enhanced reports, which now come with new features like scheduling and a centralized export location.
With scheduling, you can now set up your reports to automatically generate at specific intervals, whether it’s hourly, daily, weekly, or monthly. This means you can save time and stay on top of your data without having to manually generate reports every time you need them.
In addition to scheduling, we’ve also added a centralized export location for all of your reports. This makes it easy to find and manage your reports in one place.
Topics
- What exports are included in Reports?
- Where can I access Exports?
- Why can’t I see Reports or Exports?
- What does the Reports Activity Log include?
- How can I create a new Report?
What exports are included in Reports?
Below is a list of exports available in the Reports section. Please note that not all of them can be put on a schedule (hourly, daily, etc.) at this time.
- Insurance Cost History
- Inventory Log
- Manufacturing Order Summary and Detail reports
- Order Summary and Detail reports
- Product Inventory reports
- Product Sales Channel Bridge report
- Purchase Order Goods Receipts
- Purchase Order Summary and Detail reports
- RMA Summary and Detail reports
- Sales by SKU report
- USPS Transaction History
- Delivery Status report
Where can I access Exports?
1. Go to the Activity Menu dropdown, then select Exports.
- Previously, you could access the last five CSV files in the Activity Menu.
- The Reports section will keep all recently generated Reports from the last 30 days.
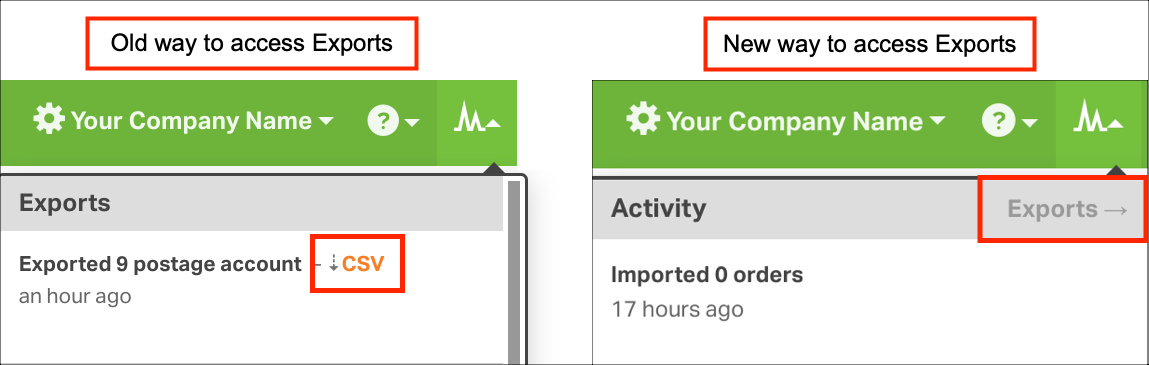
2. The Exports link will take you to the Reports Activity Log. Your recently generated exports will appear here.
- To download a report, click the CSV button to the right.
- For files larger than 10 MB, they may be zipped.
- If the large file is emailed, we’ll send a link instead of the zip file.
Why can’t I see Reports or Exports?
Based on your user permissions, you may not be able to access Reports in the Settings dropdown (see below).

Or you might encounter an inaccessible restricted section, as shown in the screenshot below.
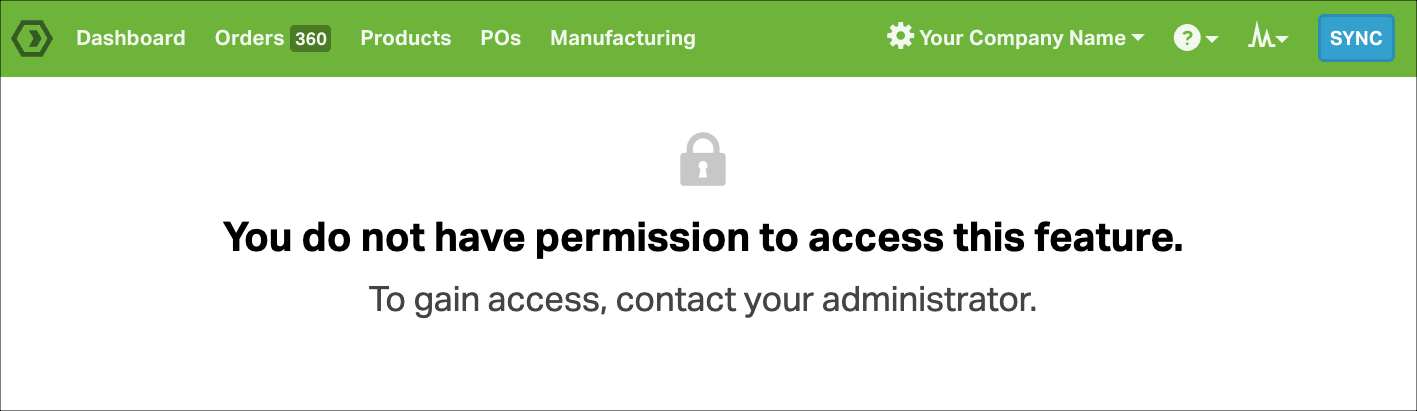
If this is the case, contact an Admin in your Ordoro account to update your user permissions, specifically for the Reports.
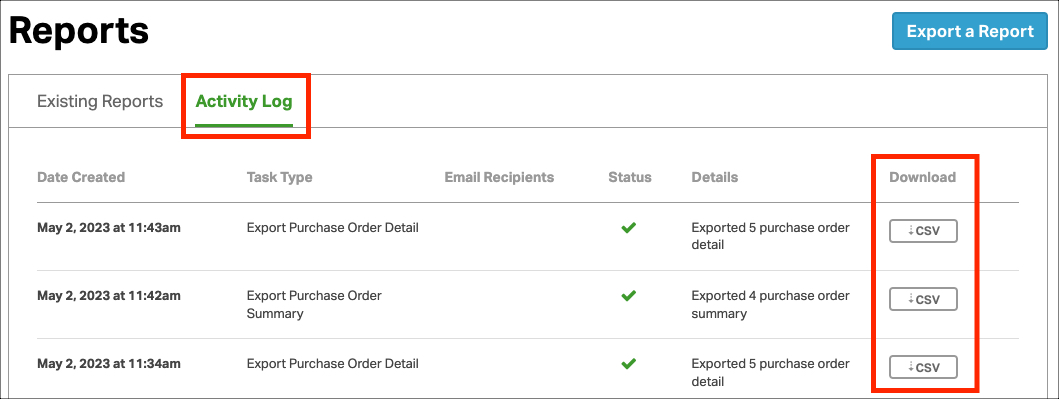
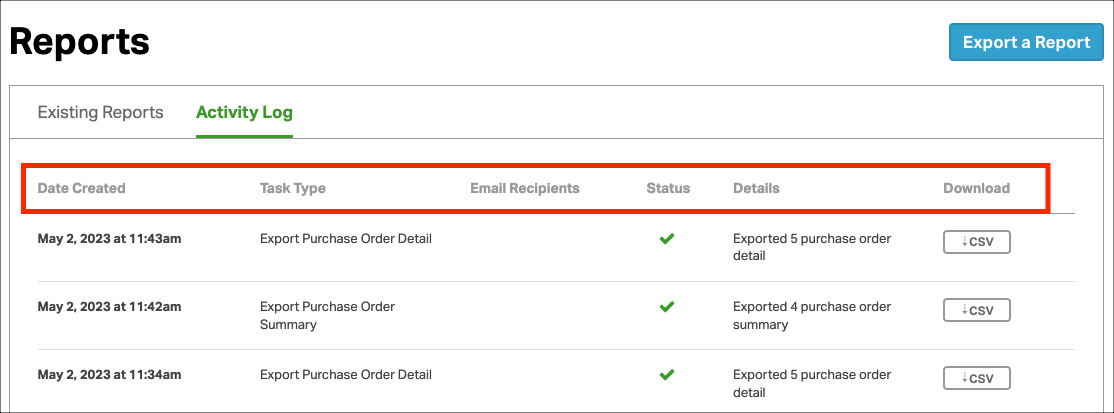
What does the Reports Activity Log include?
The following columns are available for all reports.
- Date Created
- Task Type
- Email Recipients, if any
- Status: Either successful or failed
- Details about the report: How many results are included in the CSV file
- Download: Link to the CSV file
Customize your viewing experience by selecting the number of reports and navigating between pages.

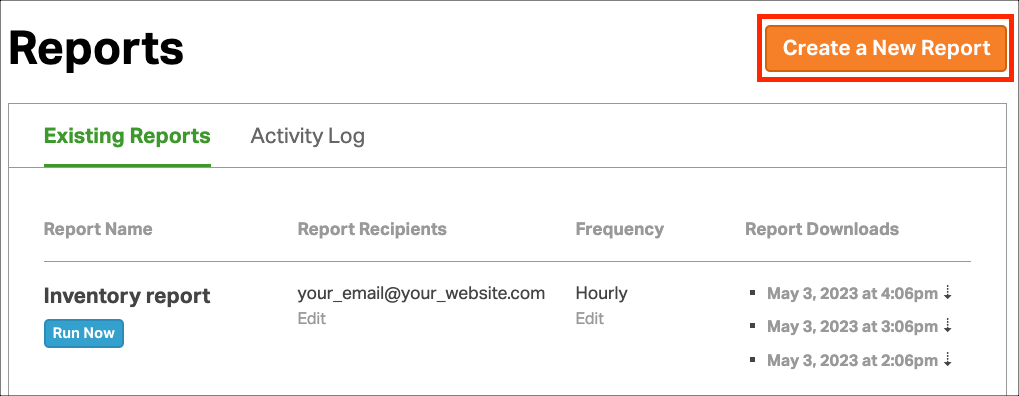
How can I create a new Report?
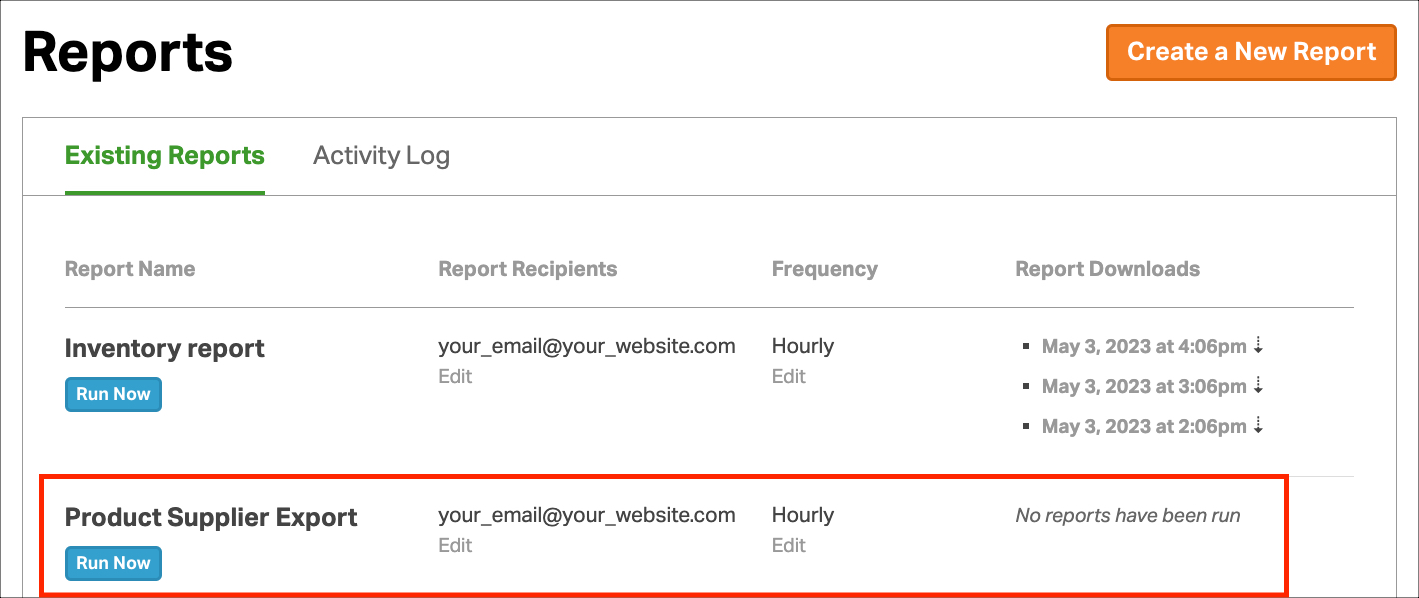
1. Go to the Reports -> Existing Reports section. Click on Create a New Report.
2. Select the criteria that you want the report to include, such as the name of the report and report type. Once the parameters are entered, you can run the report immediately or schedule it for email delivery.
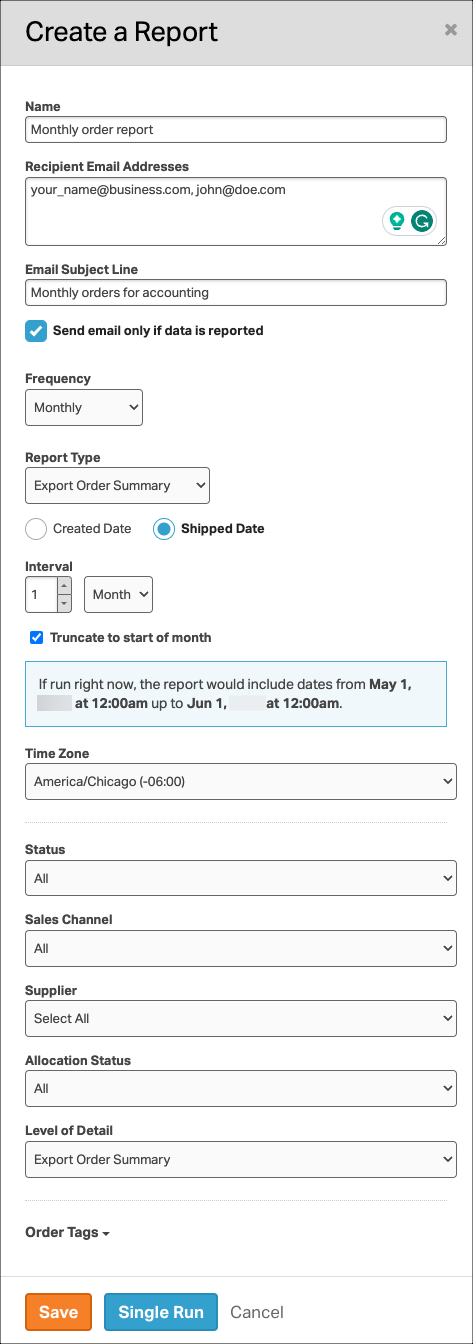
3. See below for the different report parameters.
- Name
- Enter the name you’d like for this report.
- Example: Product Supplier Export.
- Recipient Email Addresses
- Enter the email(s) to receive the report. For a list of emails, use a comma to separate them.
- Email Subject Line
- Customize the subject line of the report email.
- Send email only if data is reported
- If selected, an email will only be sent if there are report results.
- Example: If no orders shipped within the specified timeframe, the report won’t deliver as there aren’t any results.
- If you wish to receive a report, even if there are zero results, do not select the checkbox.
- Report Type
- Choose the report to schedule. Based on the type, other options may appear.
- Export Order Summary
- Export Order Detail
- Export Products
- Export Products Suppliers
- Export RMA Summary
- Export RMA Detail
- Export Sales by SKU Info
- Frequency
- The reports will initiate at varying times within the hour, determined by the last digit of your Support pin.
- The list below shows when the report will begin generating:
- Support pin ends in 0 = minute 0 (e.g., 12:00)
- Support pin ends in 1 = minute 6 (e.g., 12:06)
- Support pin ends in 2 = minute 12 (e.g, 12:12)
- Support pin ends in 3 = minute 18 (e.g., 12:18)
- Support pin ends in 4 = minute 24 (e.g., 12:24)
- Support pin ends in 5 = minute 30 (e.g., 12:30)
- Support pin ends in 6 = minute 36 (e.g., 12:36)
- Support pin ends in 7 = minute 42 (e.g., 12:42)
- Support pin ends in 8 = minute 48 (e.g., 12:48)
- Support pin ends in 9 = minute 54 (e.g., 12:54)
- The list below shows when the report will begin generating:
- Frequency Options:
- Not Scheduled
- Hourly
- Daily
- The timing is based on 12:00am UTC.
- The report may run on the previous day, based on your time zone.
- Example: 12:00am UTC on Wednesday = 7:00pm CST on Tuesday.
- Weekly: runs on Sundays
- The timing is based on 12:00am UTC.
- The report may run on Saturday instead, based on your time zone.
- Example: 12:00am UTC on Sunday = 7:00pm CST on Saturday.
- Monthly: runs on the 1st of the month
- The timing is based on 12:00am UTC.
- The report may run on the final day of the previous month, based on your time zone.
- Example: 12:00am UTC on the 1st = 7:00pm CST on the last day of the previous month.
- The reports will initiate at varying times within the hour, determined by the last digit of your Support pin.
- Interval
- Interval Options:
- Specific Date Range
- Hour
- Day
- Week
- Month
- If you select Hour, Day, Week, or Month – then Ordoro uses your current time to run the report.
- Example: if the current time is 9:18am, selecting “Hour” will return results from 8:18am to 9:18am.
- Truncate to start of hour / day / week / month
- By selecting this option, the report will run from the start of the chosen interval (minute 0) to the end of the same interval (minute 0).
- Example: if the current time is 9:18pm, selecting the truncate option will return results from 8:00am to 9:00am.
- Interval Options:
- Save / Single Run
- If you select Single Run, go to the Reports Activity Log to download the report once generated.
- Otherwise, you can Save to schedule the report.
4. Once the scheduled Report is saved, it will appear in the Existing Reports list. The list is ordered alphabetically by Report Name.