When you create a new listing/product in your Sales Channel, there are some actions you’ll need to take to get you products in shape for managing orders and inventory for these products.
NOTE: Keep in mind, not everyone will update each of the following items. Feel free to skip any things that don’t apply to you.
Topics
- Import Your Products Into Ordoro
- Update Product Information
- Assign Suppliers and Manage Dropshipping Status
- Add Kit/BOM Components
- Update Inventory Writeback Settings
- Apply Product Tags for Organization
How To Import Your Products Into Ordoro
1. Create your product’s listing in your Sales Channel first. Be sure to set your permanent SKU in this listing (click here for details on best practices for creating SKUs for your products). Do not enter an inventory quantity for the listing in the Sales Channel. We’ll do that step later.
2. Once your listing is setup in your Sales Channel, import your products into Ordoro. Click on the Sync button in the upper-right corner of Ordoro.

3. In the Sync Settings click Select all, and then Deselect all. This should uncheck all sync settings. Then click on the box next to Import Products for the Sales Channel you are trying to import from. Then click Sync Once. See Shopify store in the example video below.
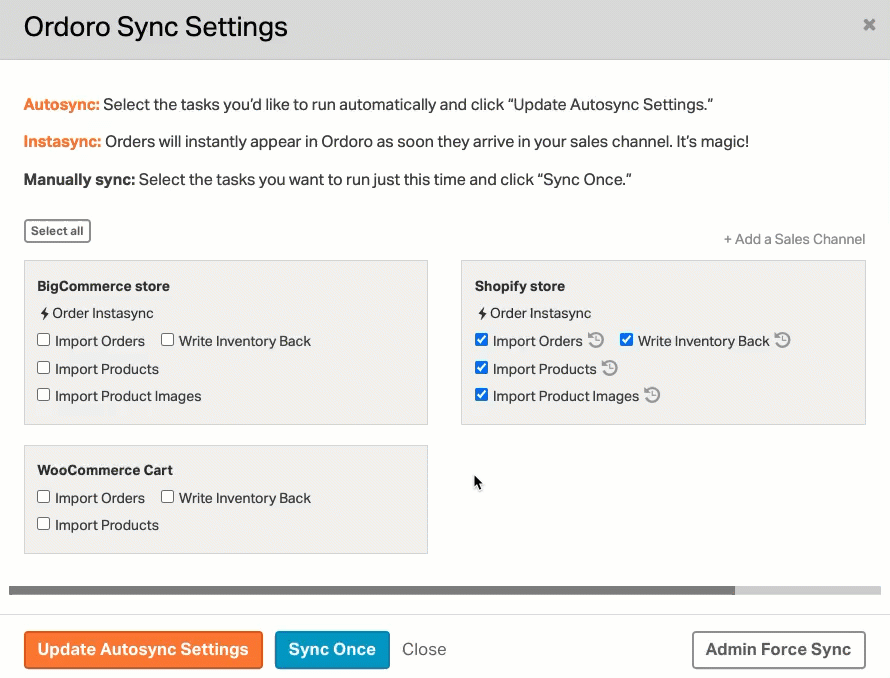
4. Depending on the amount of products you have, this sync could take up to an hour to run.
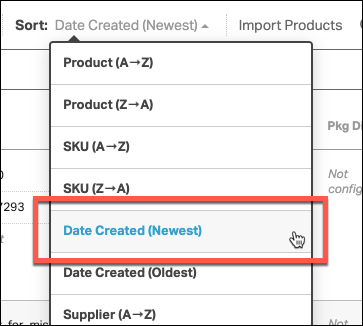
5. Once the product imports into Ordoro, find your newly created products in Ordoro. You can search for your product in the Product List page, or sort your newly created products.
6. Click on the Product to open the Product Detail page to update this product’s details. See steps below.
Update Product Information
You’ll want to update product information that may be helpful for your workflows in Ordoro. In the Product Detail page, update the following information:
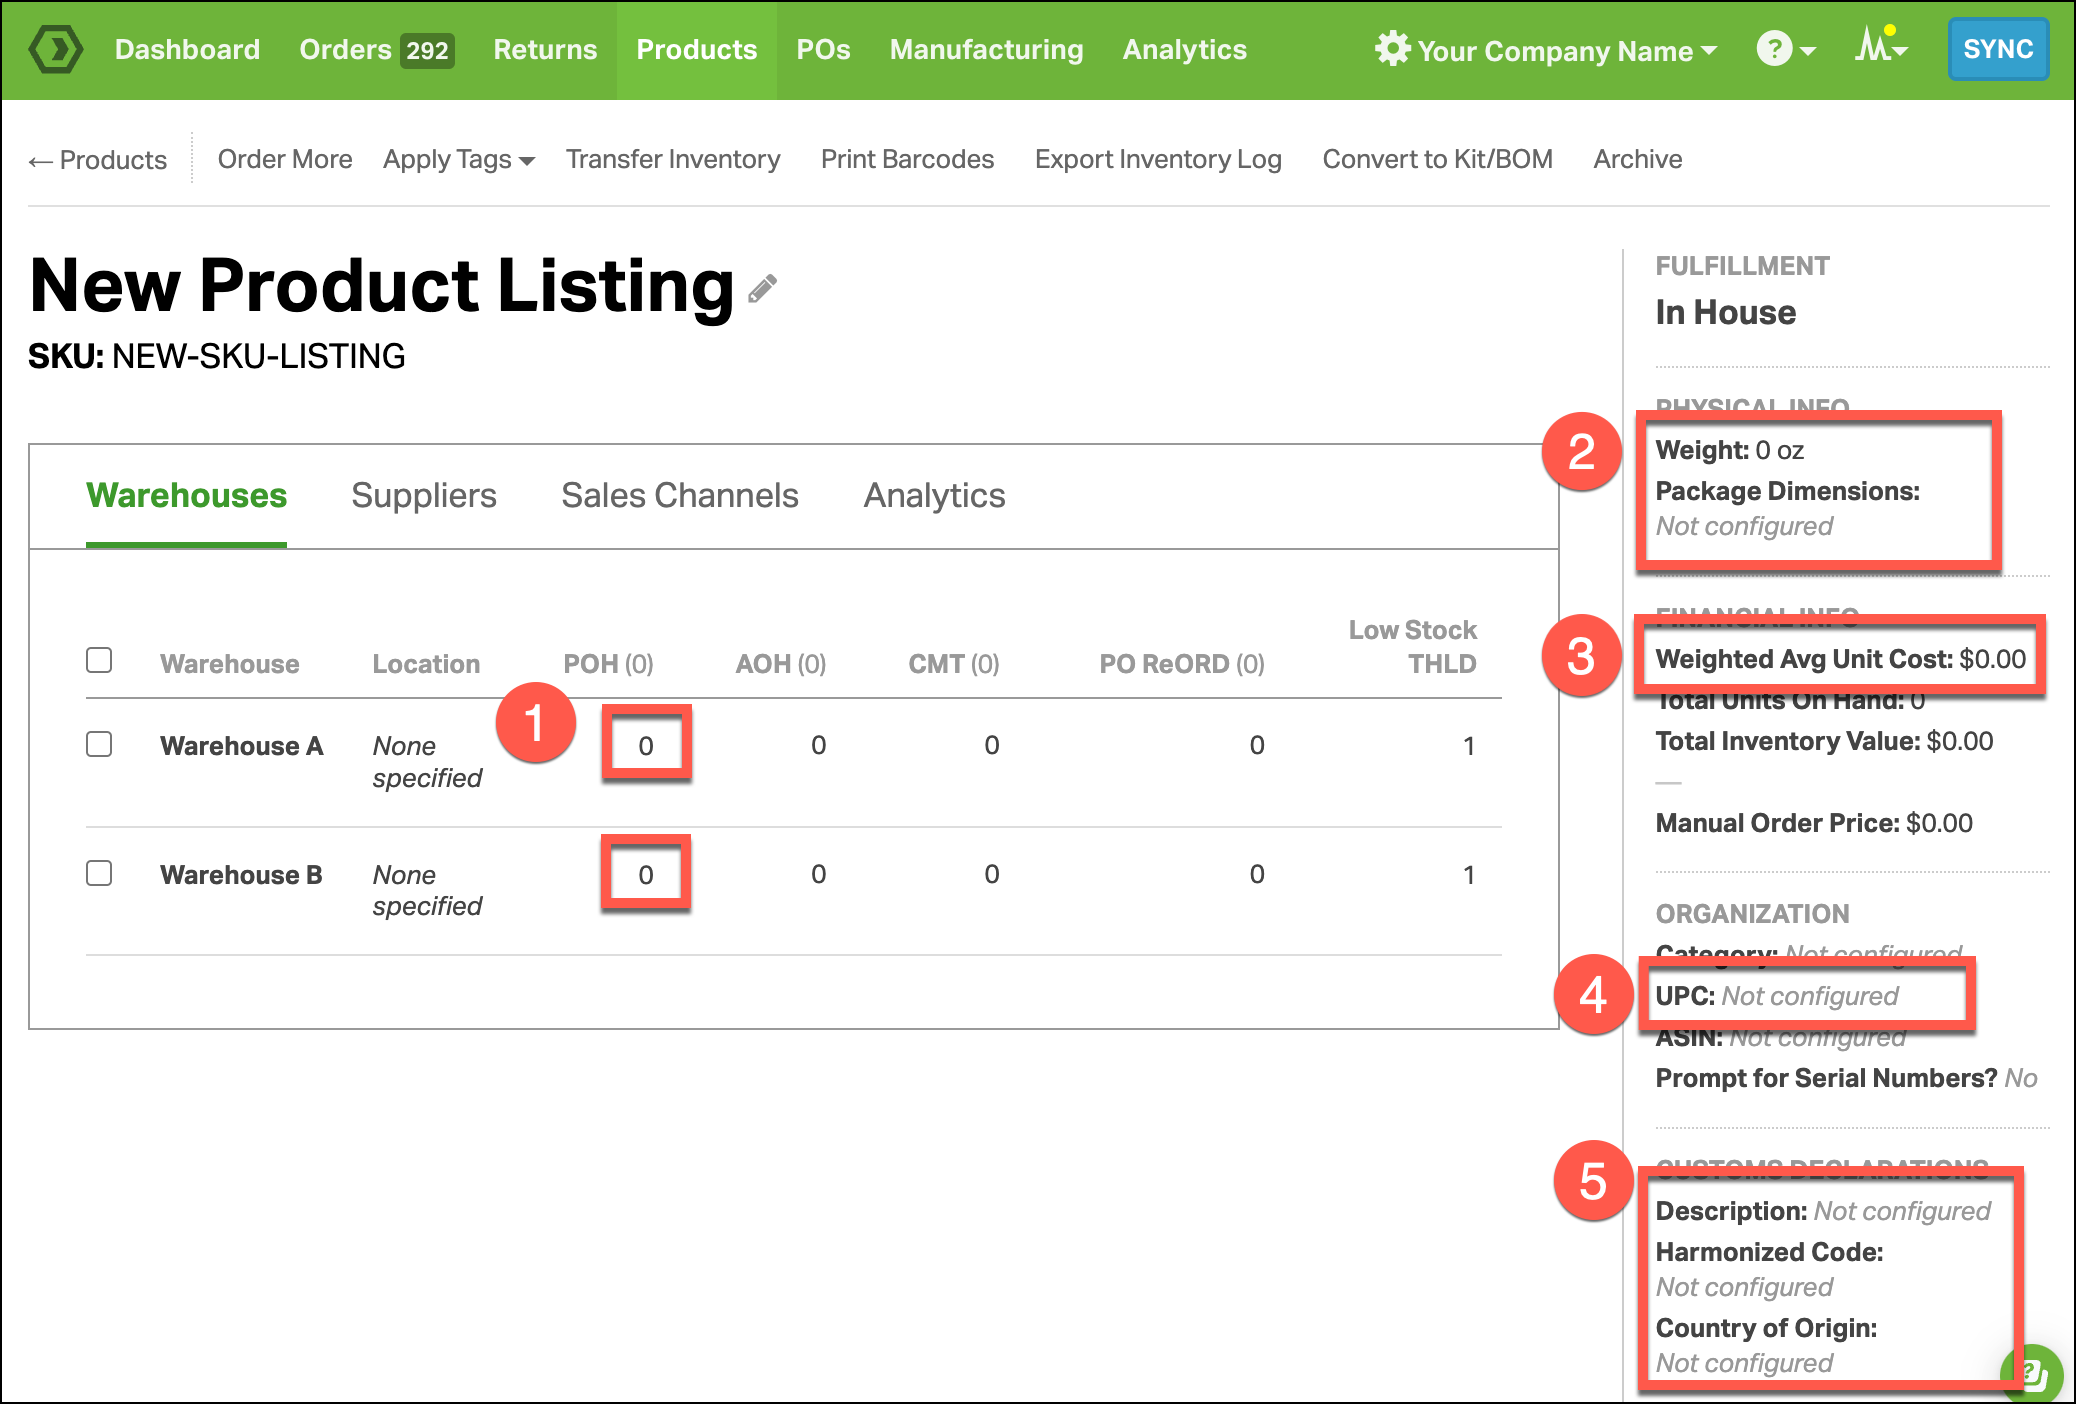
- Update the Inventory for this product (click here for instructions). Once the inventory is updated in Ordoro, this will be synced back to your Sales Channel. Be sure to include inventory available from all warehouses.
- Enter a Low Stock Threshold for this product (click here for instructions). You’ll need to do this for each warehouse that this product is stocked. This will help alert you when this product is needing re-order via the Low Stock Filter and Low Inventory Report.
- Update/Confirm Packaging Weights and Dimensions (click here for details). Most Sales Channels will import this information by default, but not all do. This will help default your shipping weights and dimensions for orders with this product.
- Update/Confirm Weighted Average Unit Costs (click here for instructions). Some Sales Channels import this information by default, but not all do. This will help you with cost reporting in Ordoro (click here for details).
- Update/Confirm UPC code (click here for instructions). Some Sales Channels import this information by default, but not all do. This will help you with the Barcode Scanning Workflow (click here for details).
- Update/Confirm Customs Info (click here for instructions). Some Sales Channels import this information by default, but not all do. This will help you ship your Customs Form information on international orders in Ordoro.
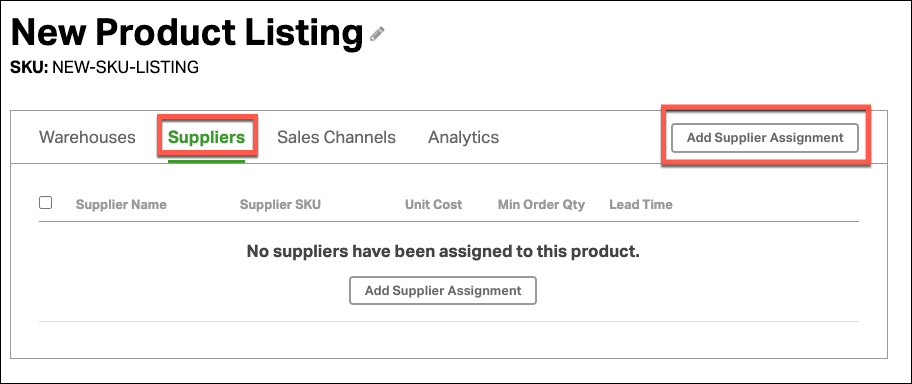
Assign Suppliers and Manage Dropshipping Status
If you’re using Ordoro to re-order products, or route dropship orders you’ll need to complete the following steps after your products import.
1. Assign the Supplier of your product to this product in Ordoro. Click here for instructions.
- This will help make it easier on you when you re-order products in Ordoro via Purchase Order. Click here for details
- By assigning a Default Supplier to your product, this unlocks the ability to dropship orders quicker or even automatically.
2. If this product is Dropshippable, you’ll want to set this product’s Fulfullment Type.
- Click here for instructions on how to setup your product to dropshippable in Ordoro.

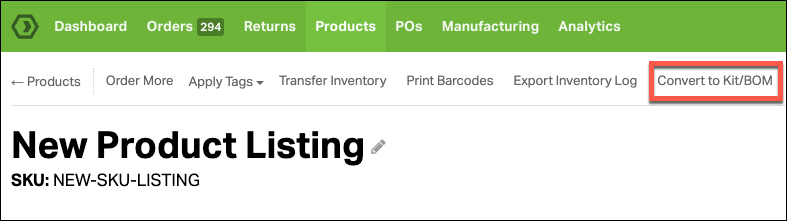
Add Kit/BOM Components
If this product is a bundle, manufactured or needs to share inventory with another product in Ordoro, you’ll need to convert this product to a Kit or BOM and add the associated component products.
- Click here for instructions on how to set up a Kits for bundle products.
- Click here for instructions on how to Kit products together to share inventory. This will allow you to link inventory quantities between multiple SKUs.
- Click here for instructions on how to set up a BOM Product for manufacturing. BOM Products are used to help you create Manufacturing Orders.
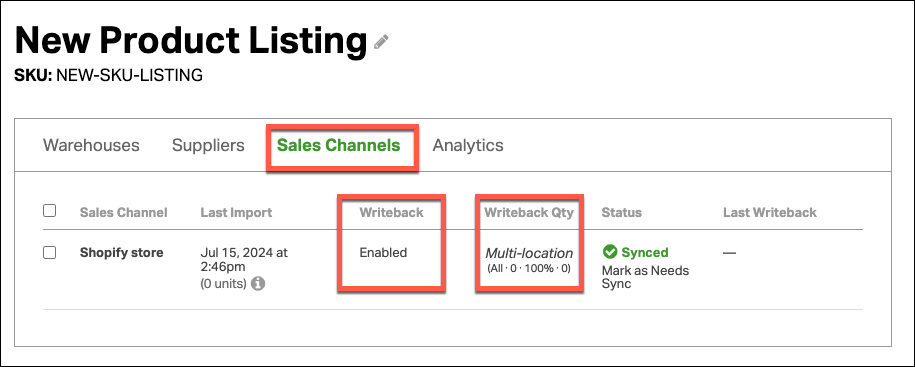
Update Inventory Writeback Settings
Ordoro allows you to alter or disable the inventory writeback on a per-product basis. You’ll need to update these settings for this product if applicable.
- Click here for instructions on how to disable inventory writeback to this sales channel for this product so that Ordoro doesn’t push inventory to your Sales Channel. By default, your products will import with inventory writeback enabled.
- Click here for instructions on how to alter your inventory writeback quantities including Max/Min Export, Percentage, and Reserve Quantity.
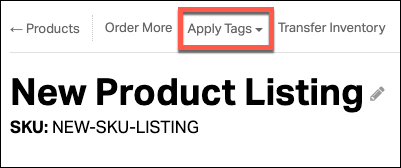
Apply Product Tags for Organization
To help you find and organize your products, you may need to apply tags to newly imported products from your Sales Channel. Click here for instructions on how to apply tags to your product.