In Ordoro, you may want to assign a supplier to a product or change how the product is fulfilled – either dropshipped or handled in-house.
While you can do some bulk editing in the app, it can be easier to upload a CSV file to do the work. See below for details!
Topics
- How to download the example file
- How to update the Product Fulfillment file
- How to upload the file to Ordoro
How to download the example file
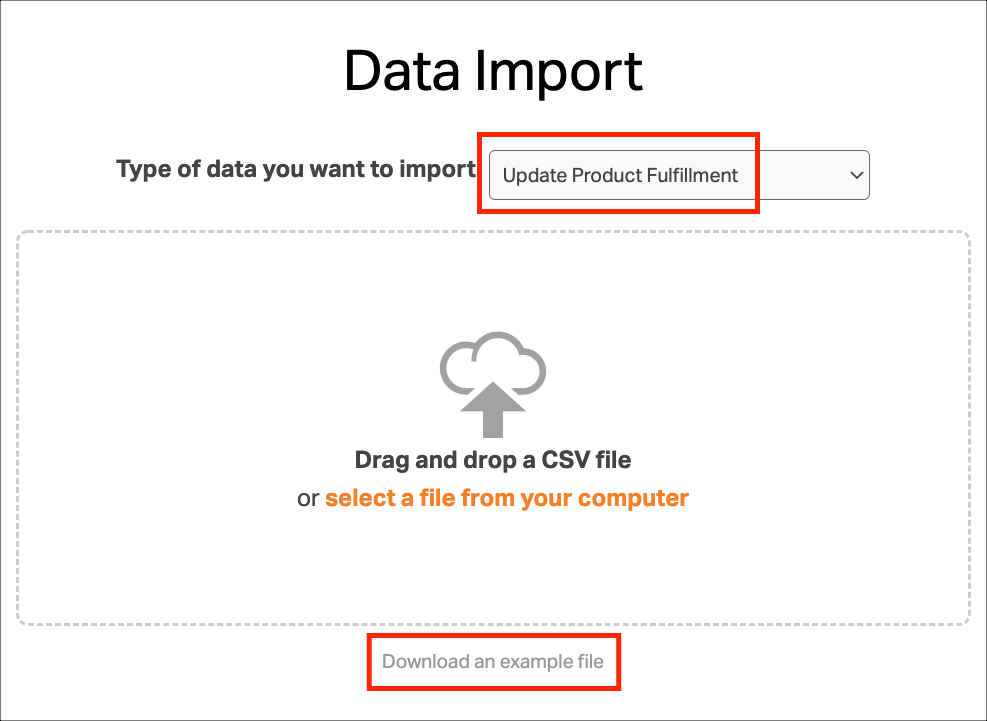
1. Click on your Company Name -> Data Import.

2. In the dropdown menu, choose Update Product Fulfillment. Download the example file.
- The CSV example file will automatically download from your browser.
- File name: Update Product Fulfillment-example.csv
How to update the Product Fulfillment file
In the example file, there are three column headings. Two are required and marked as *Req.
- SKU *Req:
- Fulfillment Type *Req
- Default Supplier
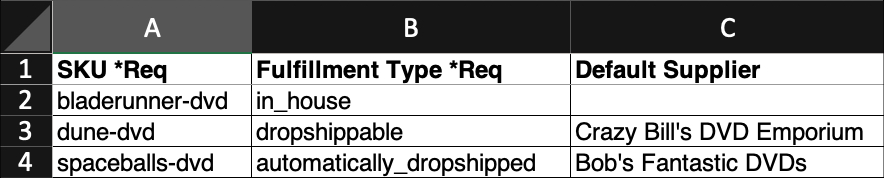
1. Column A: SKU *Req
- This is the product SKU to update.
- You can export all your products and copy and paste the SKUs here or only enter the ones to update.
2. Column B: Fulfillment Type *Req
- This field defines if you ship the product or if it’s dropshipped.
- See the entry options below. Please use these exactly as listed below.
| Desired fulfillment outcome | Fulfillment Type entry |
|---|---|
| Handled In House (i.e., you ship it yourself) | in_house |
| Dropshipped | dropshippable |
| Automatically Dropshipped | automatically_dropshipped |
3. Column C: Default Supplier
- Here you list the supplier name used for restocking or dropshipping.
- The supplier must already exist in Ordoro.
- See this article on how to set up suppliers.
- If setting products to in_house, leave the Default Supplier blank.
- Even if a Supplier is entered, it will not be saved.
- To update the Suppliers for in_house products, see this help article.
- If setting products to dropshippable / automatically_dropshipped, the Default Supplier is required.
- This field is required even if a Default Supplier already exists on the product.
4. Save the file as a .csv file.
How to upload the file to Ordoro
1. Select the file to upload to Ordoro. You can either:
- Drag and drop the file into the Data Import window or
- Select the file from your computer
2. Confirm that the column mappings are correct before uploading the file. See the Verify Column Titles section.
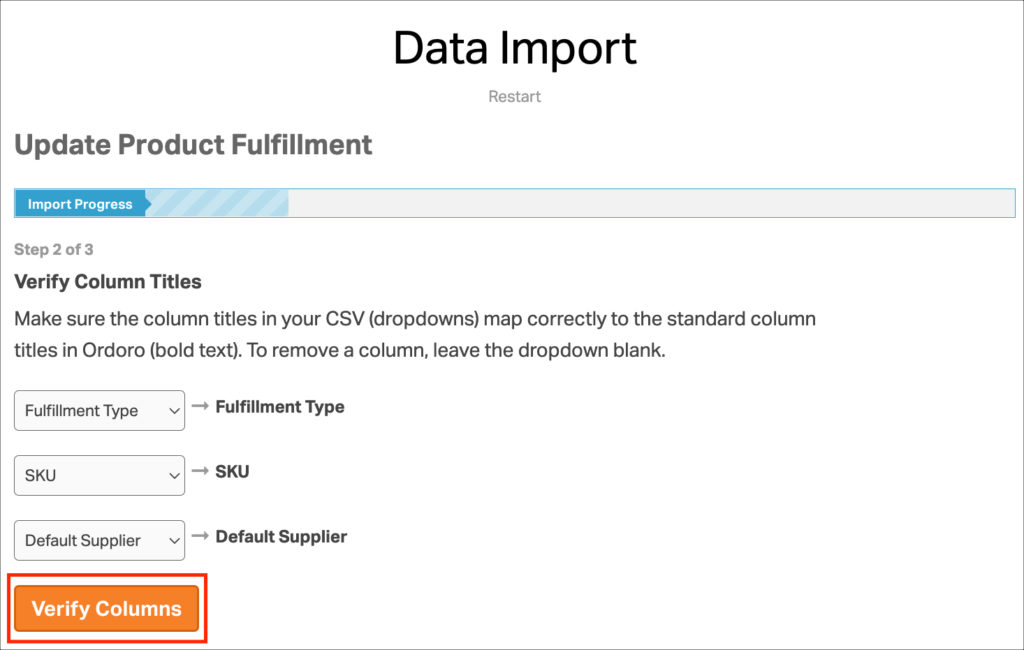
3. Once you’re ready to upload, click Verify Columns.
4. Click Save All to save the data to Ordoro. Remain on the page until the file has finished saving.
- Pause on errors will stop the upload if there is a problem.
- Otherwise, Ordoro will save all correctly mapped data and save the error reporting for the end.
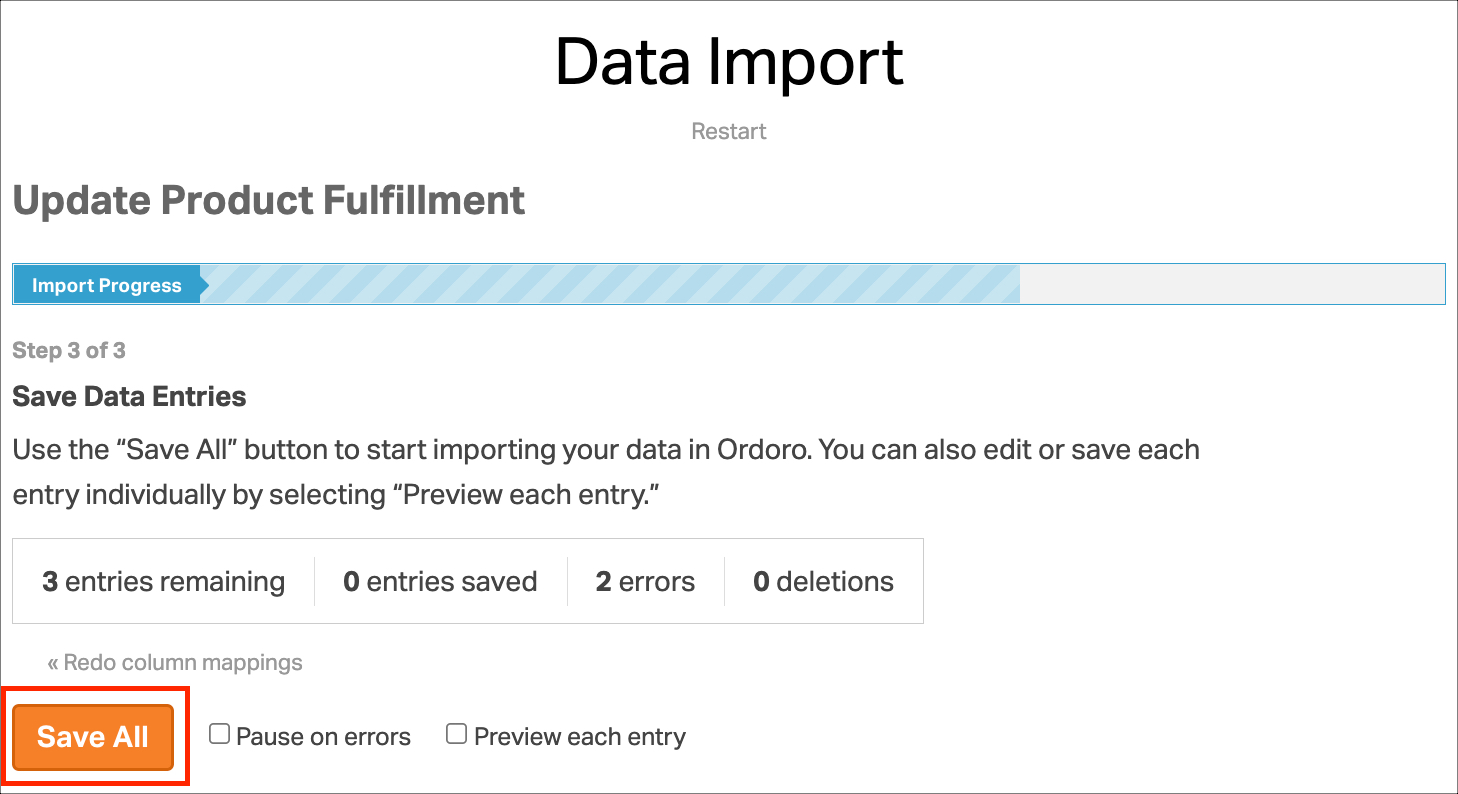
5. Once complete, you’ll see a message saying, “Your data has been saved!“
