Your order data can be exported to a CSV (comma-separated values) file. Then, it’s easy to load into Excel or Numbers to slice and dice the data however you want.
A few examples of how order data can be used:
- Export all customer email addresses and use them in email campaigns.
- Group orders by SKU and identify repeat buying patterns.
- Filter orders by the state to figure out sales tax calculations.
Topics
- How are the Order Summary and Detail reports different?
- Helpful tips
- How to export filtered order data
- Order Summary / Detail column headers
How are the Order Summary and Detail reports different?
Order Summary
- There is one row per order.
- Product line information is not included. For example, SKUs and item names.
Order Detail
- There is one row per order line (i.e., product on order).
- For example, there will be three rows if an order includes three products.
- Additionally, for users with Kitted products on your orders, the order detail report has the capability to export the Kit component products required to fulfill the order.
See the comprehensive list of column headings in each report.
Helpful tips
The report may show different data based on the order shipping method or your Ordoro subscription.
Orders shipped via Flat Rate methods
- A few examples are:
- USPS Small Flat Rate Box
- FedEx One Rate Boxes
- UPS Express Boxes
- The report will not include package dimensions because the dimensions are predetermined.
- The shipping weight will be included since that can vary.
Multi-package shipments
- A few examples are:
- The report does not show package dimensions, and the weight is the total weight for all labels created.
Allocation
- Allocation is only available for customers who have opted into the Inventory module. See our pricing page here for more details.
- The export has a column for Allocation, but the data is only accurate for customers who have opted into the Allocation module.
- Two extra columns will export when Allocation is enabled on your account:
- Allocation Status: the order level status
- Order Line Allocation: which lines have/have not been allocated
Exporting Kit Components
- Kitting is only available for customers who have opted into the Inventory module. See our pricing page here for more details.
- When exporting the Order Detail report, you will have the option to also export the kit components needed to fulfill the order lines.
- For each kit component, Ordoro will add a new row to the report.
- If you have a multi-level kit on an exported order, the lowest level components will be shown, as it does on the order in the app.
- Three extra columns will export when you select Include kit components in report:
- Component Ordered Qty: The units of the component required to fulfill the kit on the order.
- Component SKU: The component SKU needed to fulfill the Kit on the order.
- Component SKU Description: The Product Name of the component SKU.
How to export filtered order data
1. Go to the Orders tab -> select Actions.
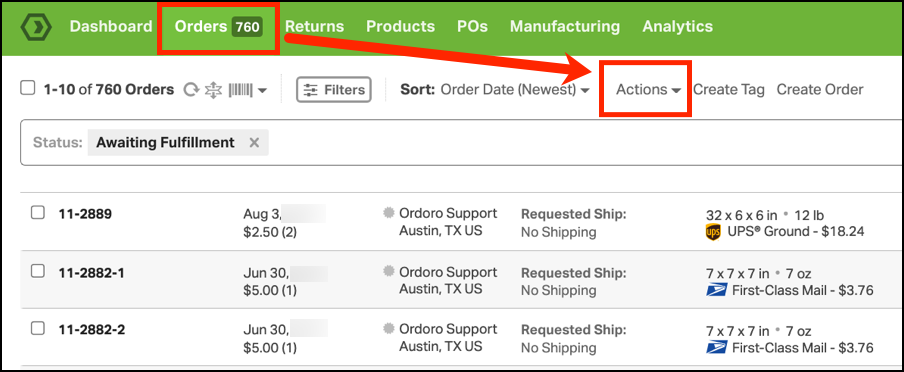
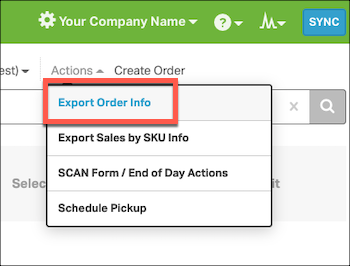
2. From the dropdown, select Export Order Info.
3. This will open the Export Order Info modal. Click the Edit button to customize the export.
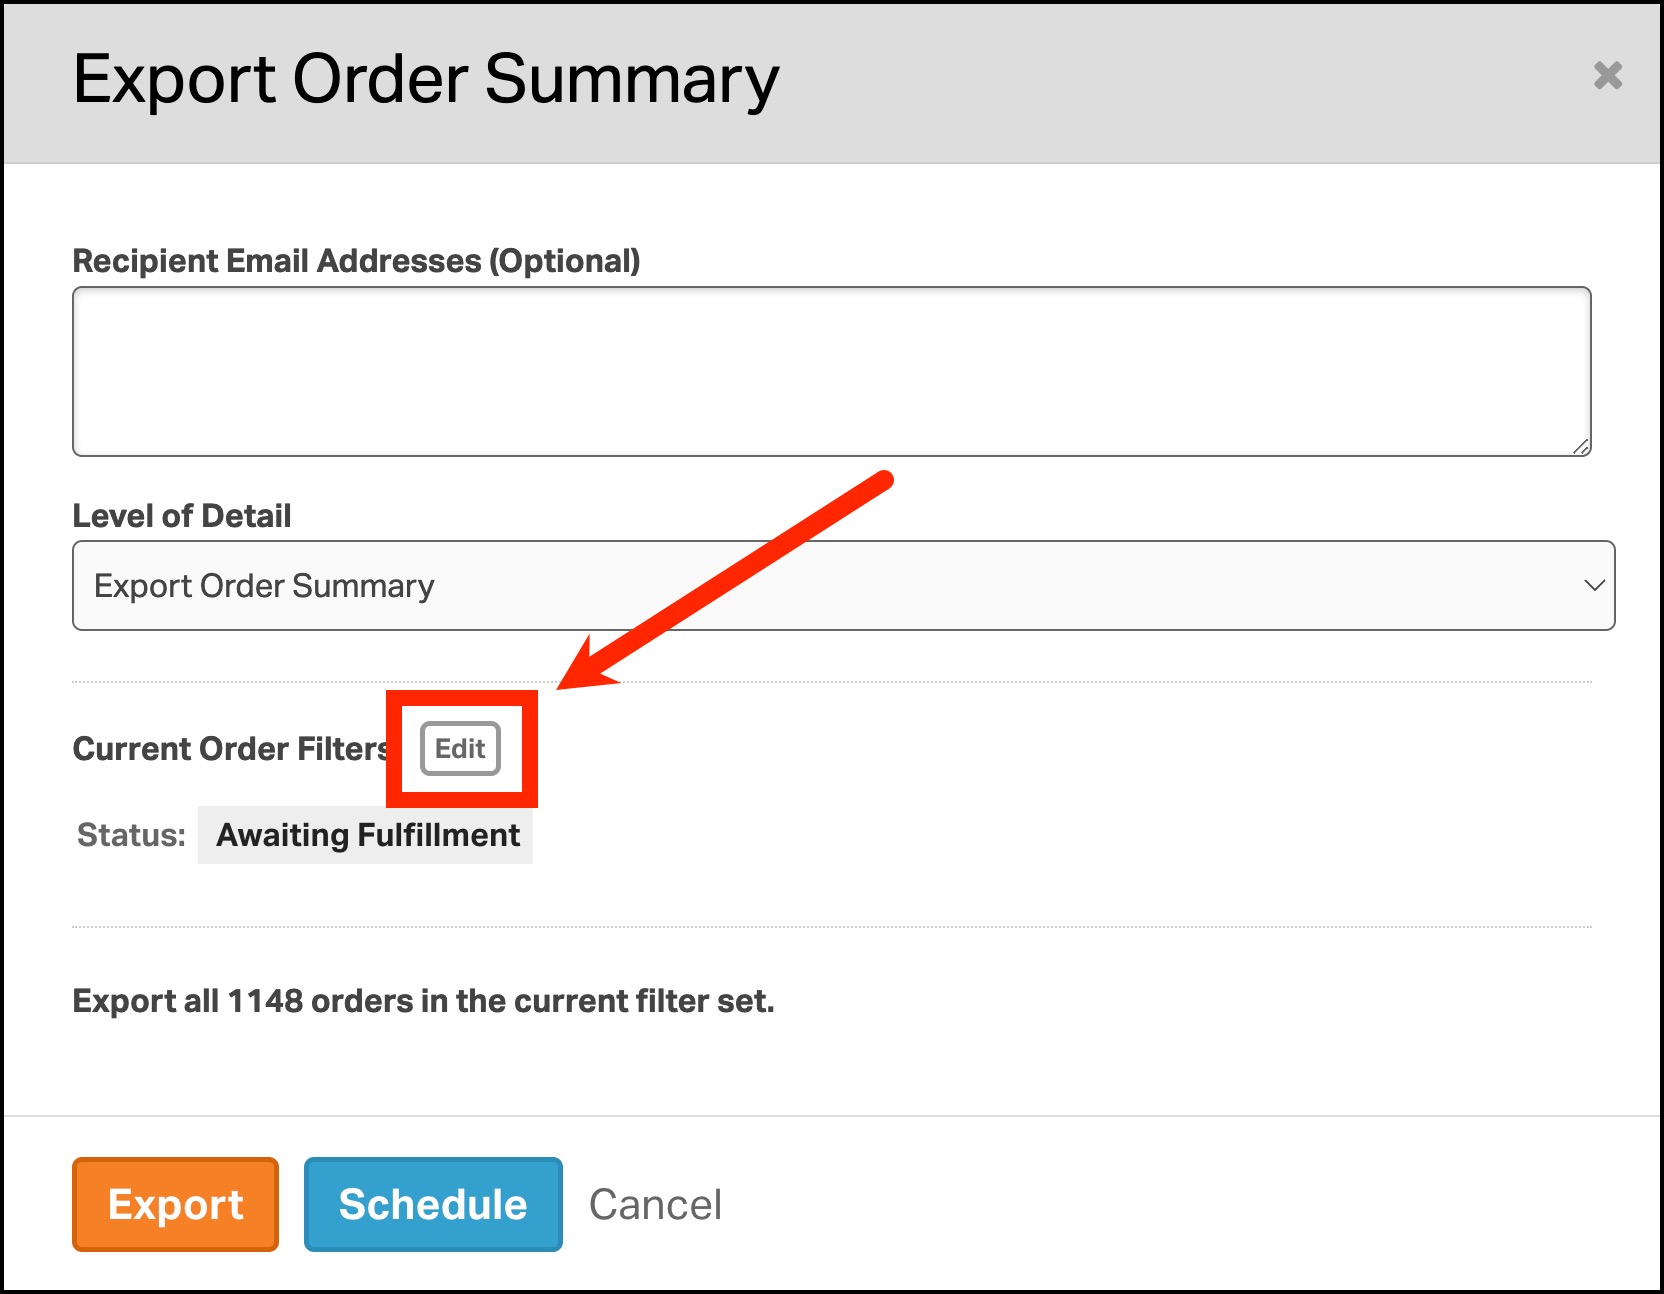
If you are exporting the Order Detail, you’ll also have the option to select Include kit components in report, which will allow you to export Kit Component SKUs needed to fulfill the orders exported.

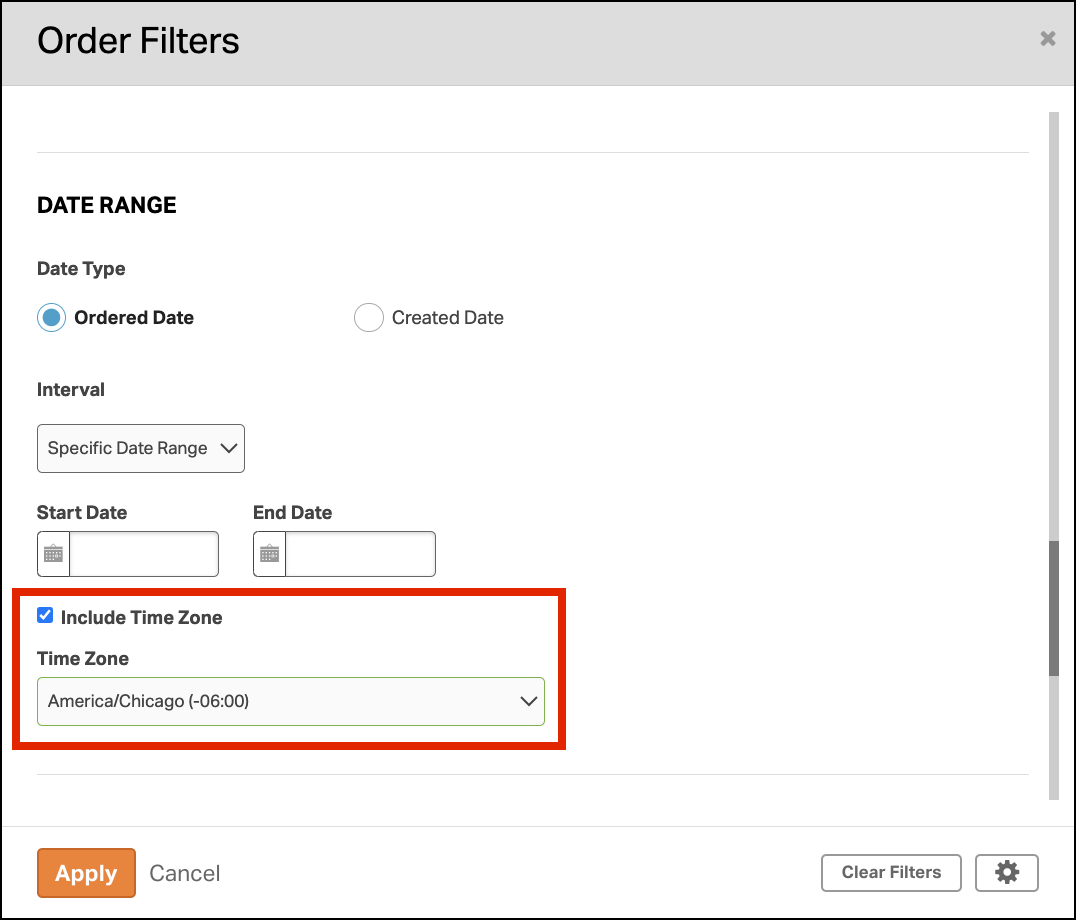
4. The Order Filters will appear allowing you to narrow down your search and locate the desired orders. Click Apply when finished.
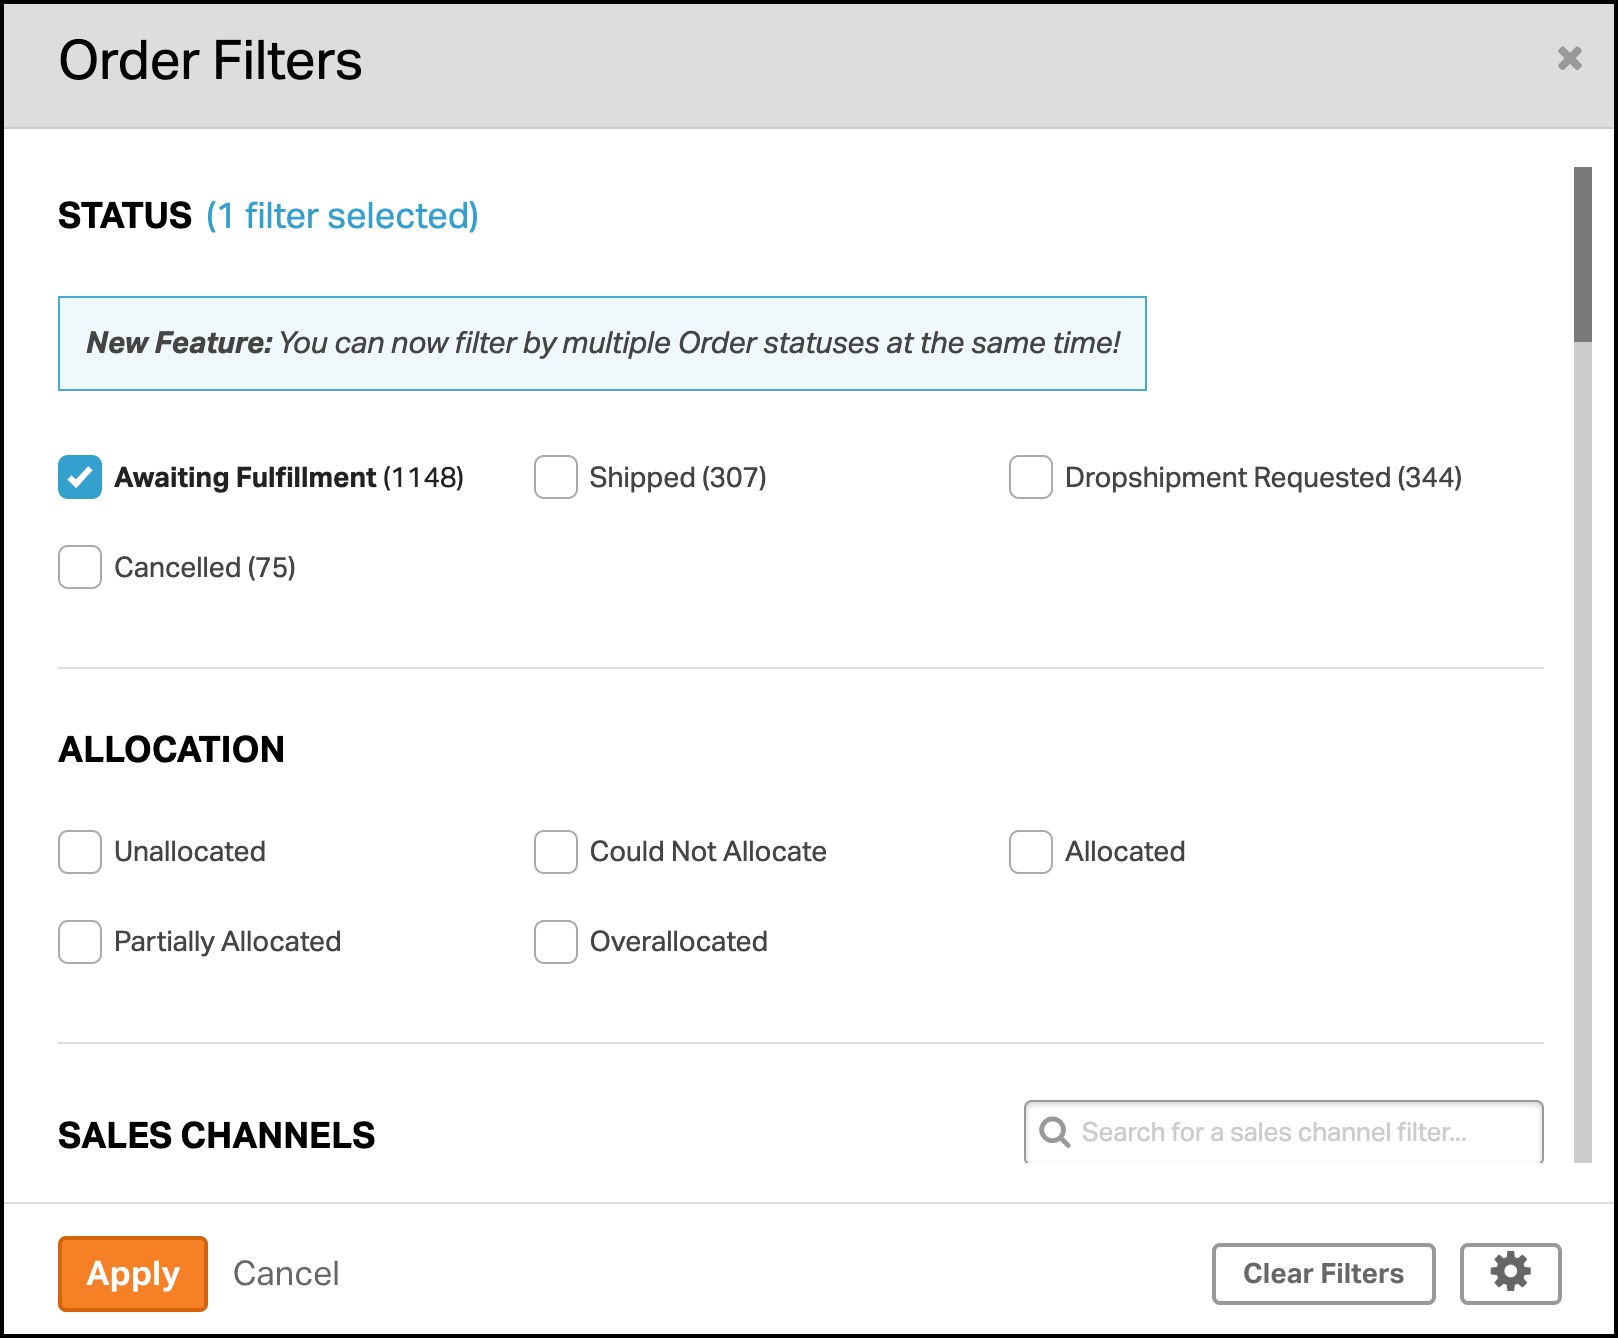
NOTE: The order export results default to UTC. To change this, go to the Date Range section, select Include Time Zone, and pick your timezone from the dropdown.
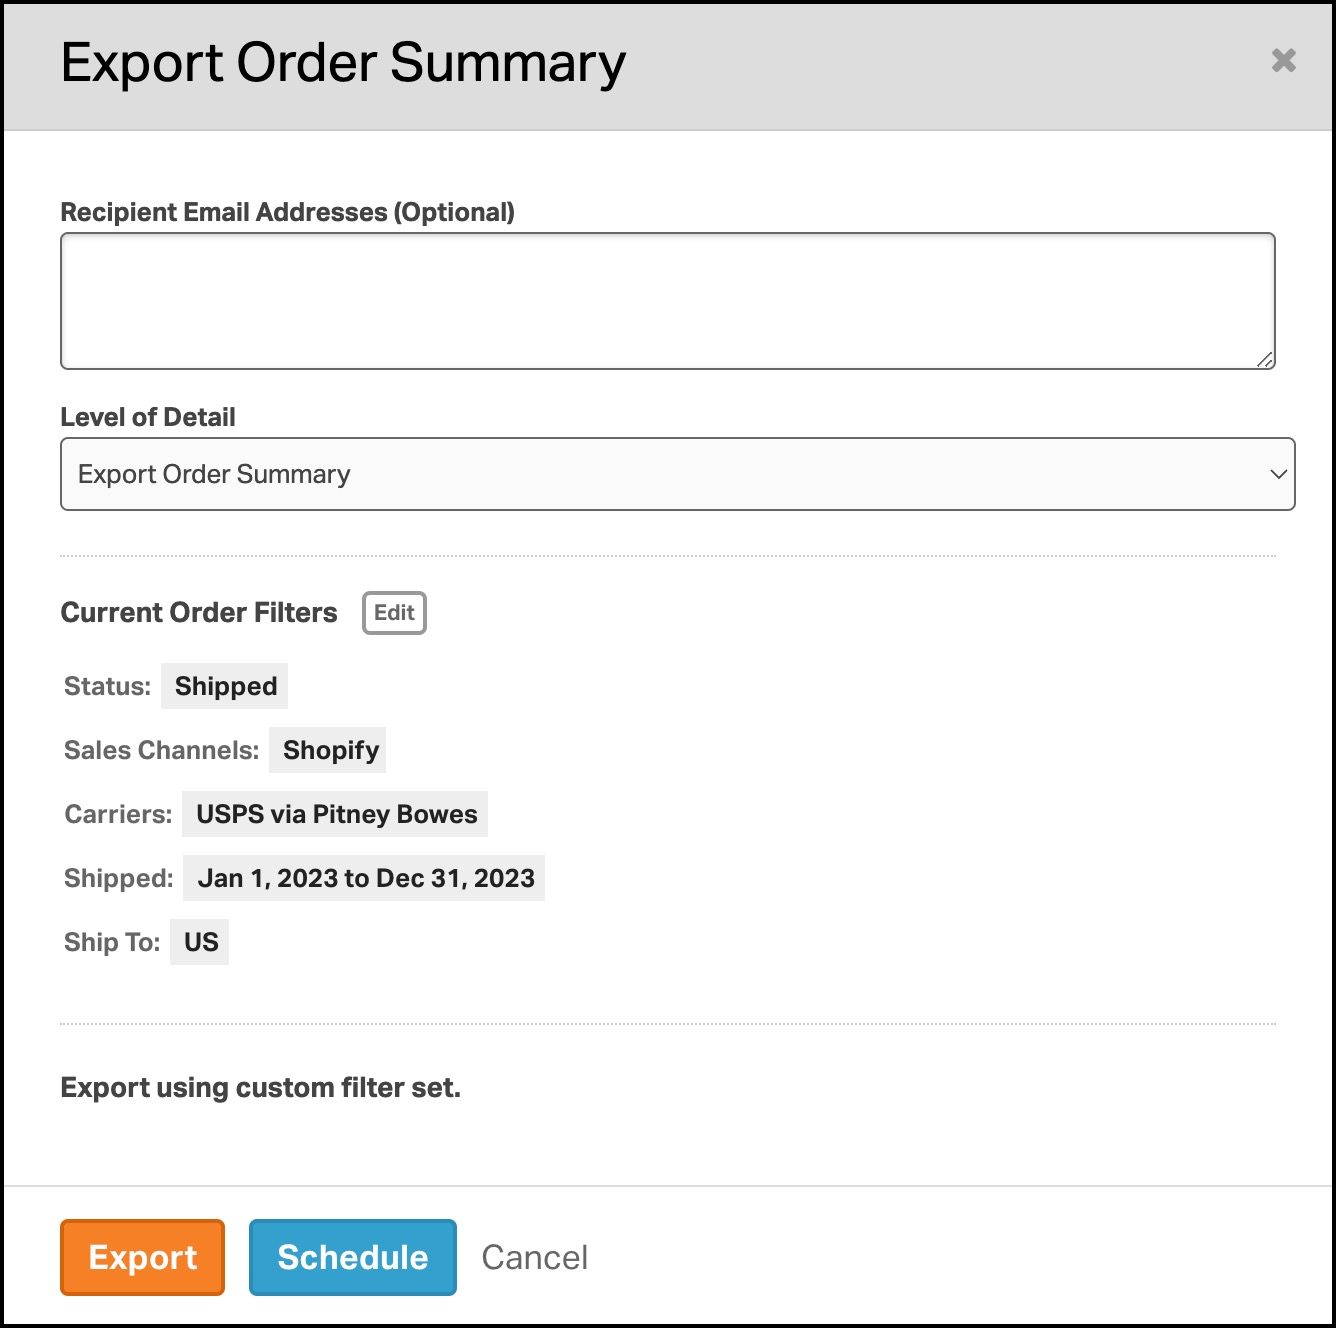
5. You’ll return to the previous modal, which displays all of your selected filters. Click Export or Schedule to generate the CSV file.
- If you select Schedule, you’ll be prompted to create a report. See this support article for details.
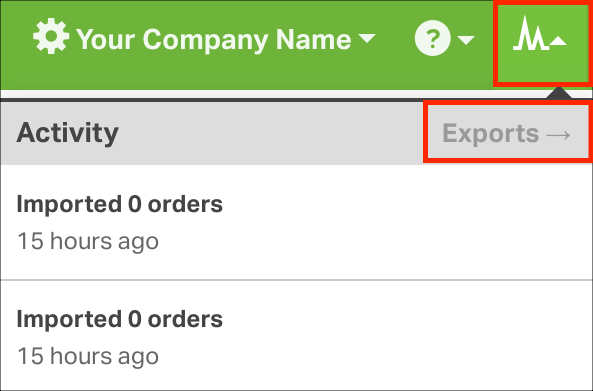
6. Once the report is complete, it is available in the Activity Menu -> Exports.
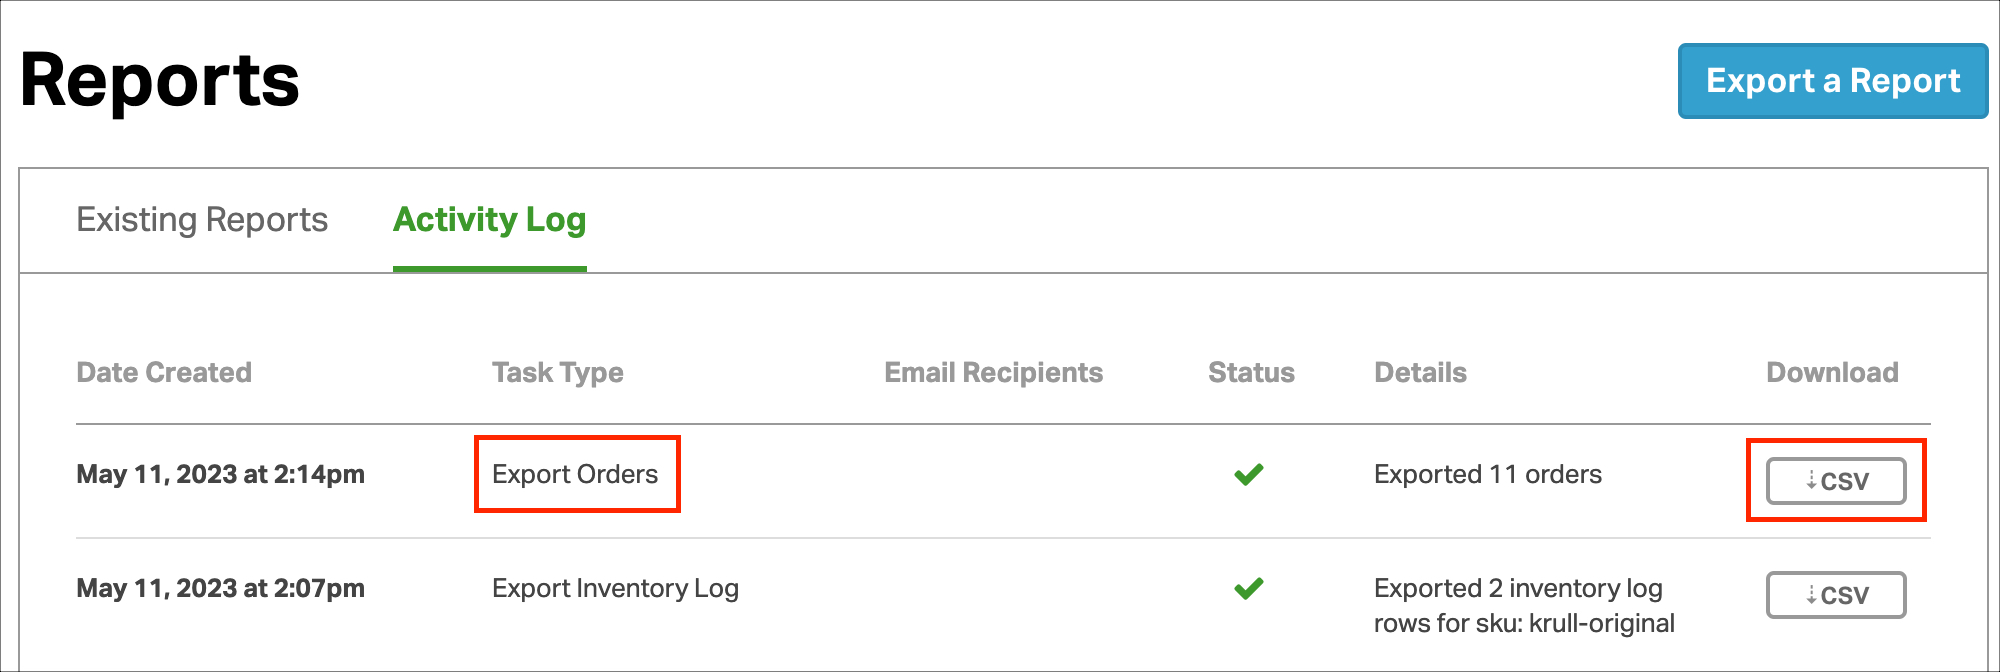
7. Click the CSV button. The file will automatically download to your computer.
Order Summary / Detail Column Headers
| Column | Order Summary | Order Detail |
|---|---|---|
| Order ID | ✓ | ✓ |
| External Order ID | ✓ | ✓ |
| Order Date | ✓ | ✓ |
| Cart Name | ✓ | ✓ |
| Order Status | ✓ | ✓ |
| Number of Lines | ✓ | ✓ |
| Total Price | ✓ | ✓ |
| Product Subtotal | ✓ | ✓ |
| Discount | ✓ | ✓ |
| Shipping & Handling | ✓ | ✓ |
| Tax | ✓ | ✓ |
| Credit Card Issuer | ✓ | ✓ |
| Bill To (Company Name) | ✓ | ✓ |
| Bill To (Name) | ✓ | ✓ |
| Bill To (Street1) | ✓ | ✓ |
| Bill To (Street2) | ✓ | ✓ |
| Bill To (City) | ✓ | ✓ |
| Bill To (State) | ✓ | ✓ |
| Bill To (Code) | ✓ | ✓ |
| Bill To (Country) | ✓ | ✓ |
| Bill To (Email) | ✓ | ✓ |
| Bill To (Phone) | ✓ | ✓ |
| Bill To (Fax) | ✓ | ✓ |
| Bill To (Reference Number) | ✓ | ✓ |
| Ship To (Company Name) | ✓ | ✓ |
| Ship To (Name) | ✓ | ✓ |
| Ship To (Street1) | ✓ | ✓ |
| Ship To (Street2) | ✓ | ✓ |
| Ship To (City) | ✓ | ✓ |
| Ship To (State) | ✓ | ✓ |
| Ship To (Code) | ✓ | ✓ |
| Ship To (Country) | ✓ | ✓ |
| Ship To (Email) | ✓ | ✓ |
| Ship To (Phone) | ✓ | ✓ |
| Ship To (Fax) | ✓ | ✓ |
| Ship To (Reference Number) | ✓ | ✓ |
| Requested Shipping Method | ✓ | ✓ |
| Customer Instructions | ✓ | ✓ |
| Internal Notes | ✓ | ✓ |
| Order Allocation Status | ✓ | ✓ |
| Shipment Date | ✓ | ✓ |
| Ship From | ◯ | ✓ |
| SKU | ◯ | ✓ |
| SKU Description | ◯ | ✓ |
| SKU Additional Details | ◯ | ✓ |
| Category | ◯ | ✓ |
| Ordered Qty | ◯ | ✓ |
| Order Line Price | ◯ | ✓ |
| Shipped Qty | ◯ | ✓ |
| Order Line Allocated | ◯ | ✓ |
| Vendor | ✓ | ✓ |
| Shipping Method | ✓ | ✓ |
| Tracking Number | ✓ | ✓ |
| Tracking Status (USPS only) | ✓ | ✓ |
| Shipping Cost | ✓ | ✓ |
| Length | ✓ | ✓ |
| Width | ✓ | ✓ |
| Height | ✓ | ✓ |
| Weight (in oz) | ✓ | ✓ |
| Package Type | ✓ | ✓ |
| Weighted Average Unit Cost | ◯ | ✓ |
| Tags | ✓ | ✓ |
| Supplier | ✓ | ✓ |
| Supplier SKU | ◯ | ✓ |
| Serial Numbers | ◯ | ✓ |
| Payor | ✓ | ✓ |
| Duties Payor | ✓ | ✓ |
| Component Ordered Qty * | ◯ | ✓ |
| Component SKU * | ◯ | ✓ |
| Component SKU Description * | ◯ | ✓ |
* If Include kit components in report is selected.