Looking to connect your Shopify store to Ordoro? This guide walks you through the full setup process, including authorizing the integration and mapping your warehouse locations. Follow these steps to ensure your orders and inventory sync smoothly between the two platforms.
Topics
- Before you begin
- Step 1: Add your Shopify store to Ordoro
- Step 2: Authorize the connection in Shopify
- Step 3: Map your warehouses to Shopify locations
- What happens after mapping
- Why mapping locations is required
- How orders and products first import into Ordoro
Before you begin
- Make sure you’re logged out of any Shopify store accounts before starting. This helps ensure you’re connecting the correct store.
- If you’re not the store owner, confirm that you have permission to manage and install apps and channels in Shopify.
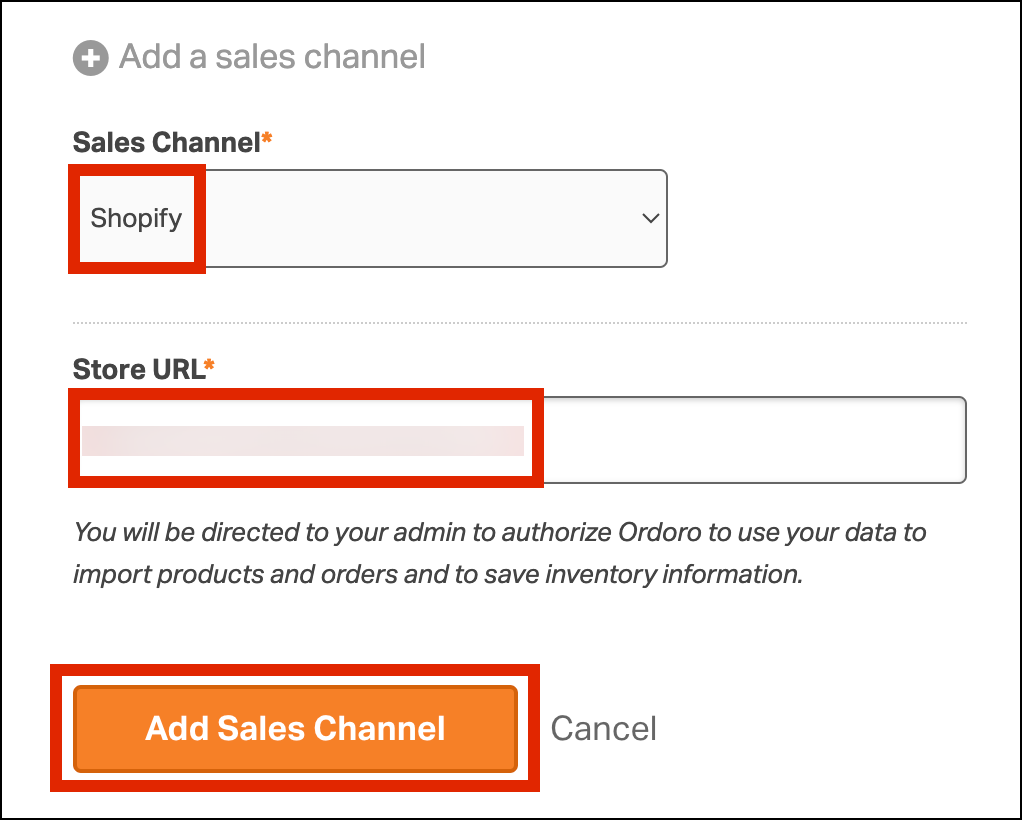
Step 1: Add your Shopify store to Ordoro
- Open your Sales Channel Settings in Ordoro
- Click Add a Sales Channel.
- Select Shopify from the dropdown.
- Enter your store’s myshopify.com URL
- You can find this in Shopify under Settings → Domains
- Click Add Sales Channel.
Step 2: Authorize the connection in Shopify
After adding your store, you’ll be redirected to Shopify.
- Log in when prompted
- Click the link that says Authorize Ordoro to manage your Shopify orders and inventory
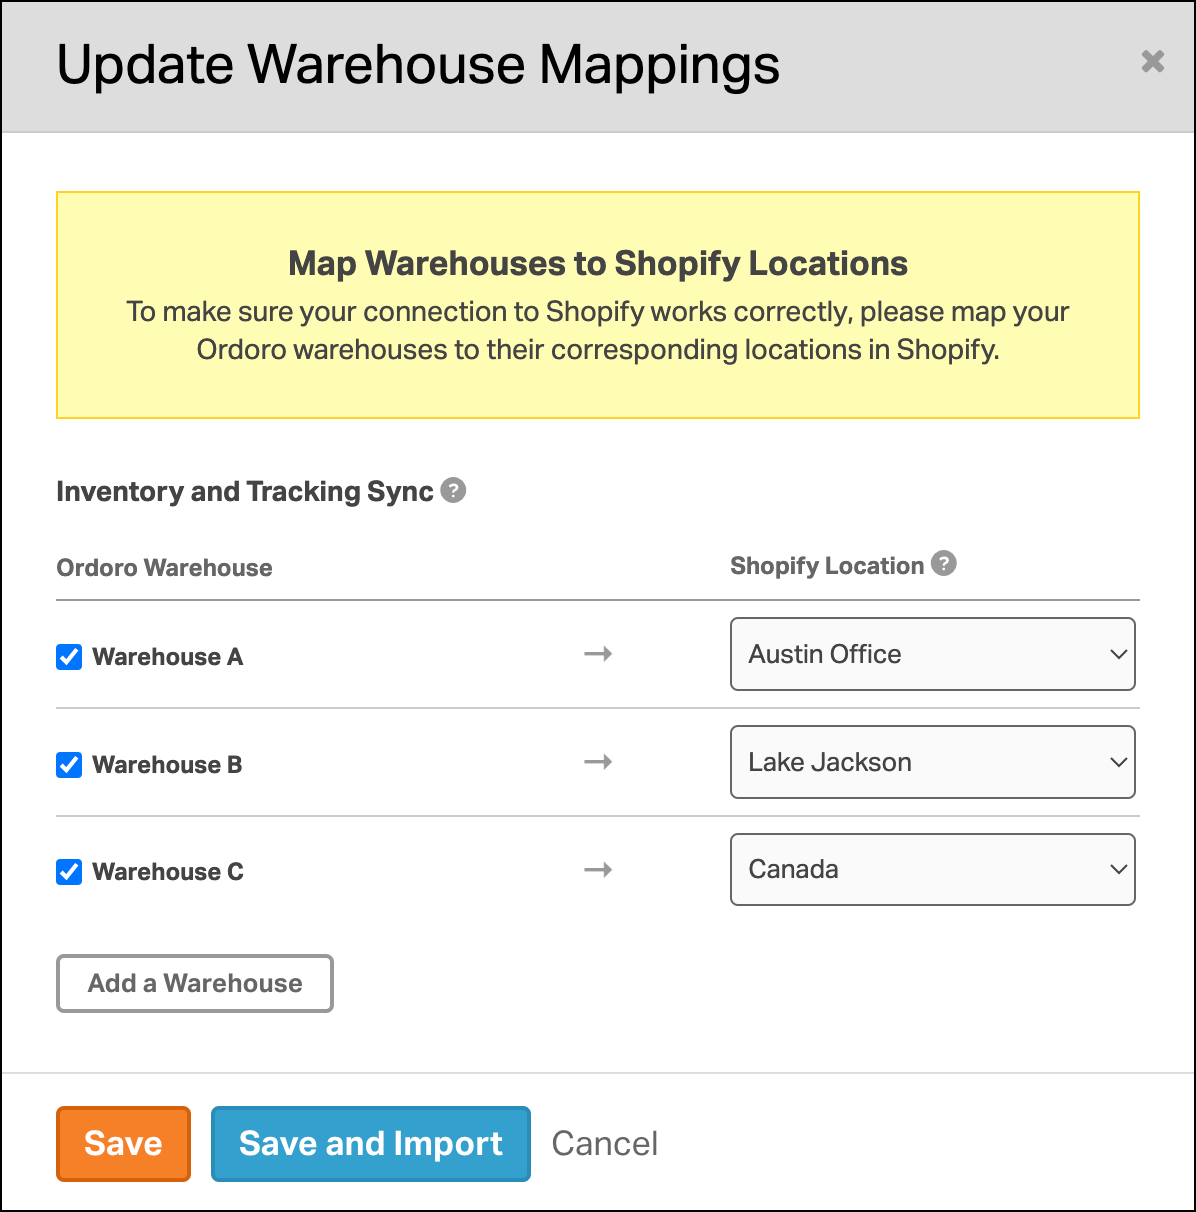
Step 3: Map your warehouses to Shopify locations
Once authorized, you’ll be asked to map your Ordoro warehouses to your Shopify locations. This step is required.
- If you haven’t created all your warehouses yet, click Add a Warehouse and set them up first
- Then, match each Ordoro warehouse to the correct Shopify location
After mapping, choose one of the following:
- Save – Saves your mappings but does not import orders or products
- Save and Import – Saves your mappings and starts importing orders and products immediately
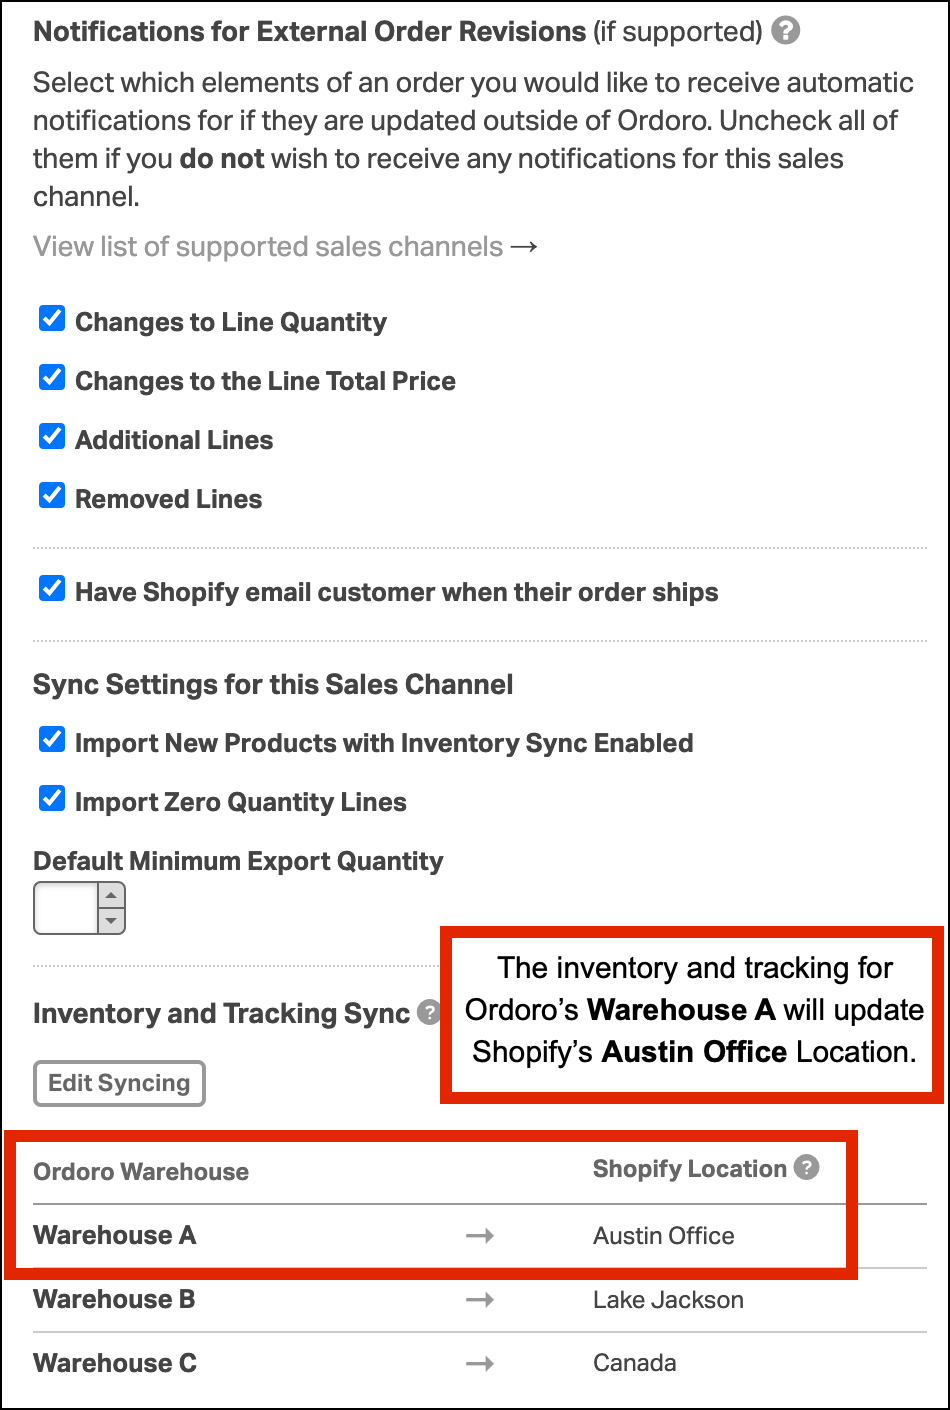
What happens after mapping
Once your warehouse locations are mapped:
- When you ship an order from that warehouse in Ordoro, tracking info is sent to the correct Shopify location
- When inventory syncs from Ordoro, quantities are sent to the matching Shopify location
Why mapping locations is required
Even if you only have one warehouse and one location in Shopify, the mapping step is still required. If it’s not completed, Ordoro cannot send tracking updates or inventory levels back to Shopify.
Need more details on how Shopify locations work with Ordoro? See this article for a deeper dive.
How orders and products first import into Ordoro
When Ordoro first connects to Shopify, this is what will import:
- Orders in the default statuses from the last 30 days
- See this support article to learn about which Shopify order statuses Ordoro will import by default.
- All active products and product images
If you need more orders or products to import, please contact Ordoro Support at support@ordoro.com for more assistance.