Return Codes help efficiently organize why your customers have sent items back. In Ordoro’s Returns module, it’s easy to create and apply.
Notes
- RMAs are exclusive for Pro and Enterprise accounts.
- Express accounts have access to our Returns workflow seen here.
- To see the complete RMA workflow, check out this support article.
Topics
- Create a Return Code
- Edit a Return Code
- Add a Return Code to a new RMA
- Edit a Return Code on an existing RMA
How to create Return Code
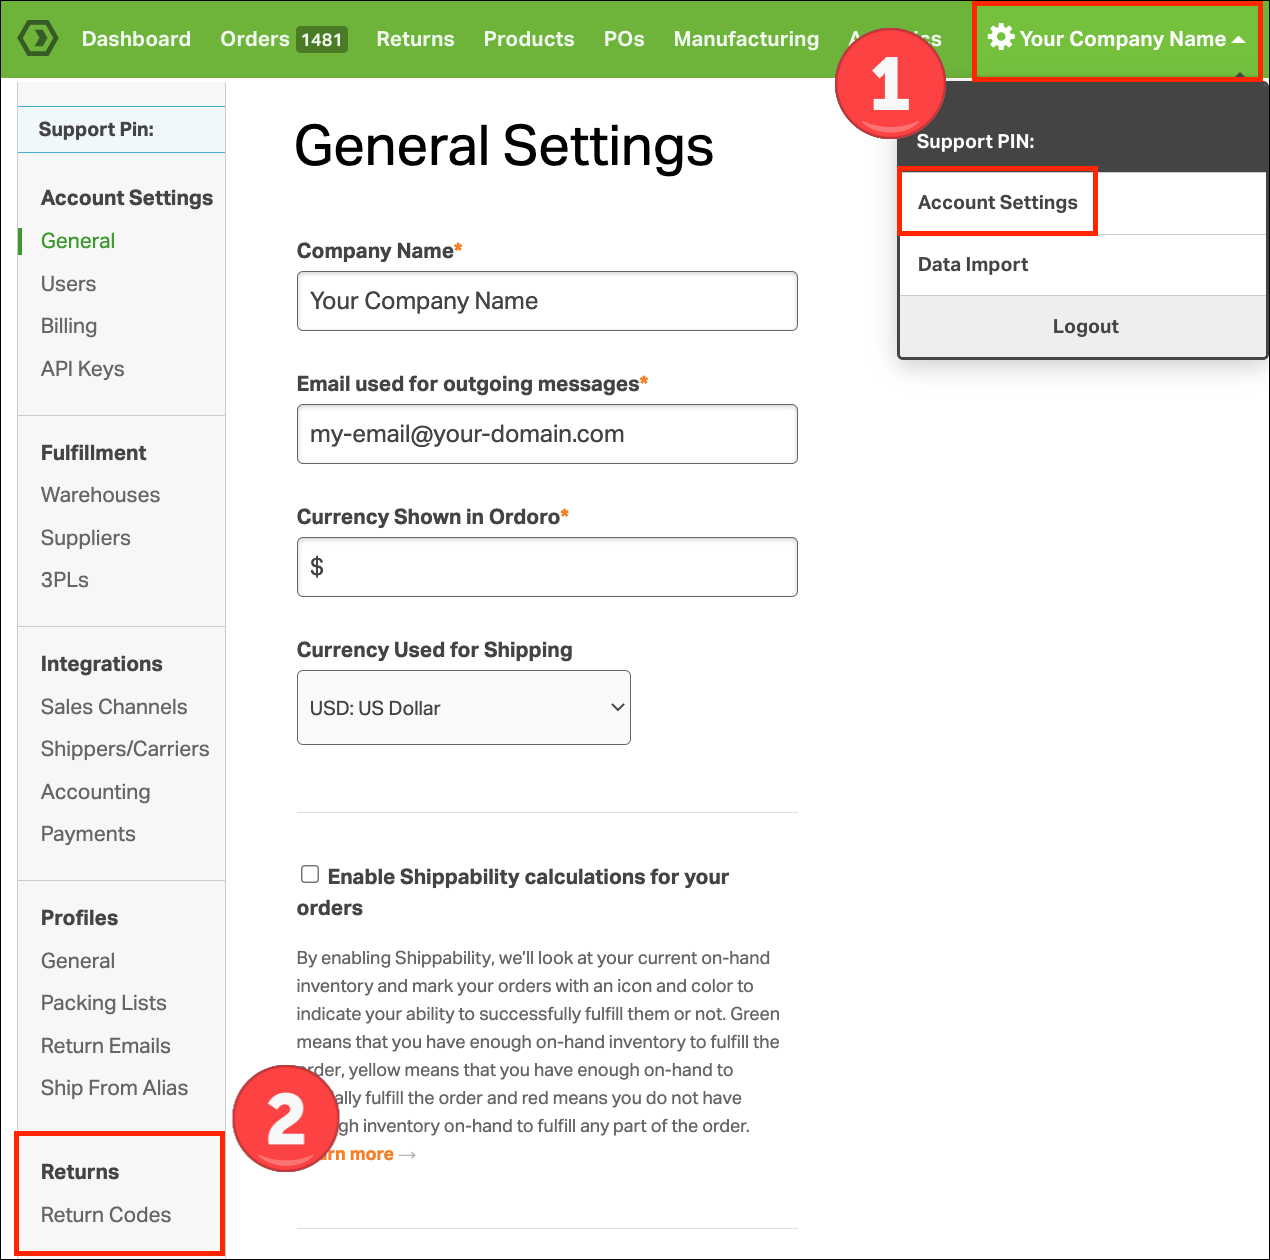
1. Go to your Company Name -> Account Settings.
2. Under Returns, select Return Codes.
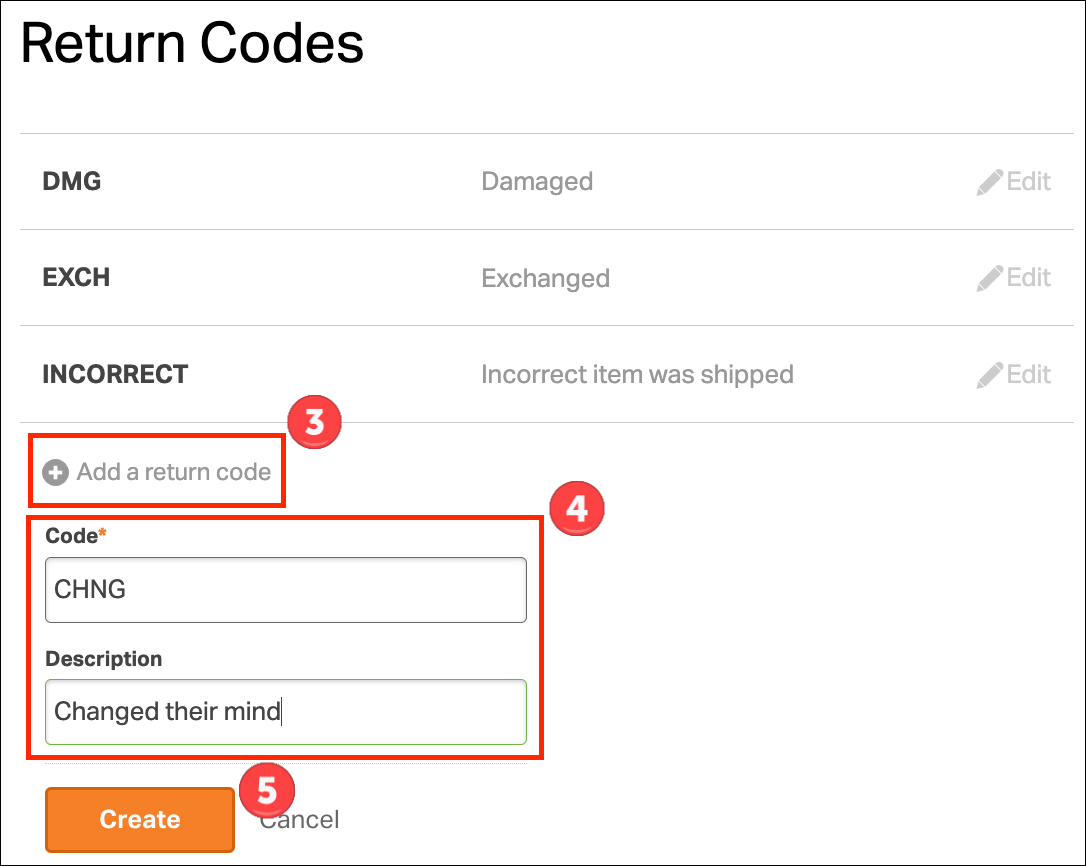
3. To add a new return code, click on Add a return code.
4. Enter the Code and Description.
- The Code appears when you create an RMA.
- The Description helps others know what the code means.
5. Click Save when the information is finalized.
How to edit a Return Code
1. Follow steps 1-2 above.
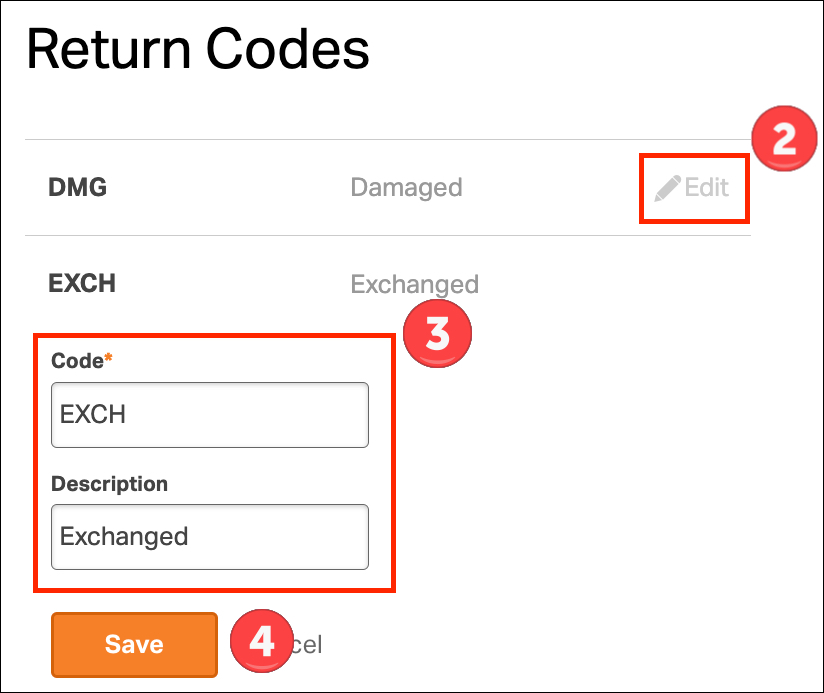
2. Click Edit next to an existing Return Code.
3. Update the Code or Description.
4. Click Save.
How to add Return Codes to a new RMA
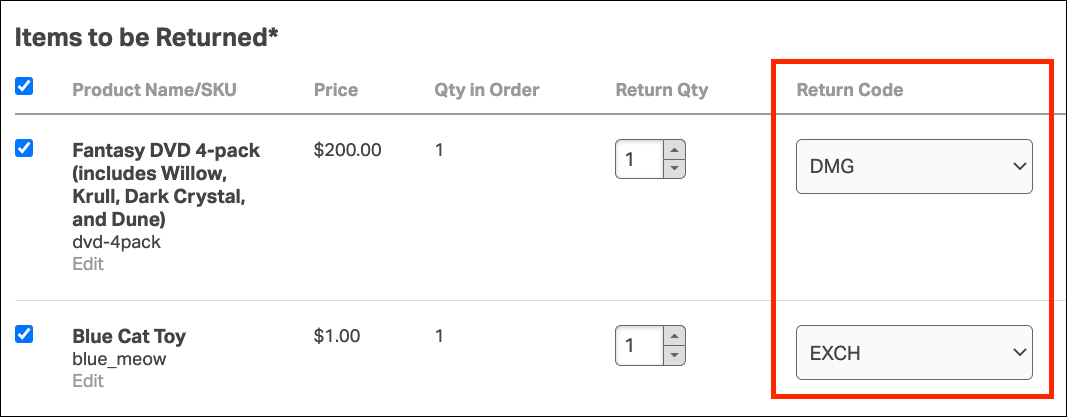
1. When you initiate a Return (RMA), Return Codes can be added under Items to be Returned.
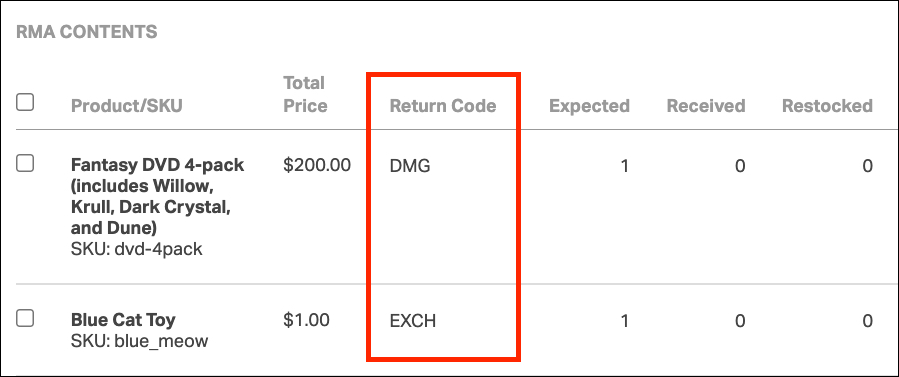
2. Once the RMA is created, here’s how the Return Codes will appear.
How to edit Return Codes on an existing RMA
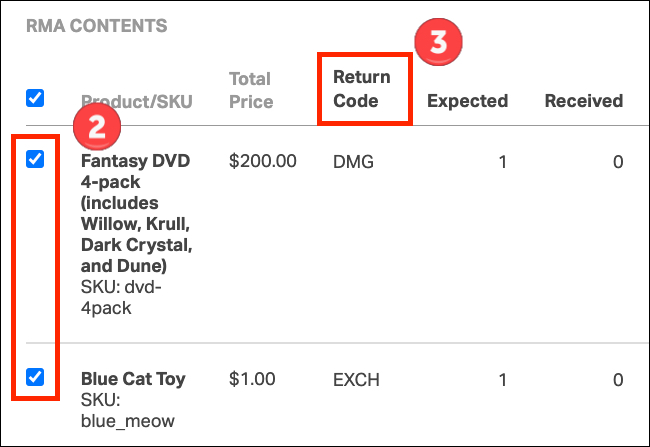
1. To edit a Return Code on an existing RMA, go to the RMA Details page.
2. Next, select which items need an updated Return Code.
3. Click the Return Code heading.
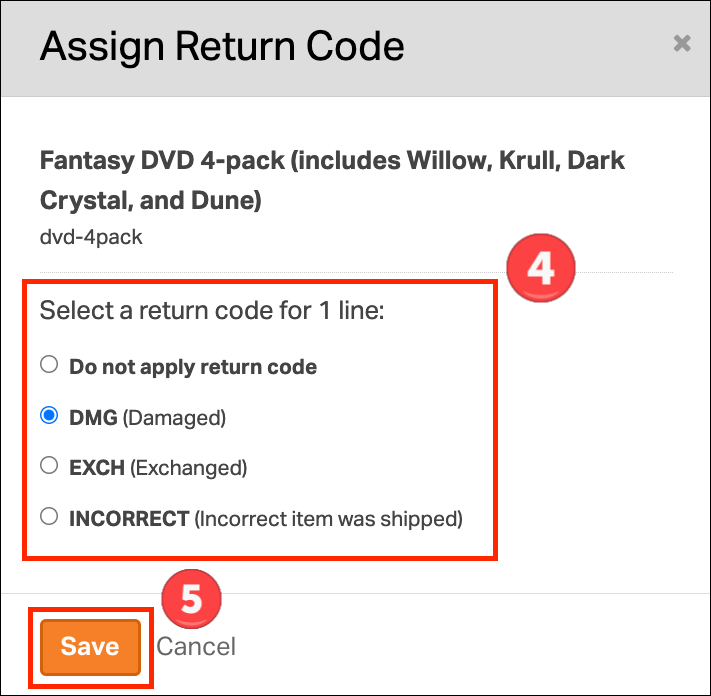
4. A modal will open where you can edit the Return Code.
- If you remove a Return Code, Ordoro will display None Specified.
5. Click Save.
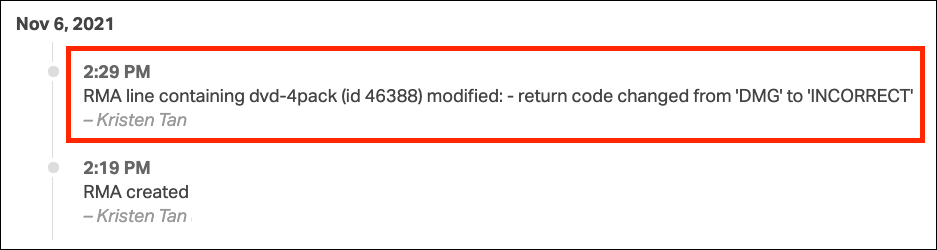
6. The RMA Order Timeline will be updated reflecting this change.