To ship your orders with UPS, Ordoro provides two options:
This article describes how to create and connect the discounted rate account.
Please note: these UPS rates are specific for Ordoro use. The UPS account will not work with other systems.
Topics
Create a UPS Discounted Rates account through Ordoro
By creating a UPS account in Ordoro, you can ship your orders with Ordoro’s discounted rates.
When creating the account in Ordoro, two emails will be sent from UPS to connect the newly created account to UPS.com. This allows you to manage pickups and pay your bills online. (Note: invoices are emailed weekly.)
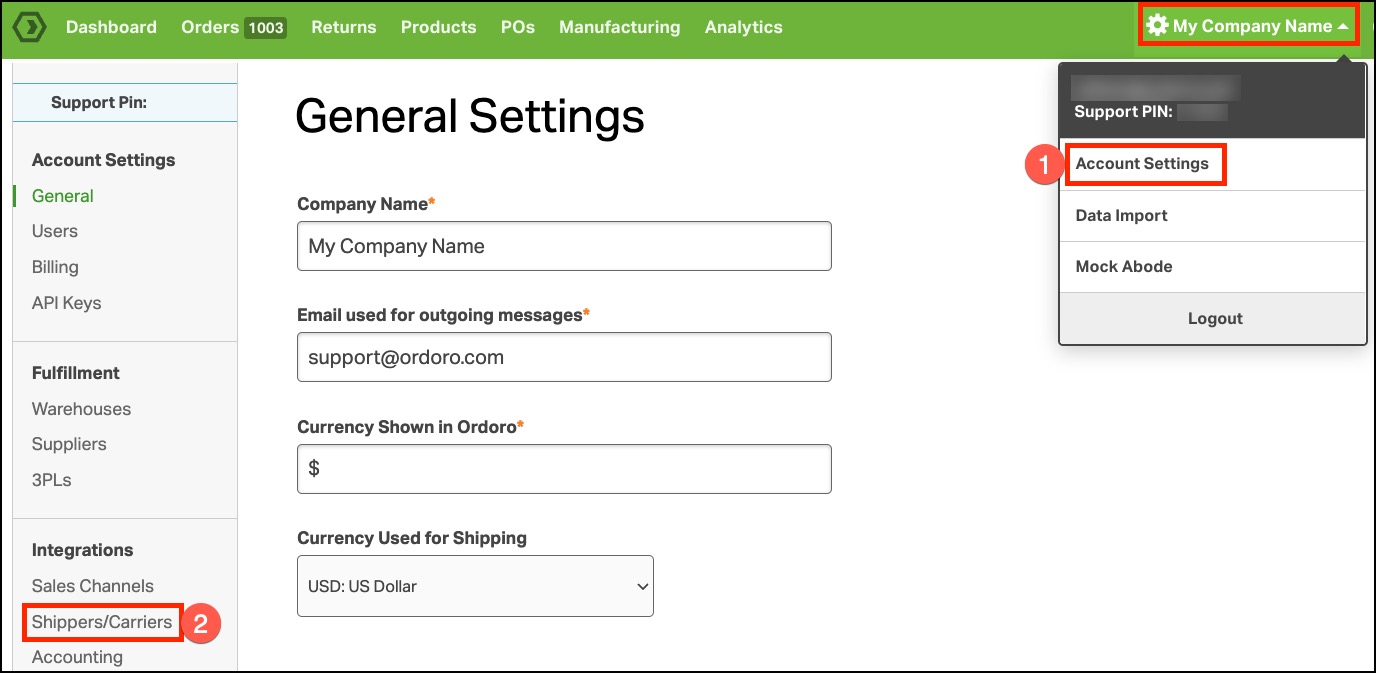
- Click on your Company Name in the top right corner. Select Account Settings.
- On the left, under Integrations, click Shippers/Carriers.
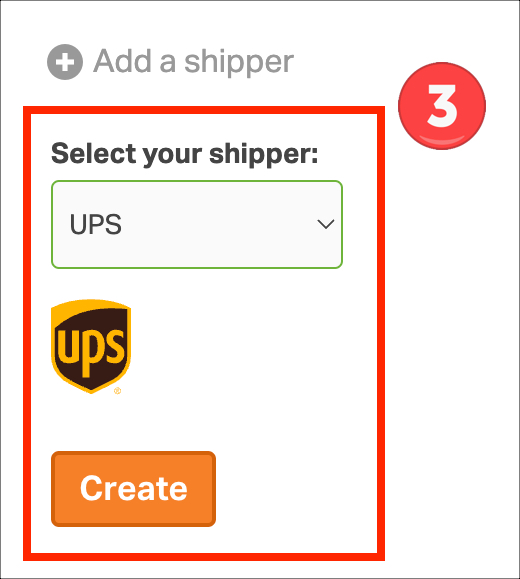
- Click Add a shipper and select UPS from the dropdown. A pop-up will appear to set up the account.
- If you do not have a UPS Profile, click the link to visit the UPS Profile creation page to set one up. Once you’ve created your profile, repeat steps 1-3 and proceed with the next steps.

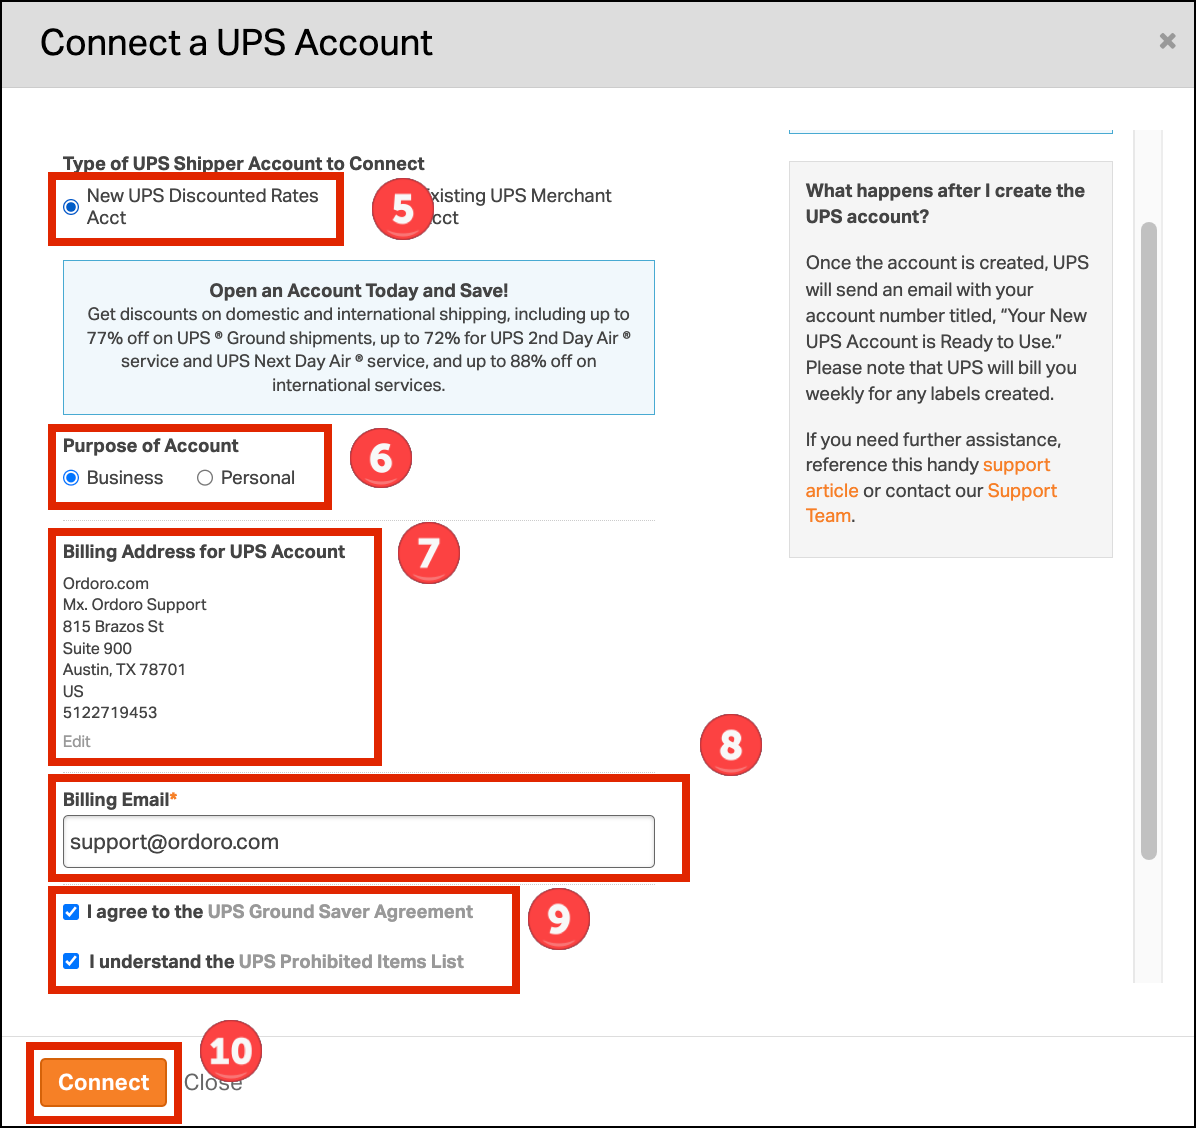
- Select New UPS Discounted Rates Acct.
- Choose the Purpose of Account. Either Business or Personal usage.
- Confirm the Billing Address for UPS Account is correct.
- Click Edit to update the billing details if needed.
- Important: Use an email address you can access, as vital information will be sent to connect the account to UPS.com for billing, etc.
- This email is also used in the UPS.com step 8 below.
- Enter your Billing Email.
- Review the terms and then select the checkboxes for the following:
- I agree to the UPS Ground Saver Agreement
- I understand the UPS Prohibited Items List
- Click Connect.
- Enter the email of your UPS profile. Select the checkbox to allow Ordoro to connect to your UPS profile. Click Continue.
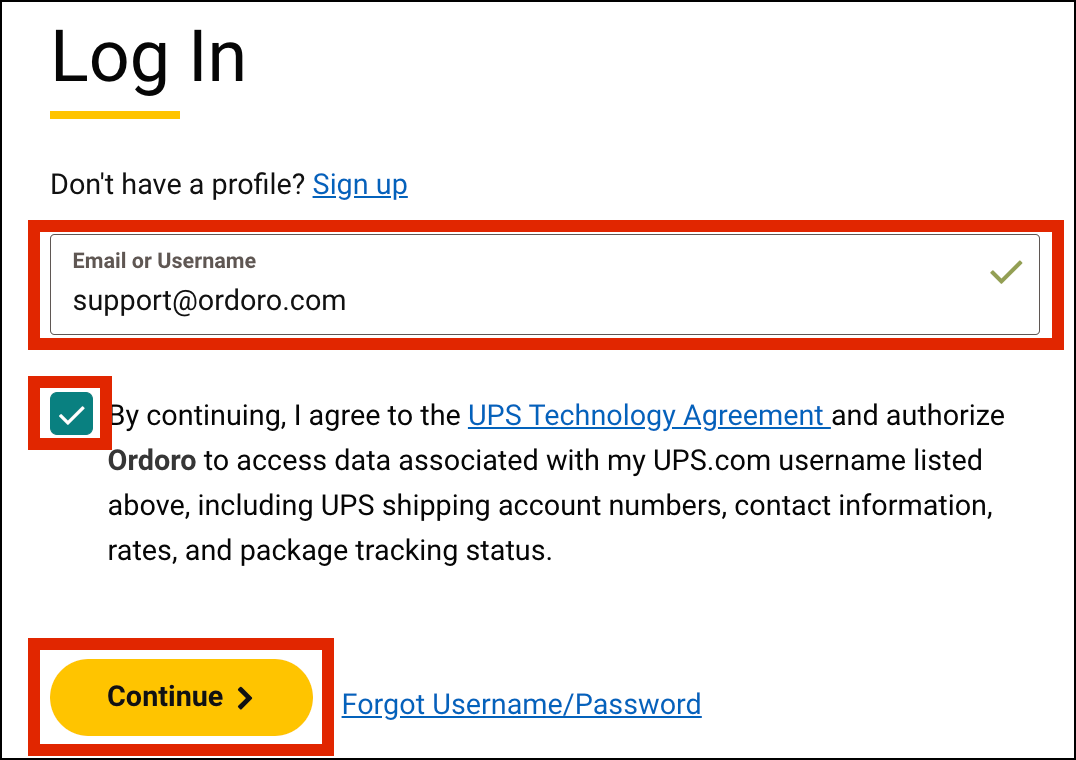
- Enter your password. Click Login.

- Click Finalize to create your UPS Discounted Rates account!

12. A pop up will appear to confirm that your account has been created:

Note: UPS bills weekly for the labels created in Ordoro with this account.
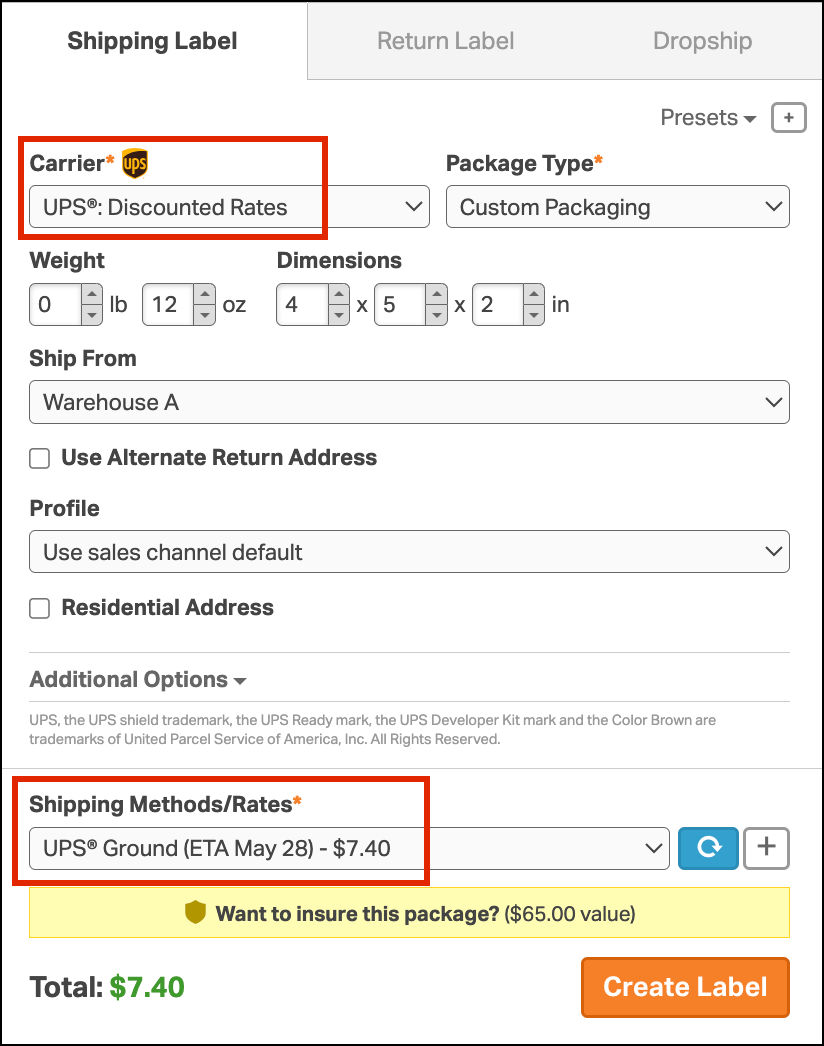
How UPS rates appear
Once UPS has been added, you’ll see Ordoro’s discounted rates or your negotiated UPS rates when creating a shipping label.