In Ordoro, connecting your USPS Business account is quick! Once you’re set up, you can manage your payments and view your transaction history directly through the USPS Business Gateway site.
Note: If you’re using the Chrome browser, the USPS site may experience issues. Try clearing your cookies and cache, or switch to Firefox or Safari if needed.
IMPORTANT:
- You must add USPS Ship through Ordoro.
- Don’t sign up on USPS.com first.
Topics
- Connect a USPS Business Account
- When you are charged for shipping labels
- How to manage your USPS Business Account
- How does shipping internationally work with my USPS business account?
1. Connect a USPS Business Account
Follow the steps below to connect your USPS Business account:
- Click your Company Name -> Account Settings.
- In the left sidebar, go to Shippers/Carriers.
- Click Add a shipper and select USPS Ship from the dropdown.
- Click Authorize.

2. Create a USPS Business account
IMPORTANT: You must add USPS Ship through Ordoro. Don’t sign up on USPS.com first.
- Click Create New Account.
- If you already have a USPS Business account, enter your Username and Password.

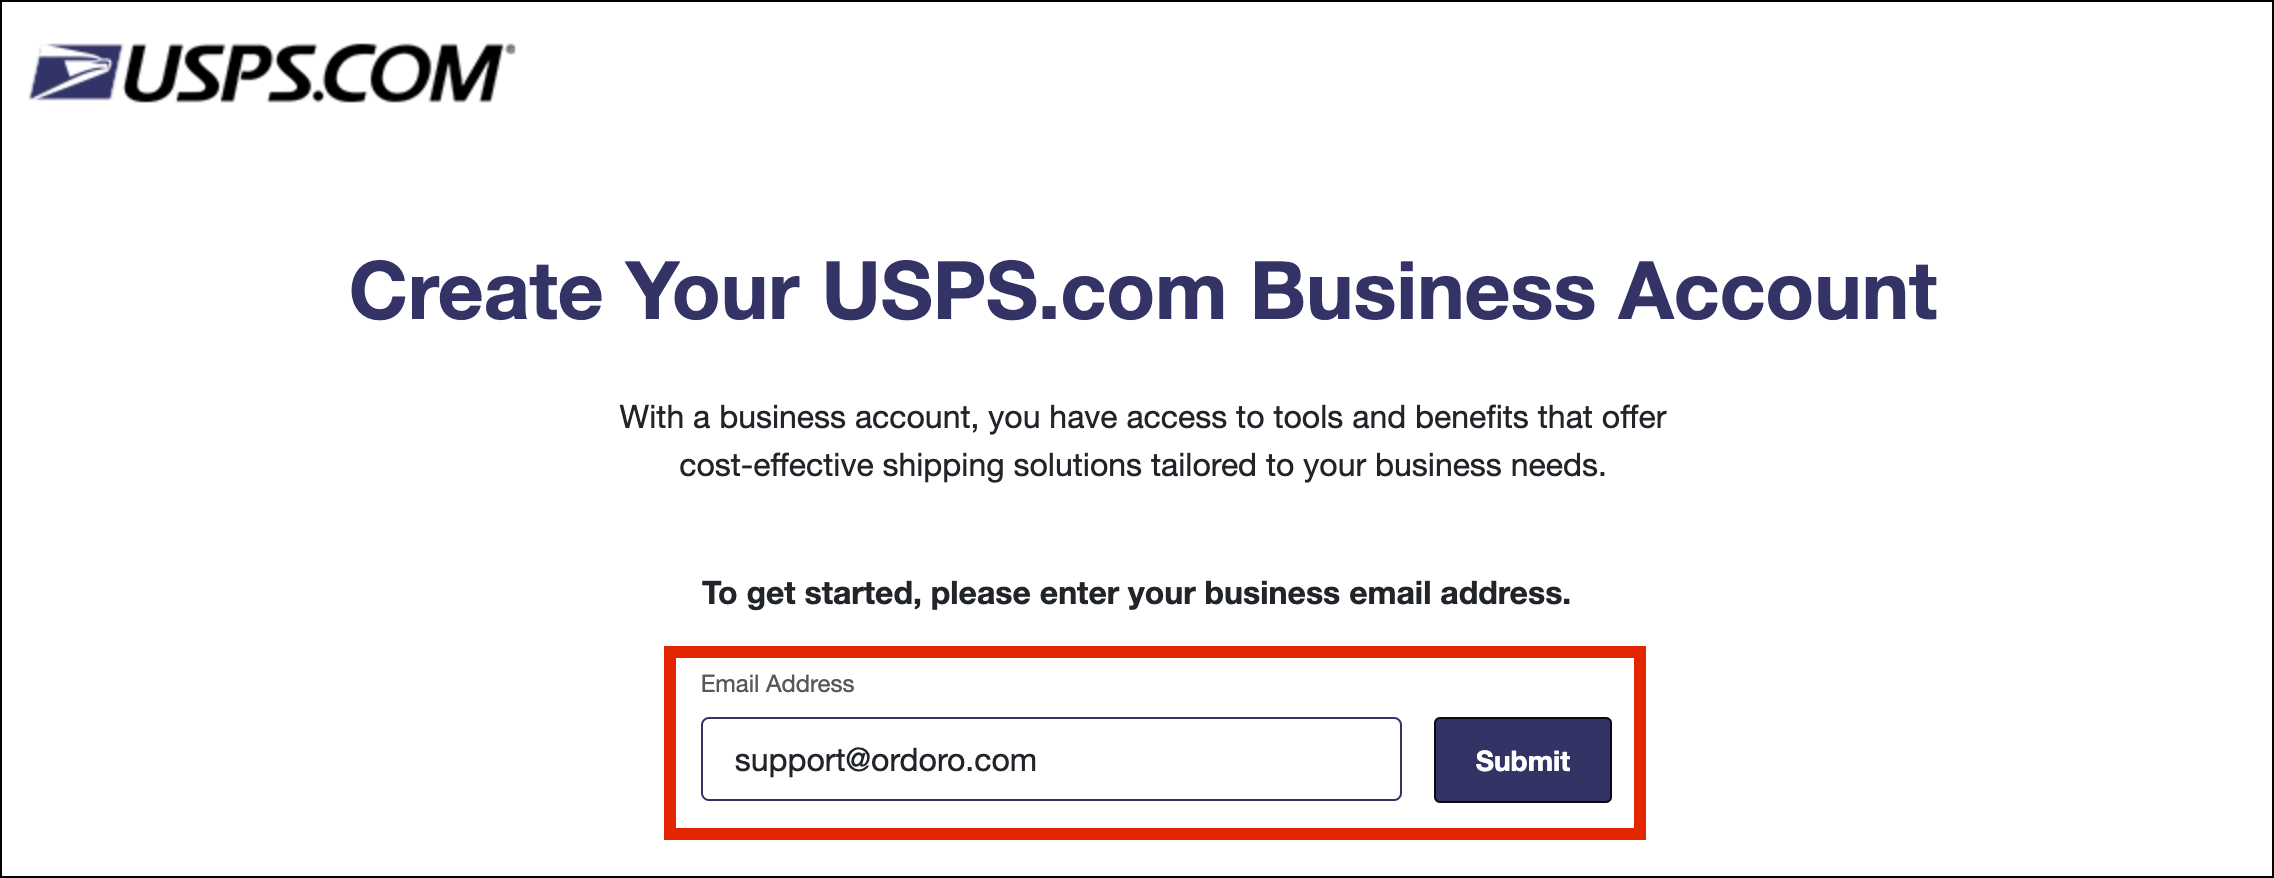
- Enter your email address and click Submit.
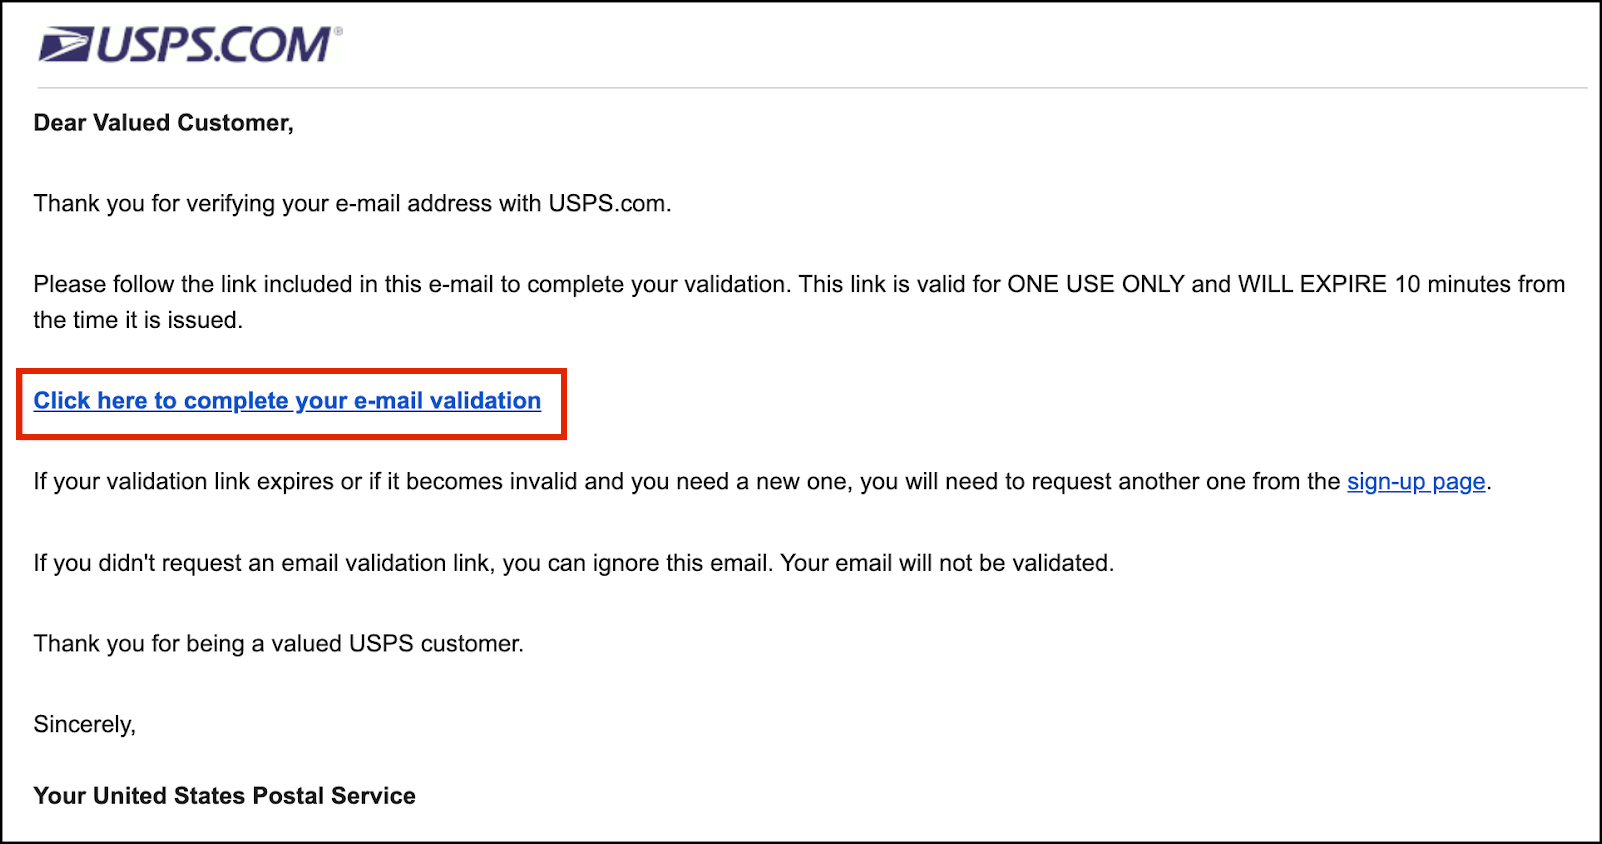
- Check your inbox for an email from USPS. In the email, select Click here to complete your e-mail validation. This link expires within 10 minutes.
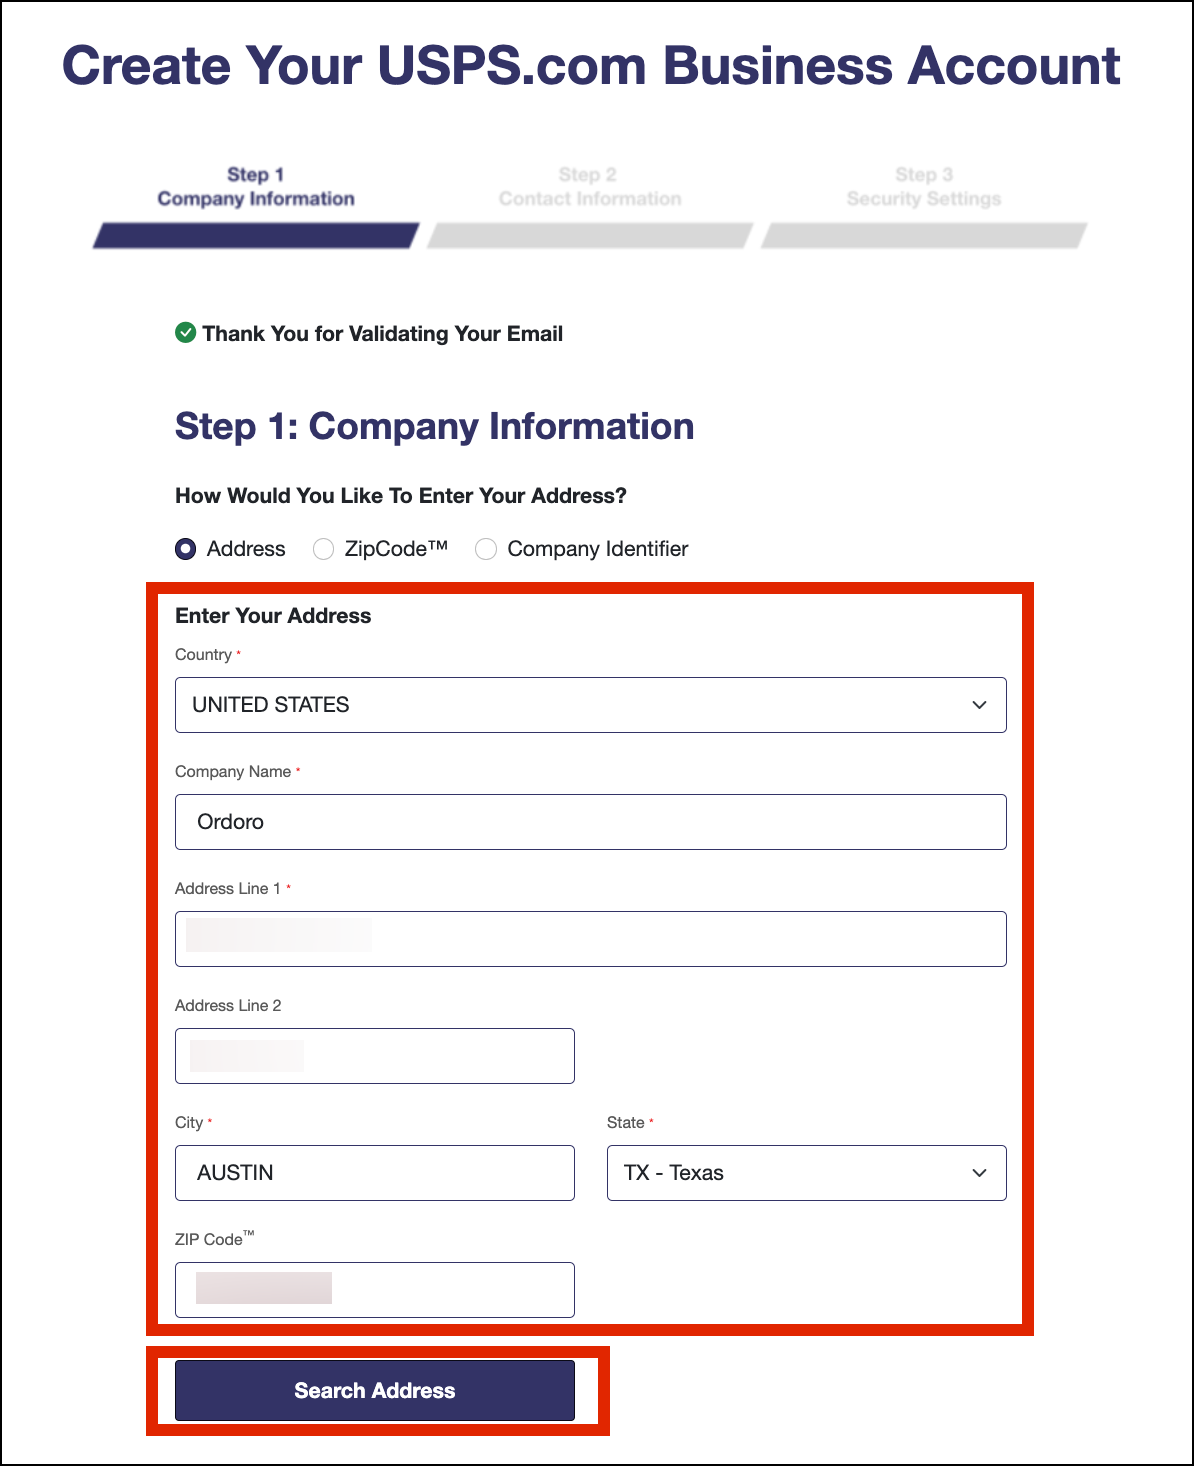
- Enter your company address, then click Search Address.
Please Note: You must enter a physical address. You cannot enter a PO Box address.
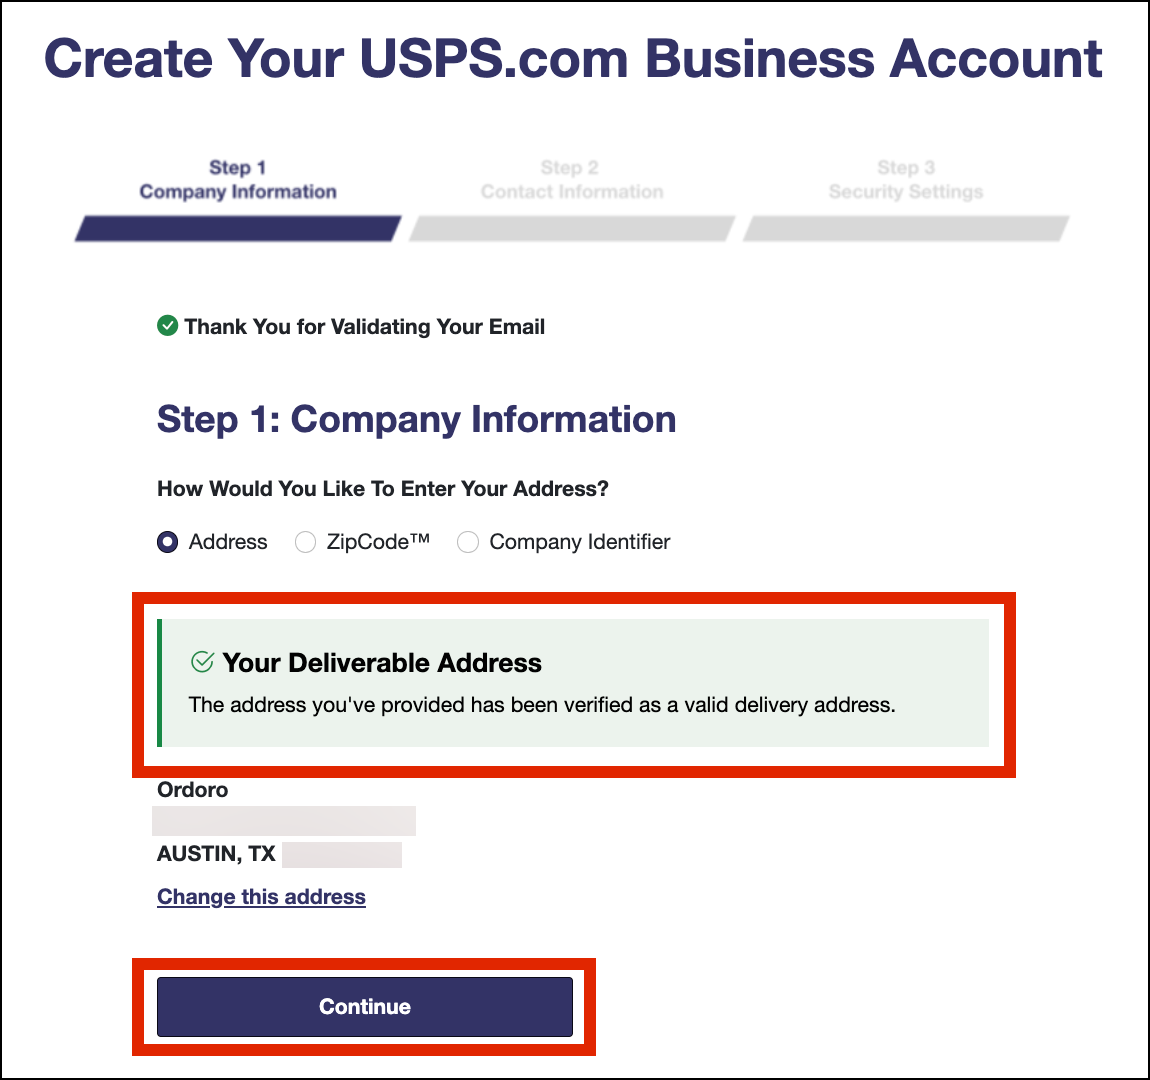
- When the address is confirmed, click Continue.
- Enter your contact information, then click Verify Account.

- Create your username, set your security questions, and enable multi-factor authentication (MFA).
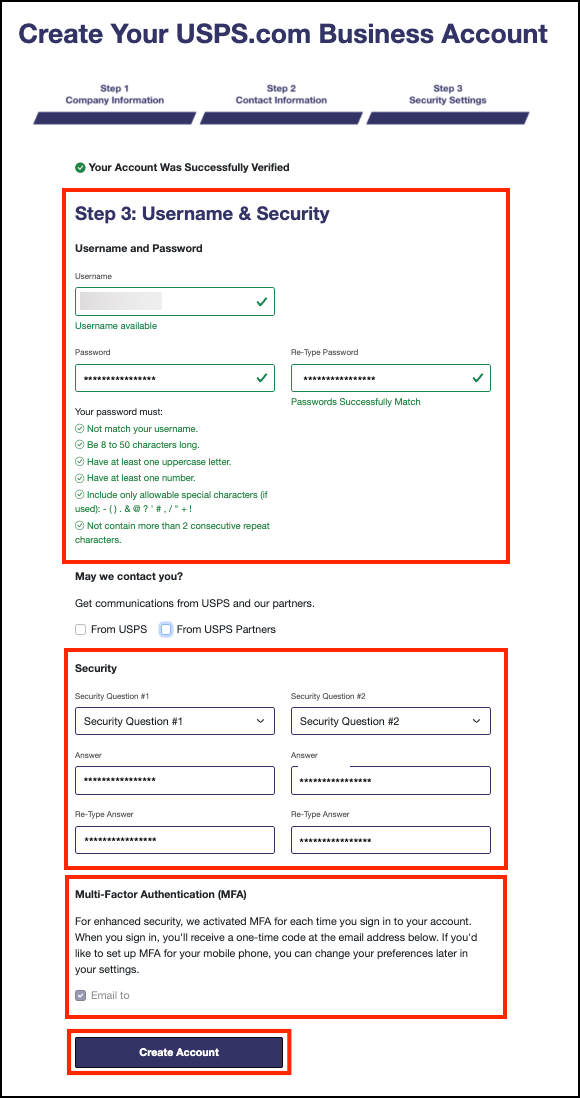
Note: If you are unable to move past this step, please try the following steps to troubleshoot.
- Do not include dashes when entering phone number and/or use a different phone number
- Use Chrome as your browser and/or try a different browser
- Delete your cookies (close any open windows and clear all cookies)
- Use either “incognito mode” or new “in private window”
- Attempt to submit request from a computer/private network instead of a mobile device.
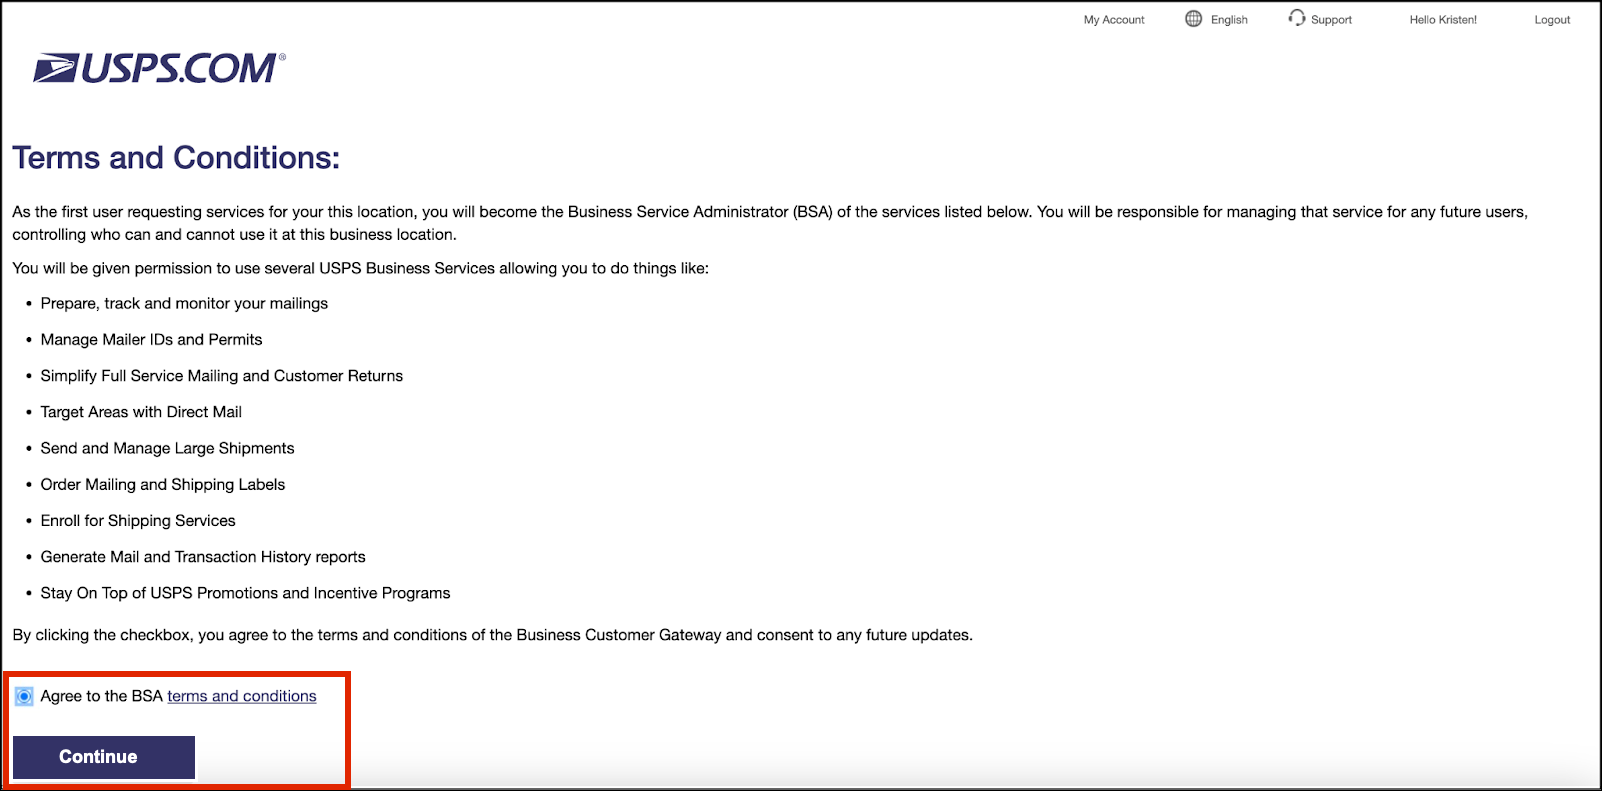
- Accept the terms and conditions, then click Continue.
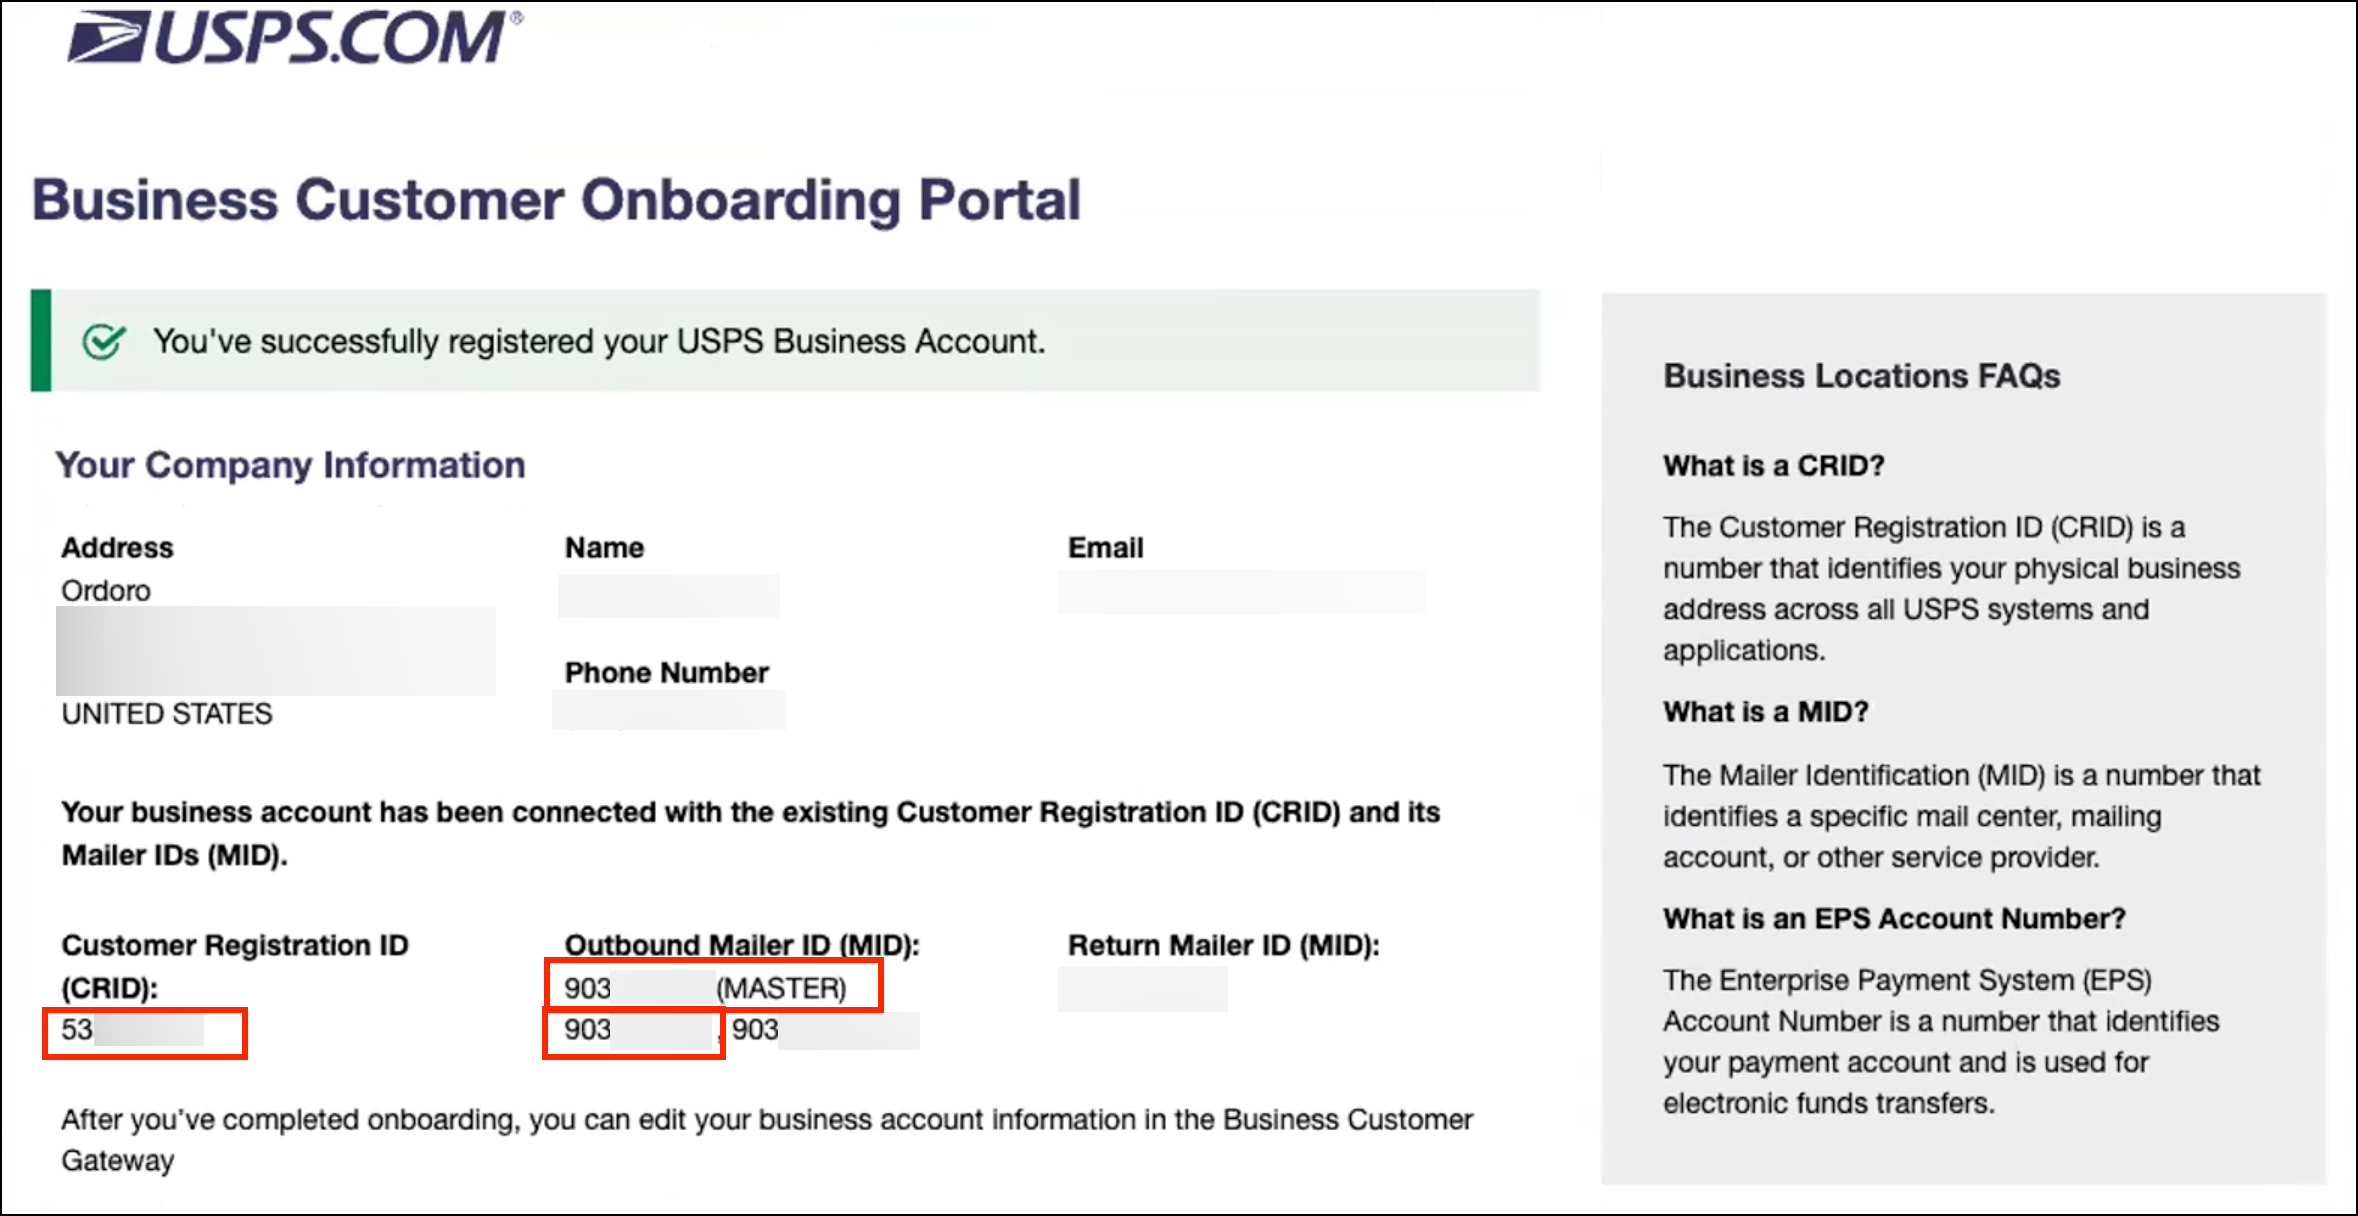
- On the Business Customer Onboarding Portal, save the following numbers for Ordoro setup:
- Customer Registration ID (CRID)
- Outbound Mailer ID (MASTER MID)
- The second MID listed below the Master MID
14. Scroll down to enter the payment method. This is required to set up the Merchant EPS/EPA number that must be saved within Ordoro.
- Select the checkbox next to I have read,understand, and agree to the Payment Account Terms and Conditions.

15. For the Payment Method, select Credit Card. Then you’ll see the Authorization Amount. Select the appropriate amount for your USPS daily spend and then select Continue.
NOTE: This amount will your maximum daily spend limit. If you spend beyond this amount, you will have to wait until the next day for the amount to replenish.
USPS will place a pre-authorization hold on your account for the amount you select. At the end of each day, USPS will charge you for the amount you spent creating labels and release the authorization hold.

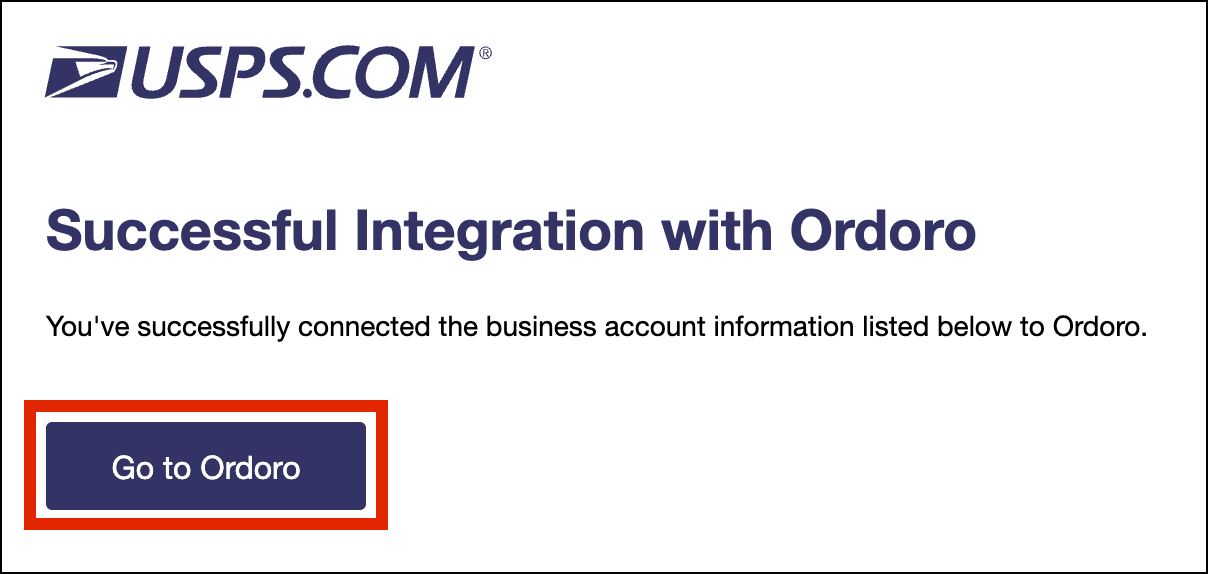
16. You’ll see a confirmation screen. Click Go to Ordoro to finish.
3. Save your credentials in Ordoro
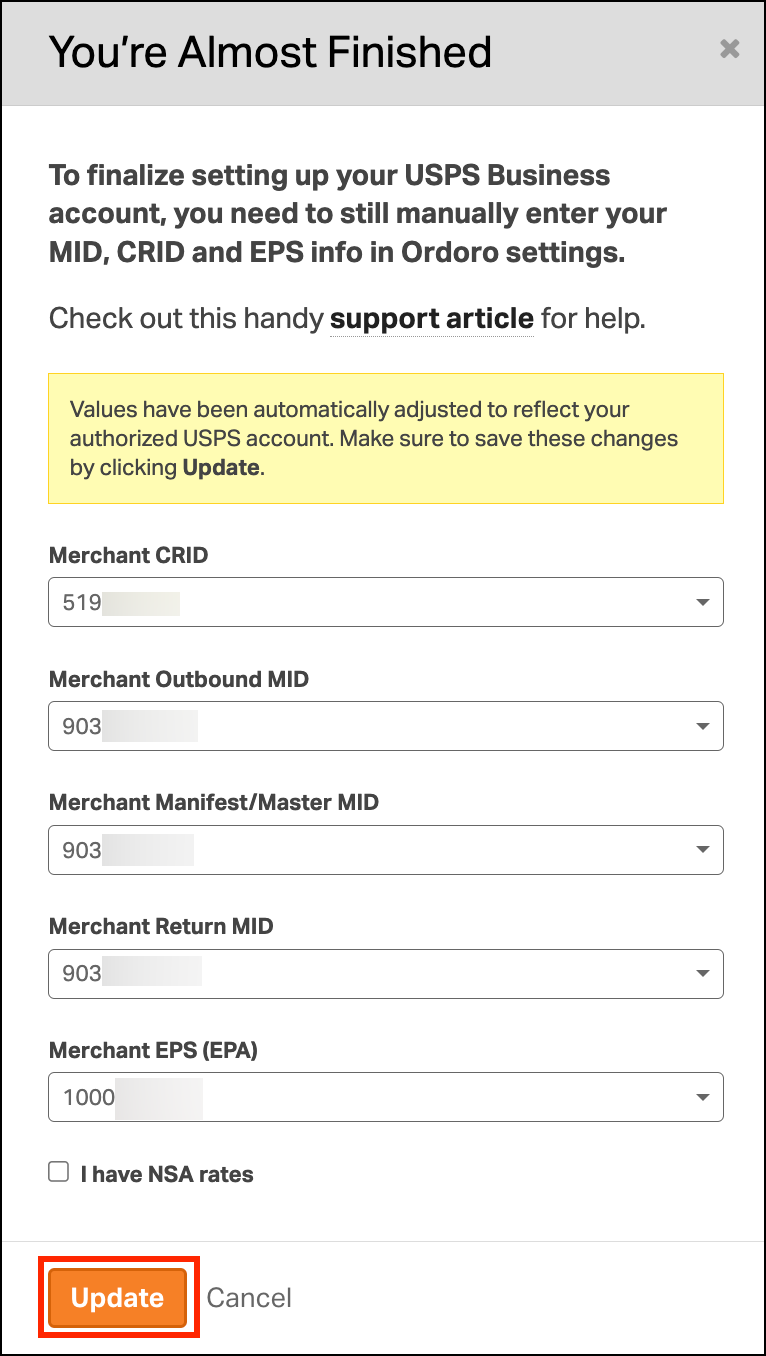
17. Under your USPS Ship carrier, select the Merchant CRID, Merchant Outbound MID, Merchant Manifest/Master MID, Merchant Return MID, and Merchant EPS (EPA) from the dropdown.
18. Click Update to save.
How do I find my USPS Ship credentials?
- Find the USPS email titled: “USPS.com Business Account Access.” Find the Outbound section with your Access codes.
- In Ordoro, enter the corresponding Access codes.
- Merchant CRID = your CRID
- Merchant Outbound MID = the second MID located in the box under Outbound MID
- Merchant Manifest/Master MID = the Outbound Master MID
- Returns MID = Merchant Return MID
- Merchant EPS (EPA) = your EPS Account Number
- Note: If you do not have an EPA/EPS Account number, please read below.
How can I find my EPA/EPS Account Number on USPS?
If you need to find your EPA/EPS Account Number, follow these steps. If you do not have an EPA/EPS number, please review the next section below.
1. Log into your USPS Business Account.
2. Go to Shipping Services.

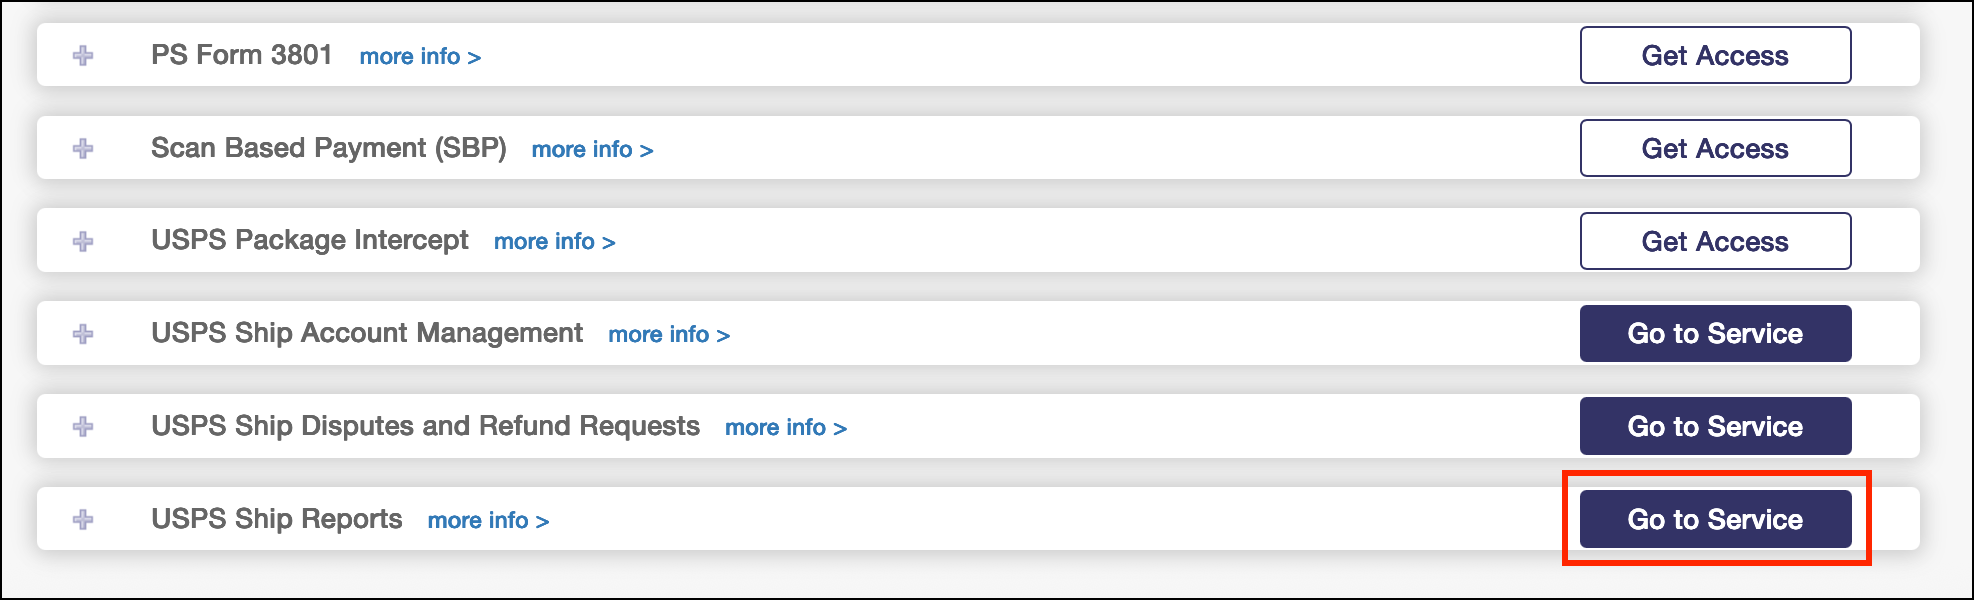
3. Find USPS Ship Account Management and select Go to Service.
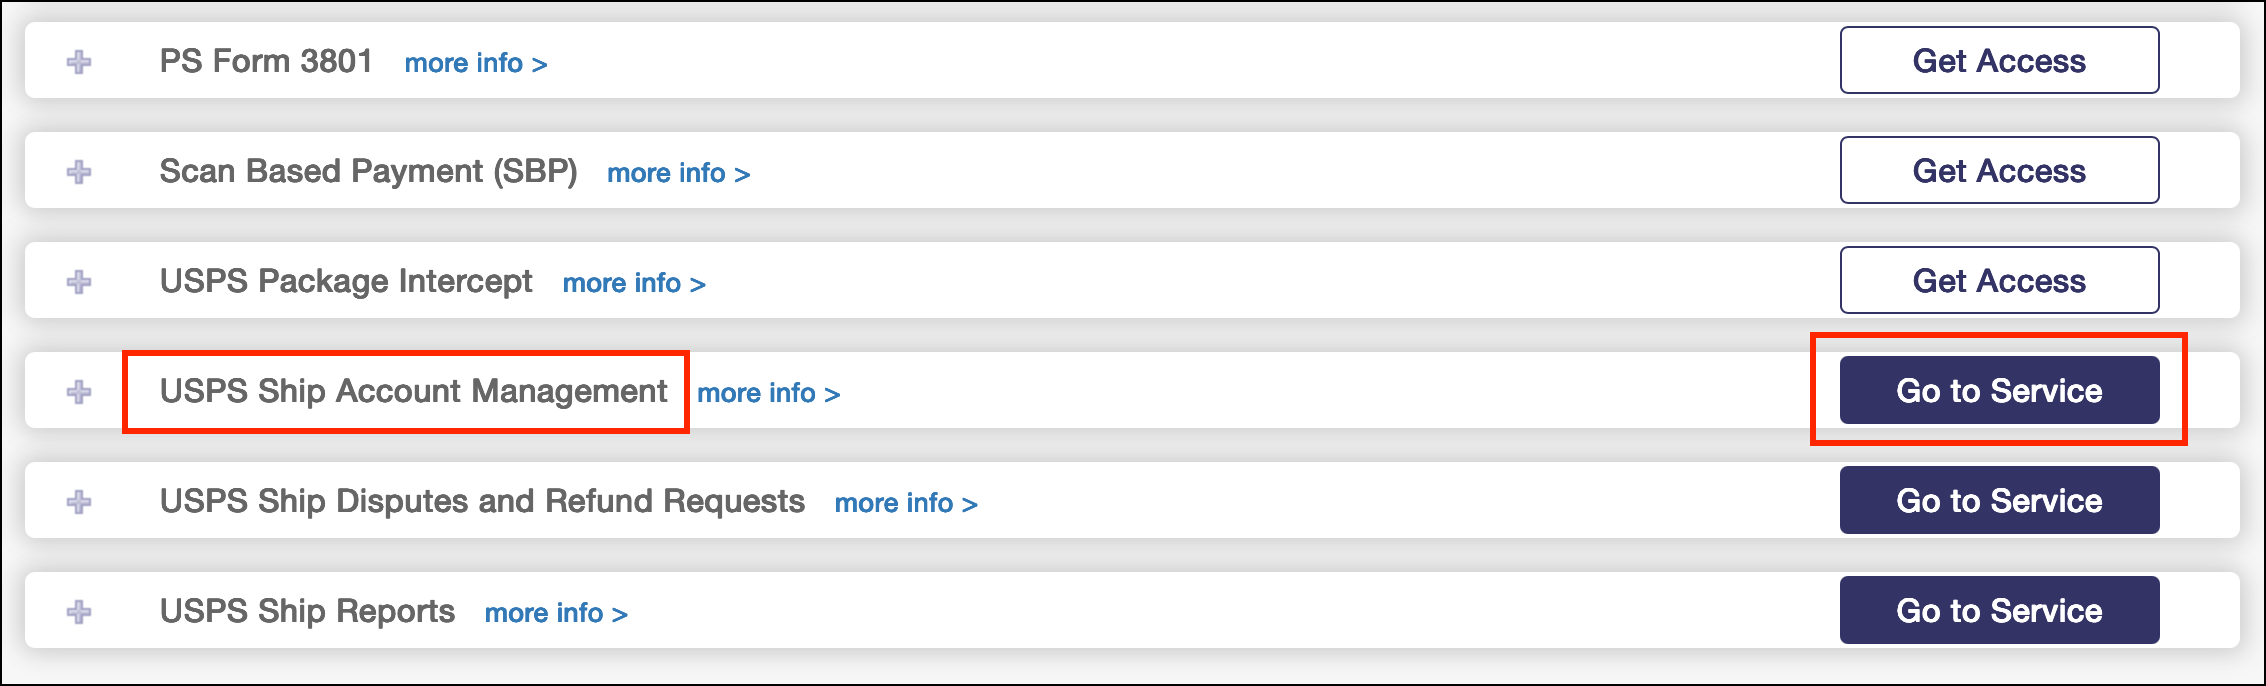
4. The EPA/EPS Account number will be listed.

How do I add a payment method and generate an EPA/EPS number on USPS.com?
If you were not given EPA/EPS account number in your email from USPS, please follow these steps to add a payment method.
1. Log into your USPS Business Gateway account.
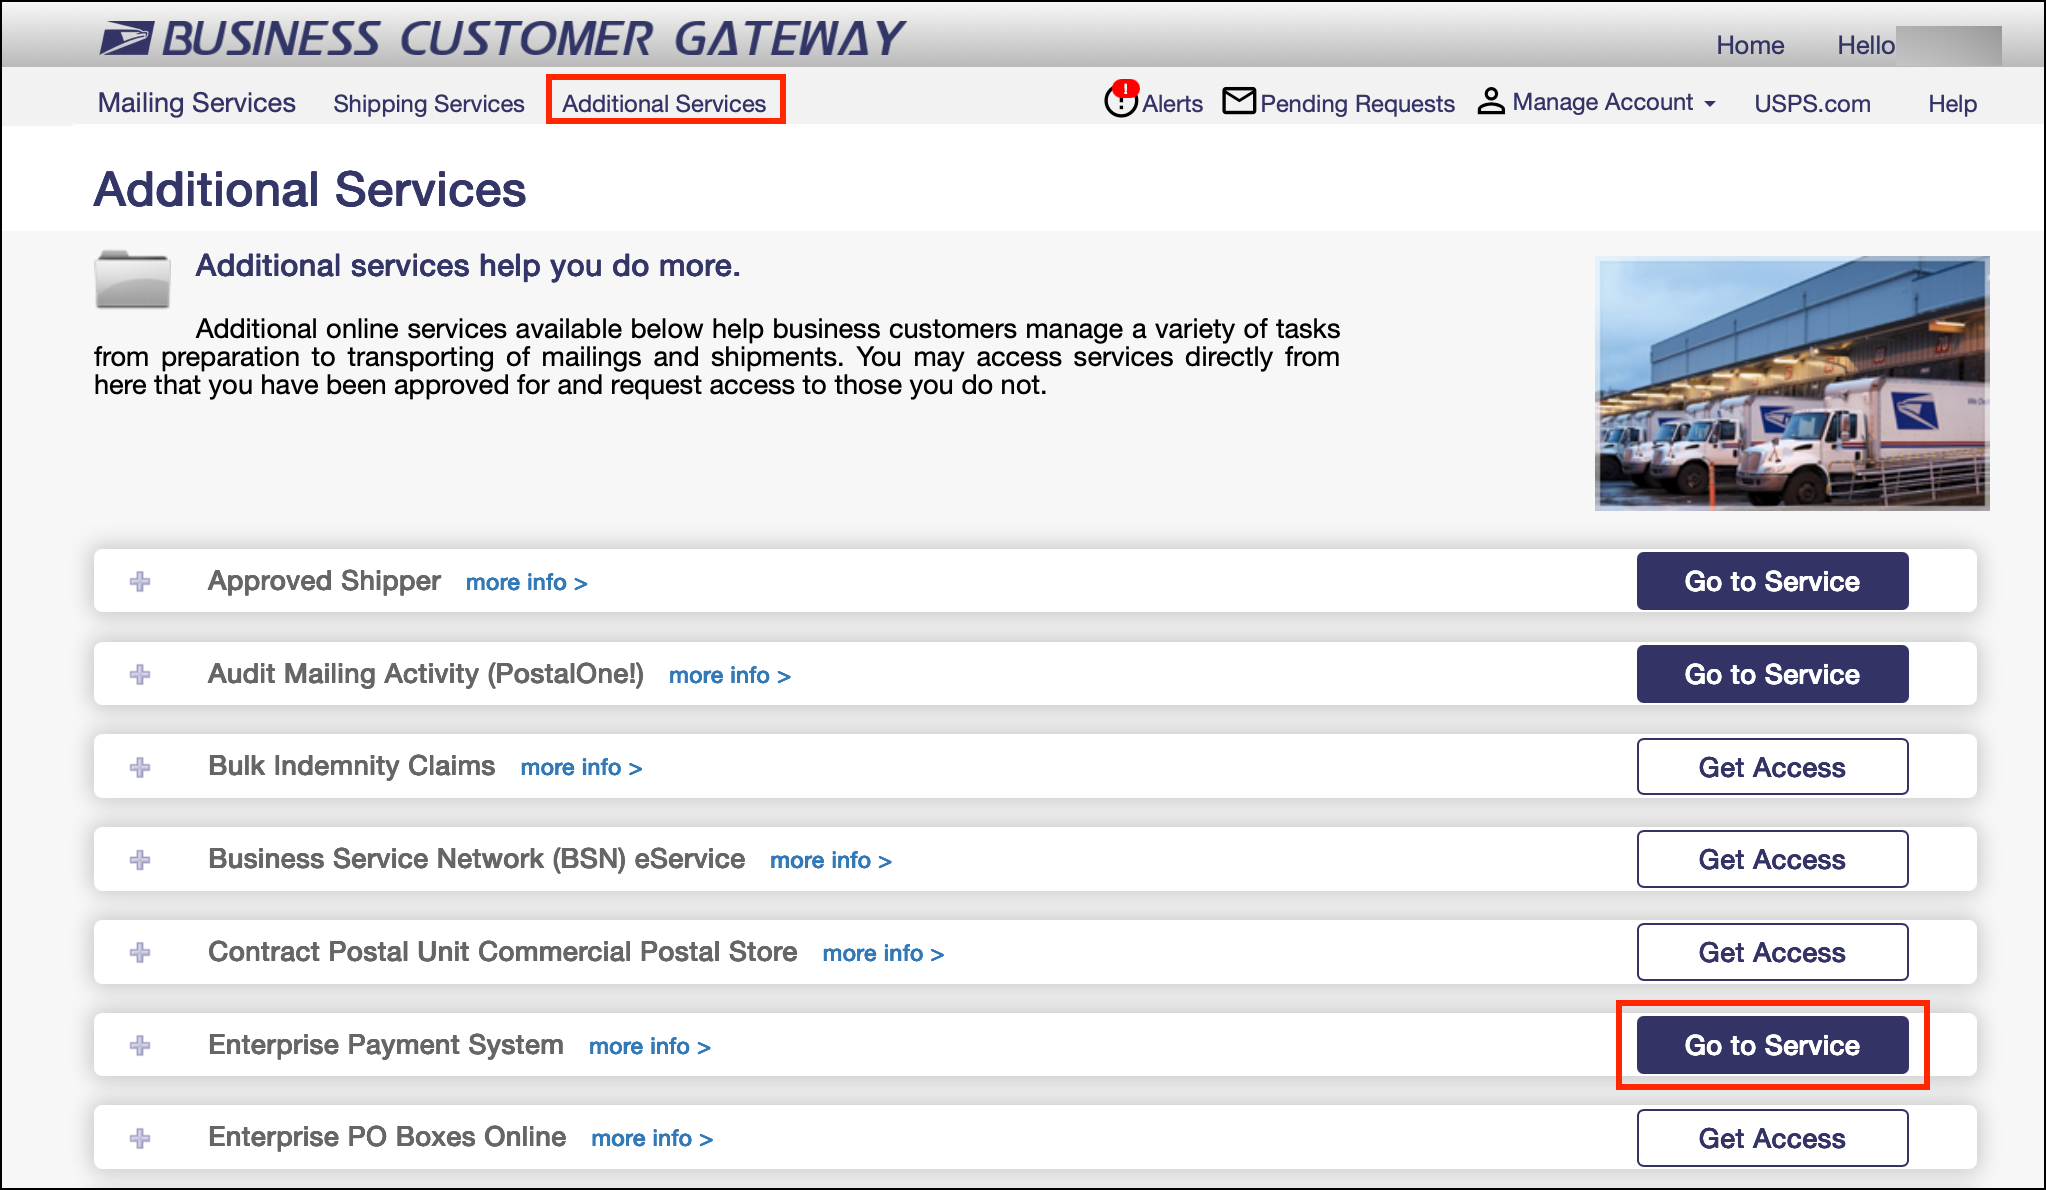
2. Go to Additional Services.
3. Find Enterprise Payment System and select Go To Service.
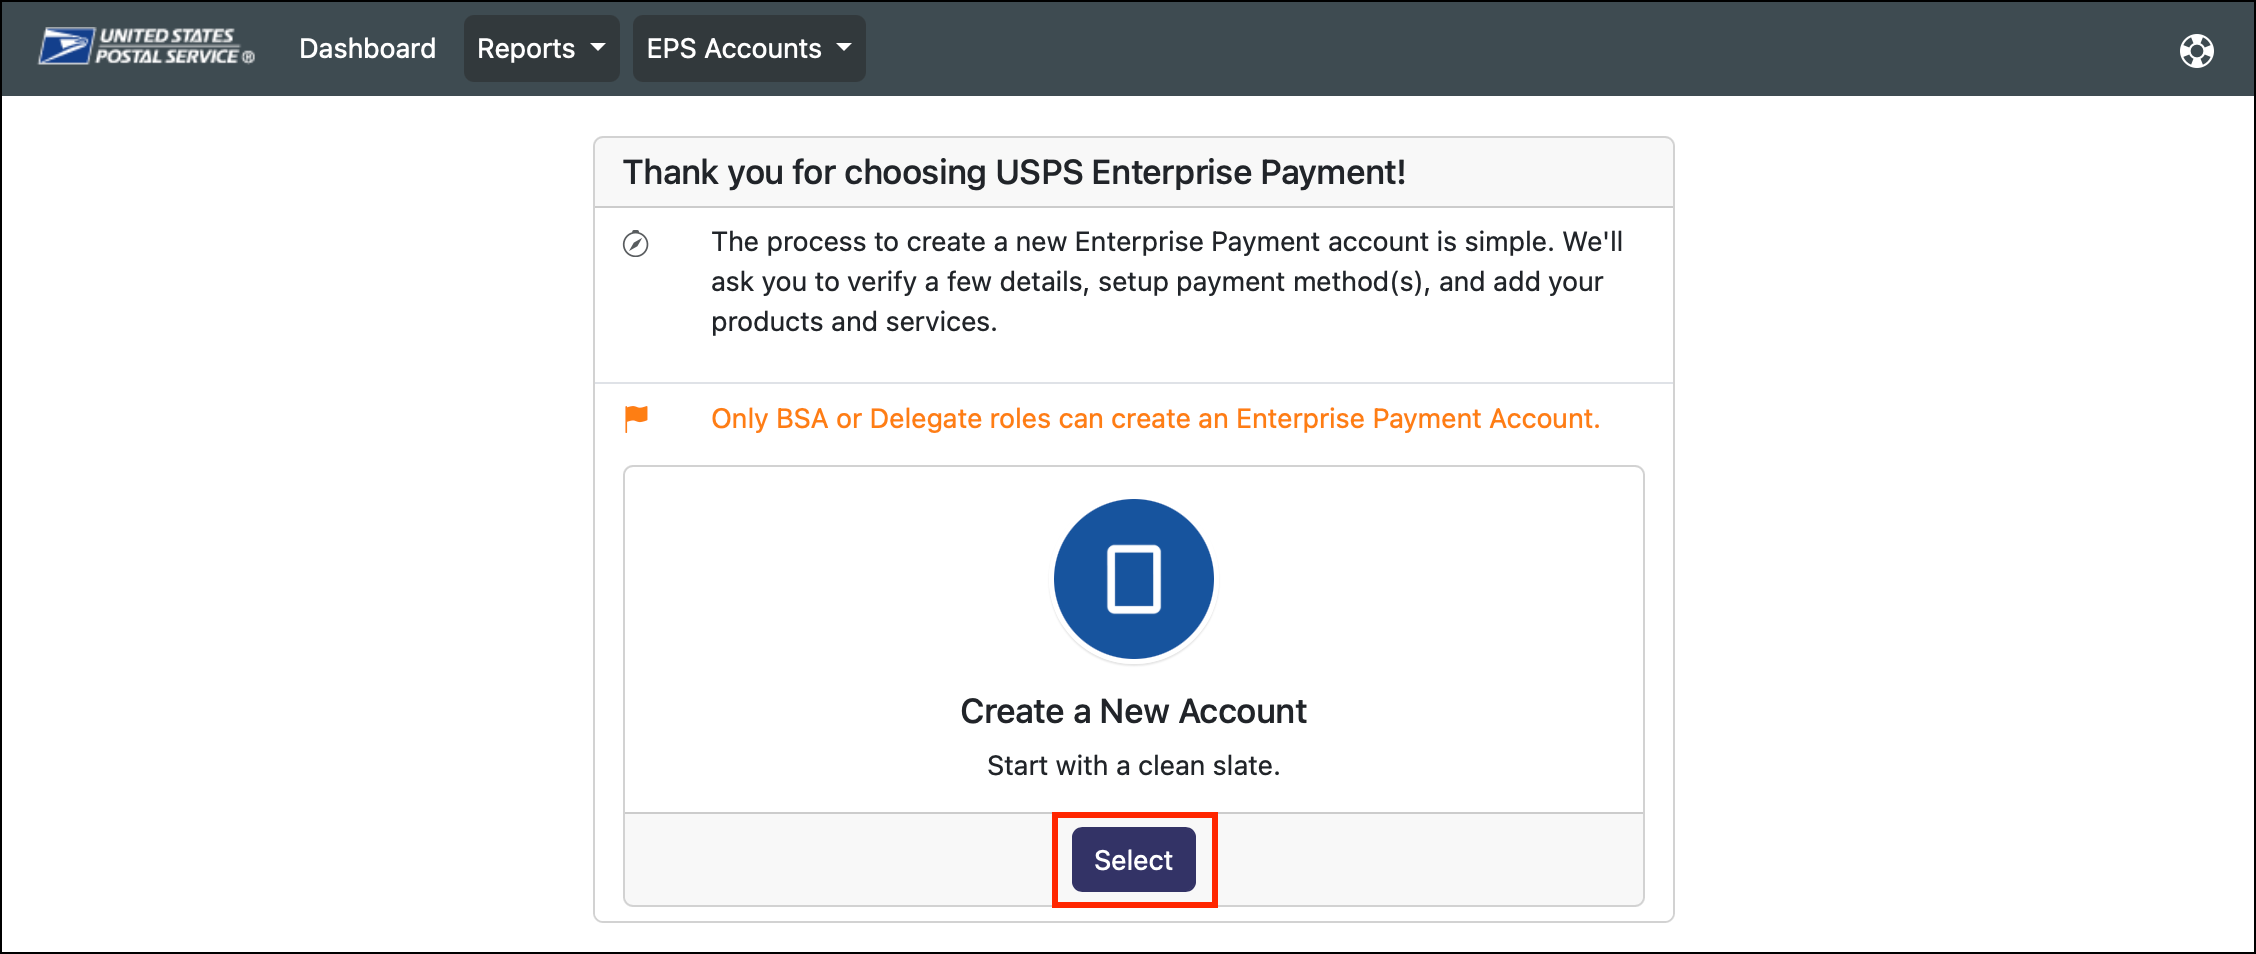
4. Click on the EPS Accounts dropdown and select Create a New EPS Account.

5. Click Select.
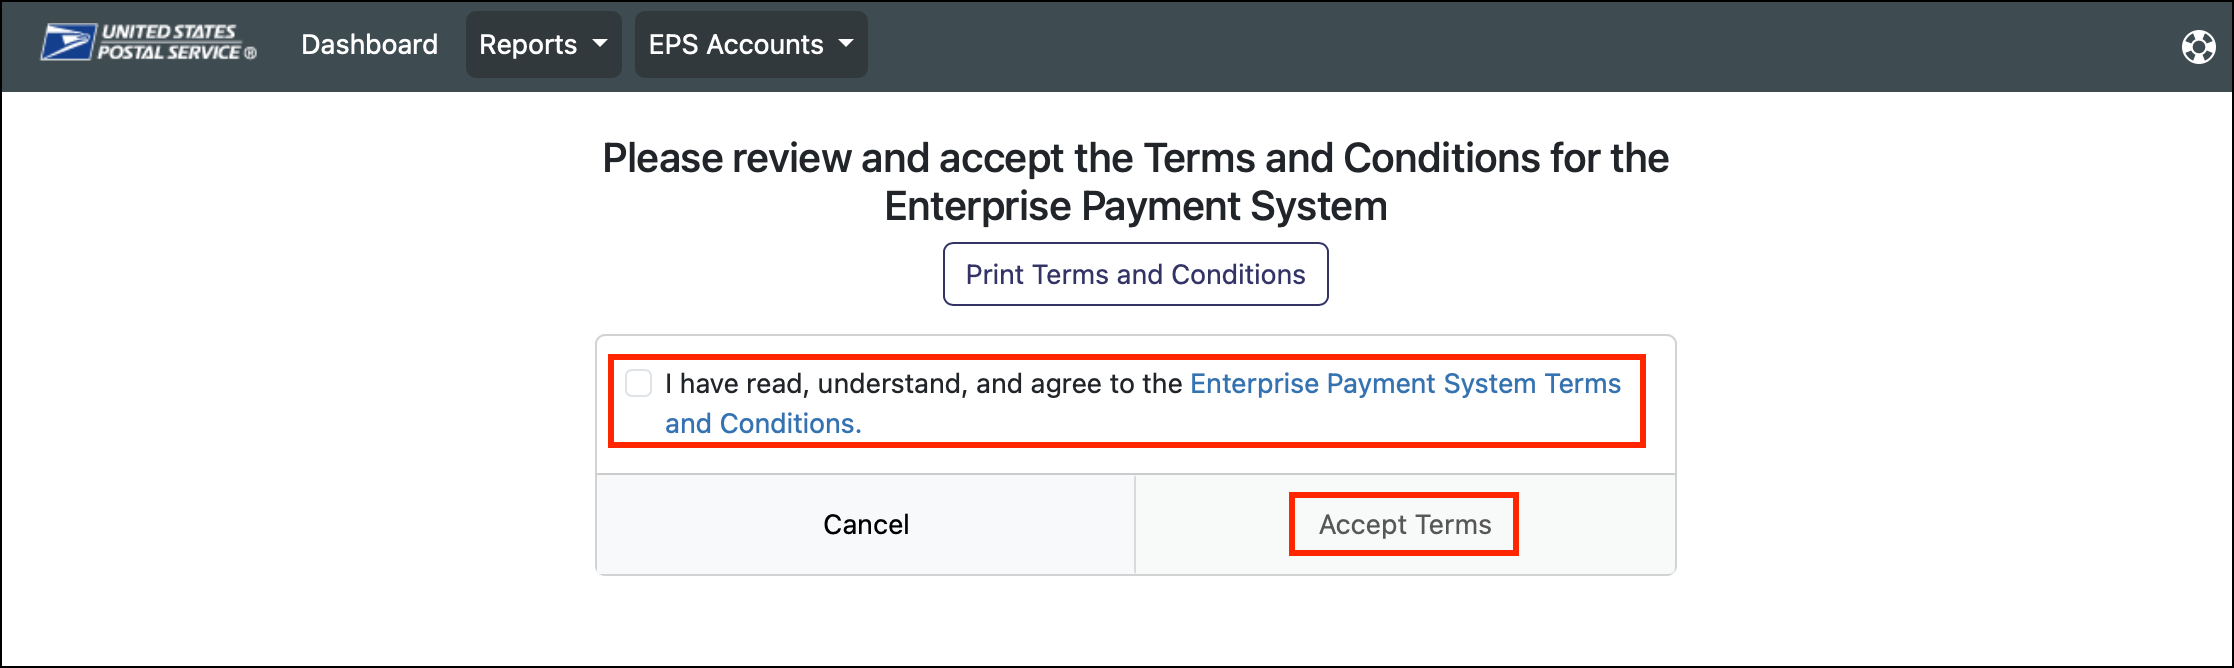
6. Select the checkbox next to I have read, understand, and agree to the Enterprise Payment System Terms and Conditions. Then select Accept Terms.
7. Verify your information and then select Next.

8. Select your business location and then select Next.

9. You do not need to associate a user with your location. This step can be skipped and completed at a later time. Select Next.

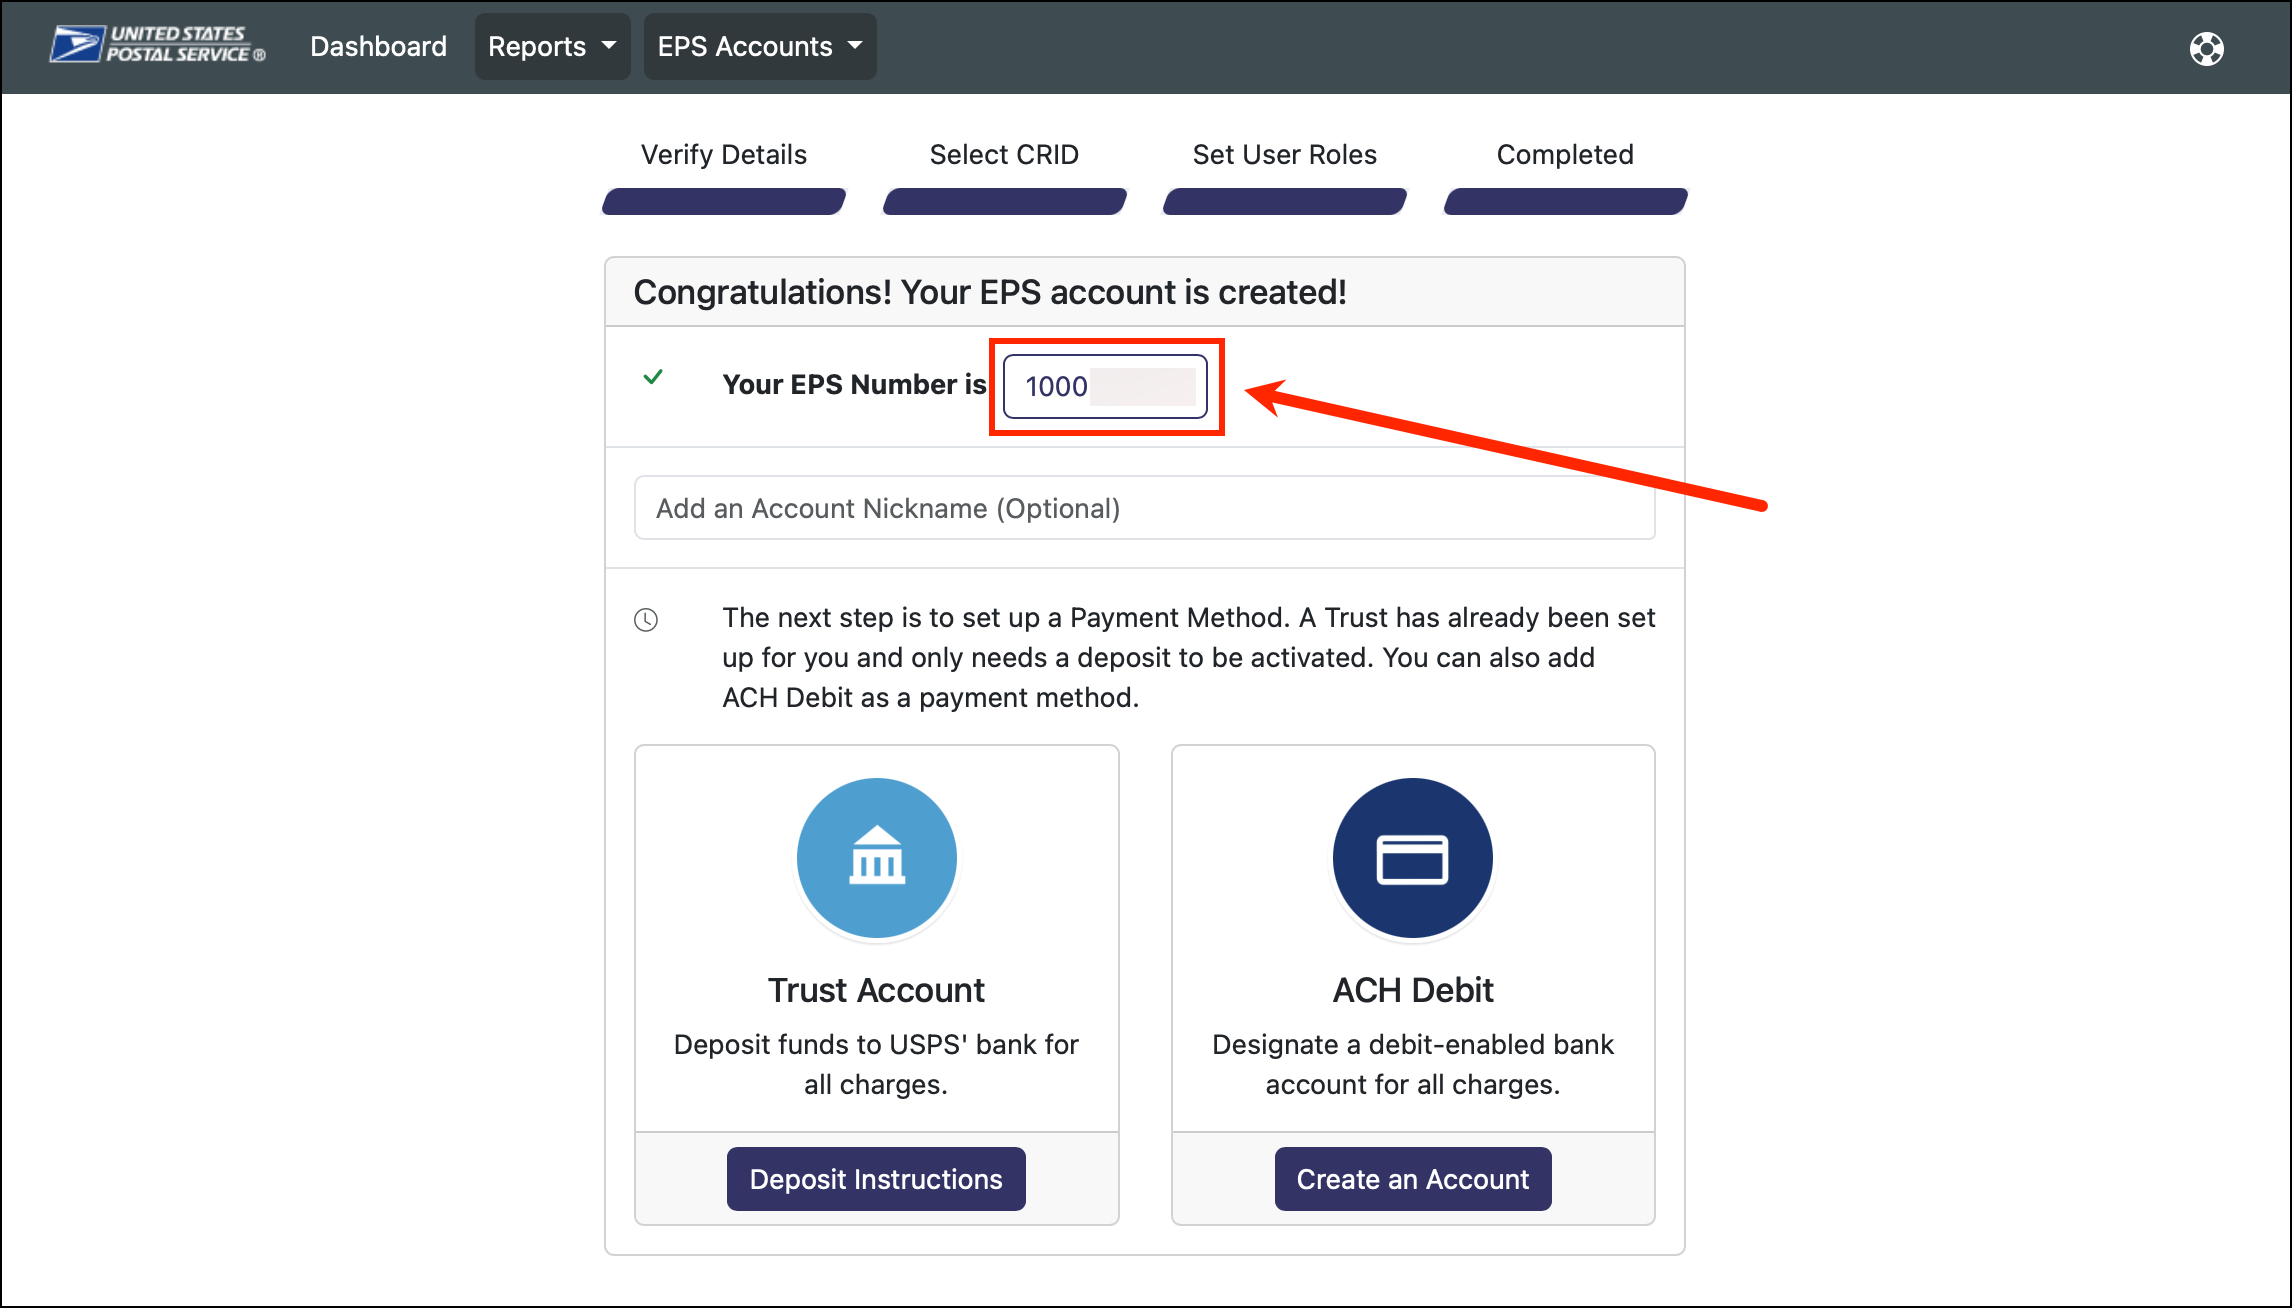
10. Your EPS Number will show on the screen. Write this number down so you can enter it into your USPS Ship carrier in Ordoro. Click on this number.
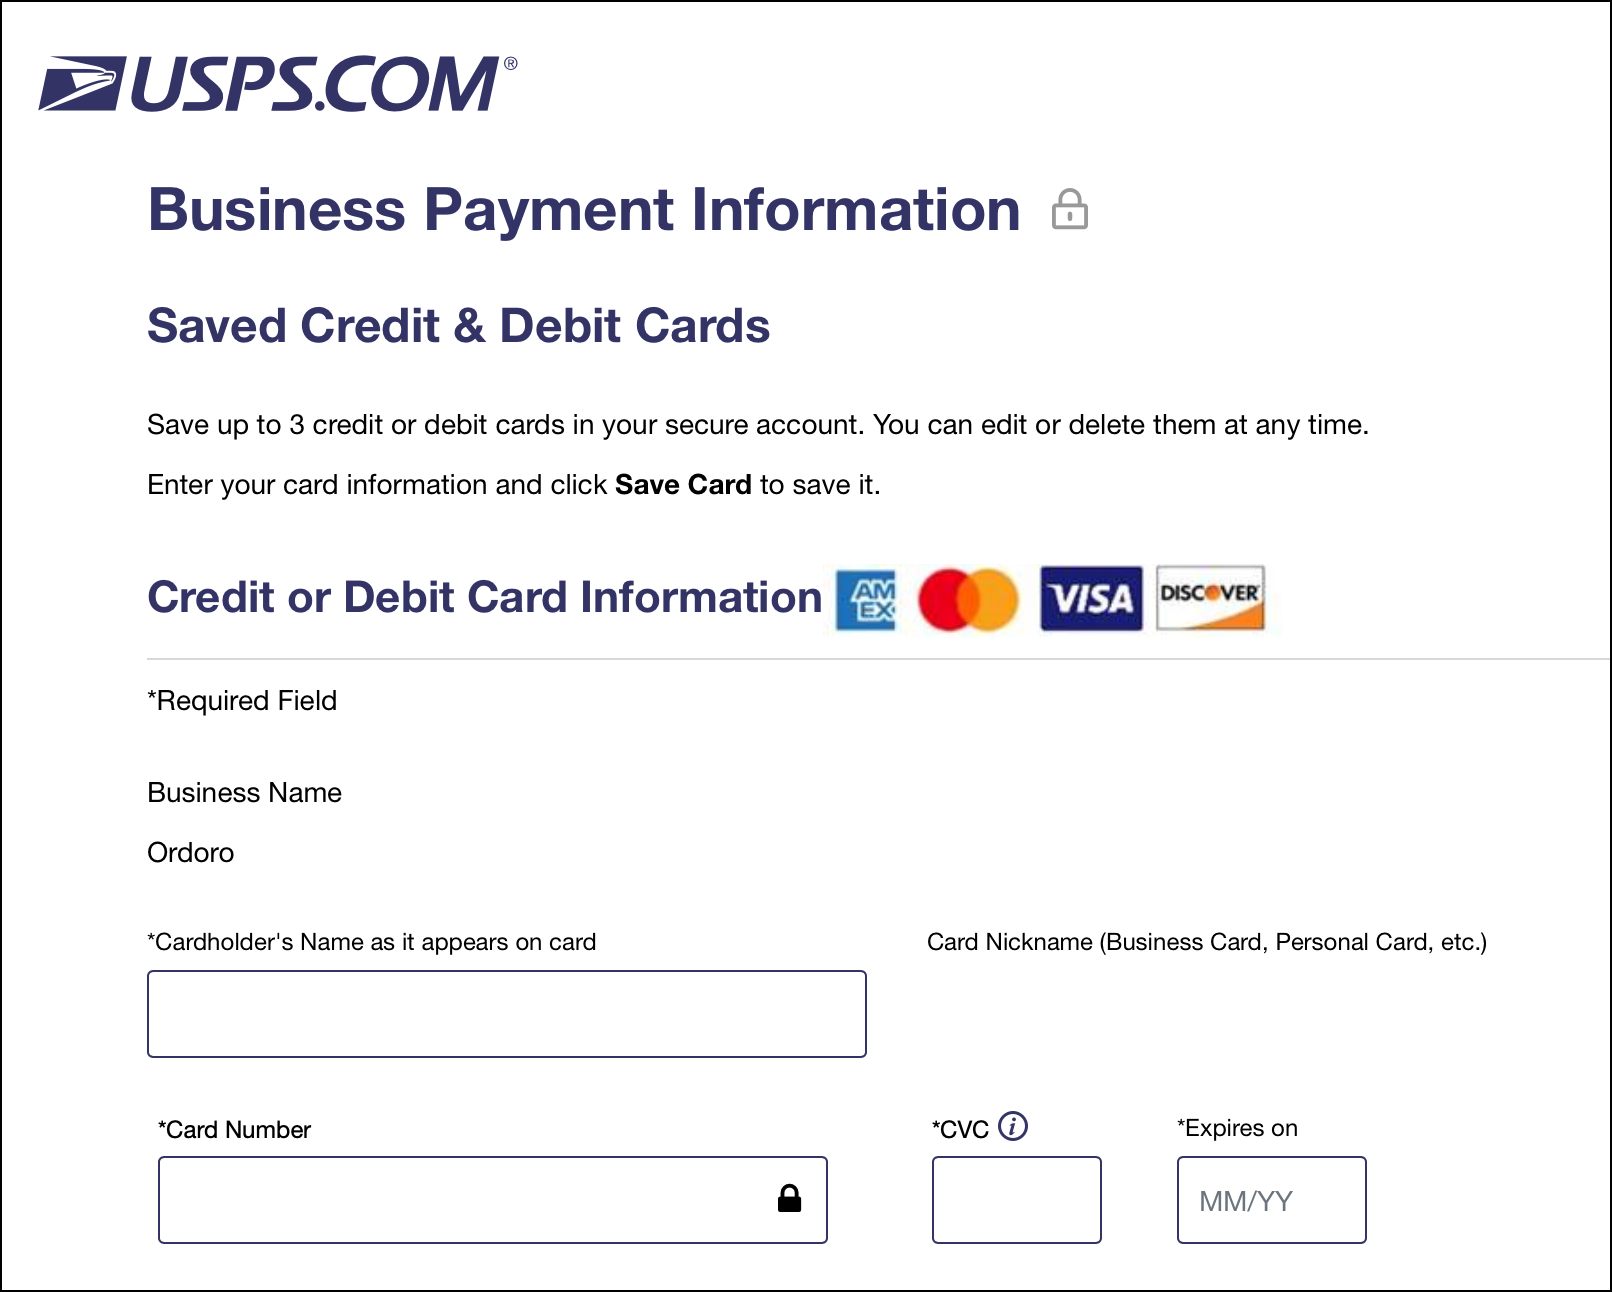
11. Under Add Payment Method dropdown, select (0 of 5) Credit Cards Used. This will allow you to add a credit card.

12. You’ll be directed to save your credit card information.
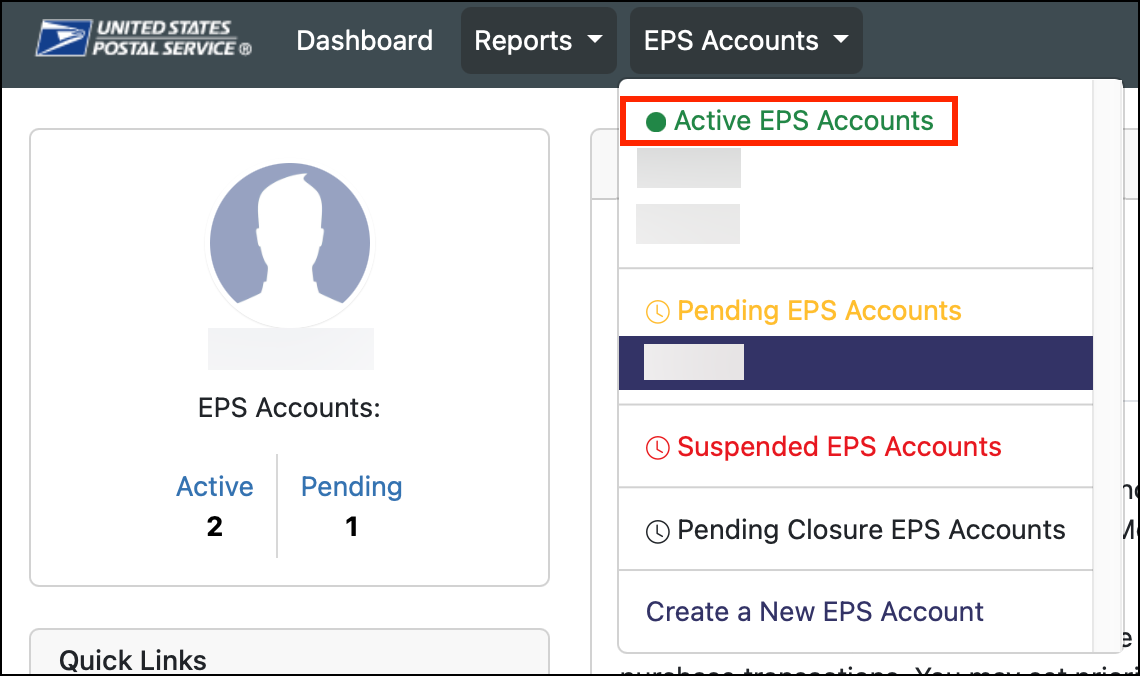
13. When you return to the EPS Accounts dropdown, your EPS number should be listed under Active EPS Accounts in green.
When you are charged for shipping labels
USPS Ship labels are not charged at the time of creation. Instead, charges are processed after the labels are manifested, either by you or automatically by USPS.
Here’s how the timing works:
| Label Status | When It’s Charged | Details |
|---|---|---|
| ✅ Manifested before 6:00pm EST | Same day (between 5:00pm – 7:00pm CST) | You’ll see these charges in the Transaction Details Report the same day. |
| ❌ Not manifested, but SCAN form submitted | Same day (between 5:00pm – 7:00pm CST) | Submitting an End of Day SCAN form before 5:00pm CST also counts as manifesting. |
| ❌ Not manifested or SCAN form submitted | Next day (between 5:00pm – 7:00pm CST) | USPS auto-manifests the label at midnight CST and charges it the next day. |
Example:
- If you create labels on Monday at 3:00pm CST and manifest them by 4:45pm CST, they’ll be charged Monday evening.
- If you forget to manifest them, USPS will auto-process them at midnight CST, and the charges will appear Tuesday evening.
How to manage your USPS Business Account
Once connected, manage your account directly through the USPS Business Customer Gateway.
- Log in using your USPS Business credentials.
- From your dashboard, you can:
- Manage your payment settings and saved cards.
- View transaction and shipping history.
- Change your multi-factor authentication (MFA) settings.
How can I find my CRID and MIDs?
To view your CRID and MIDs:
- Log in to the USPS Business Customer Gateway.
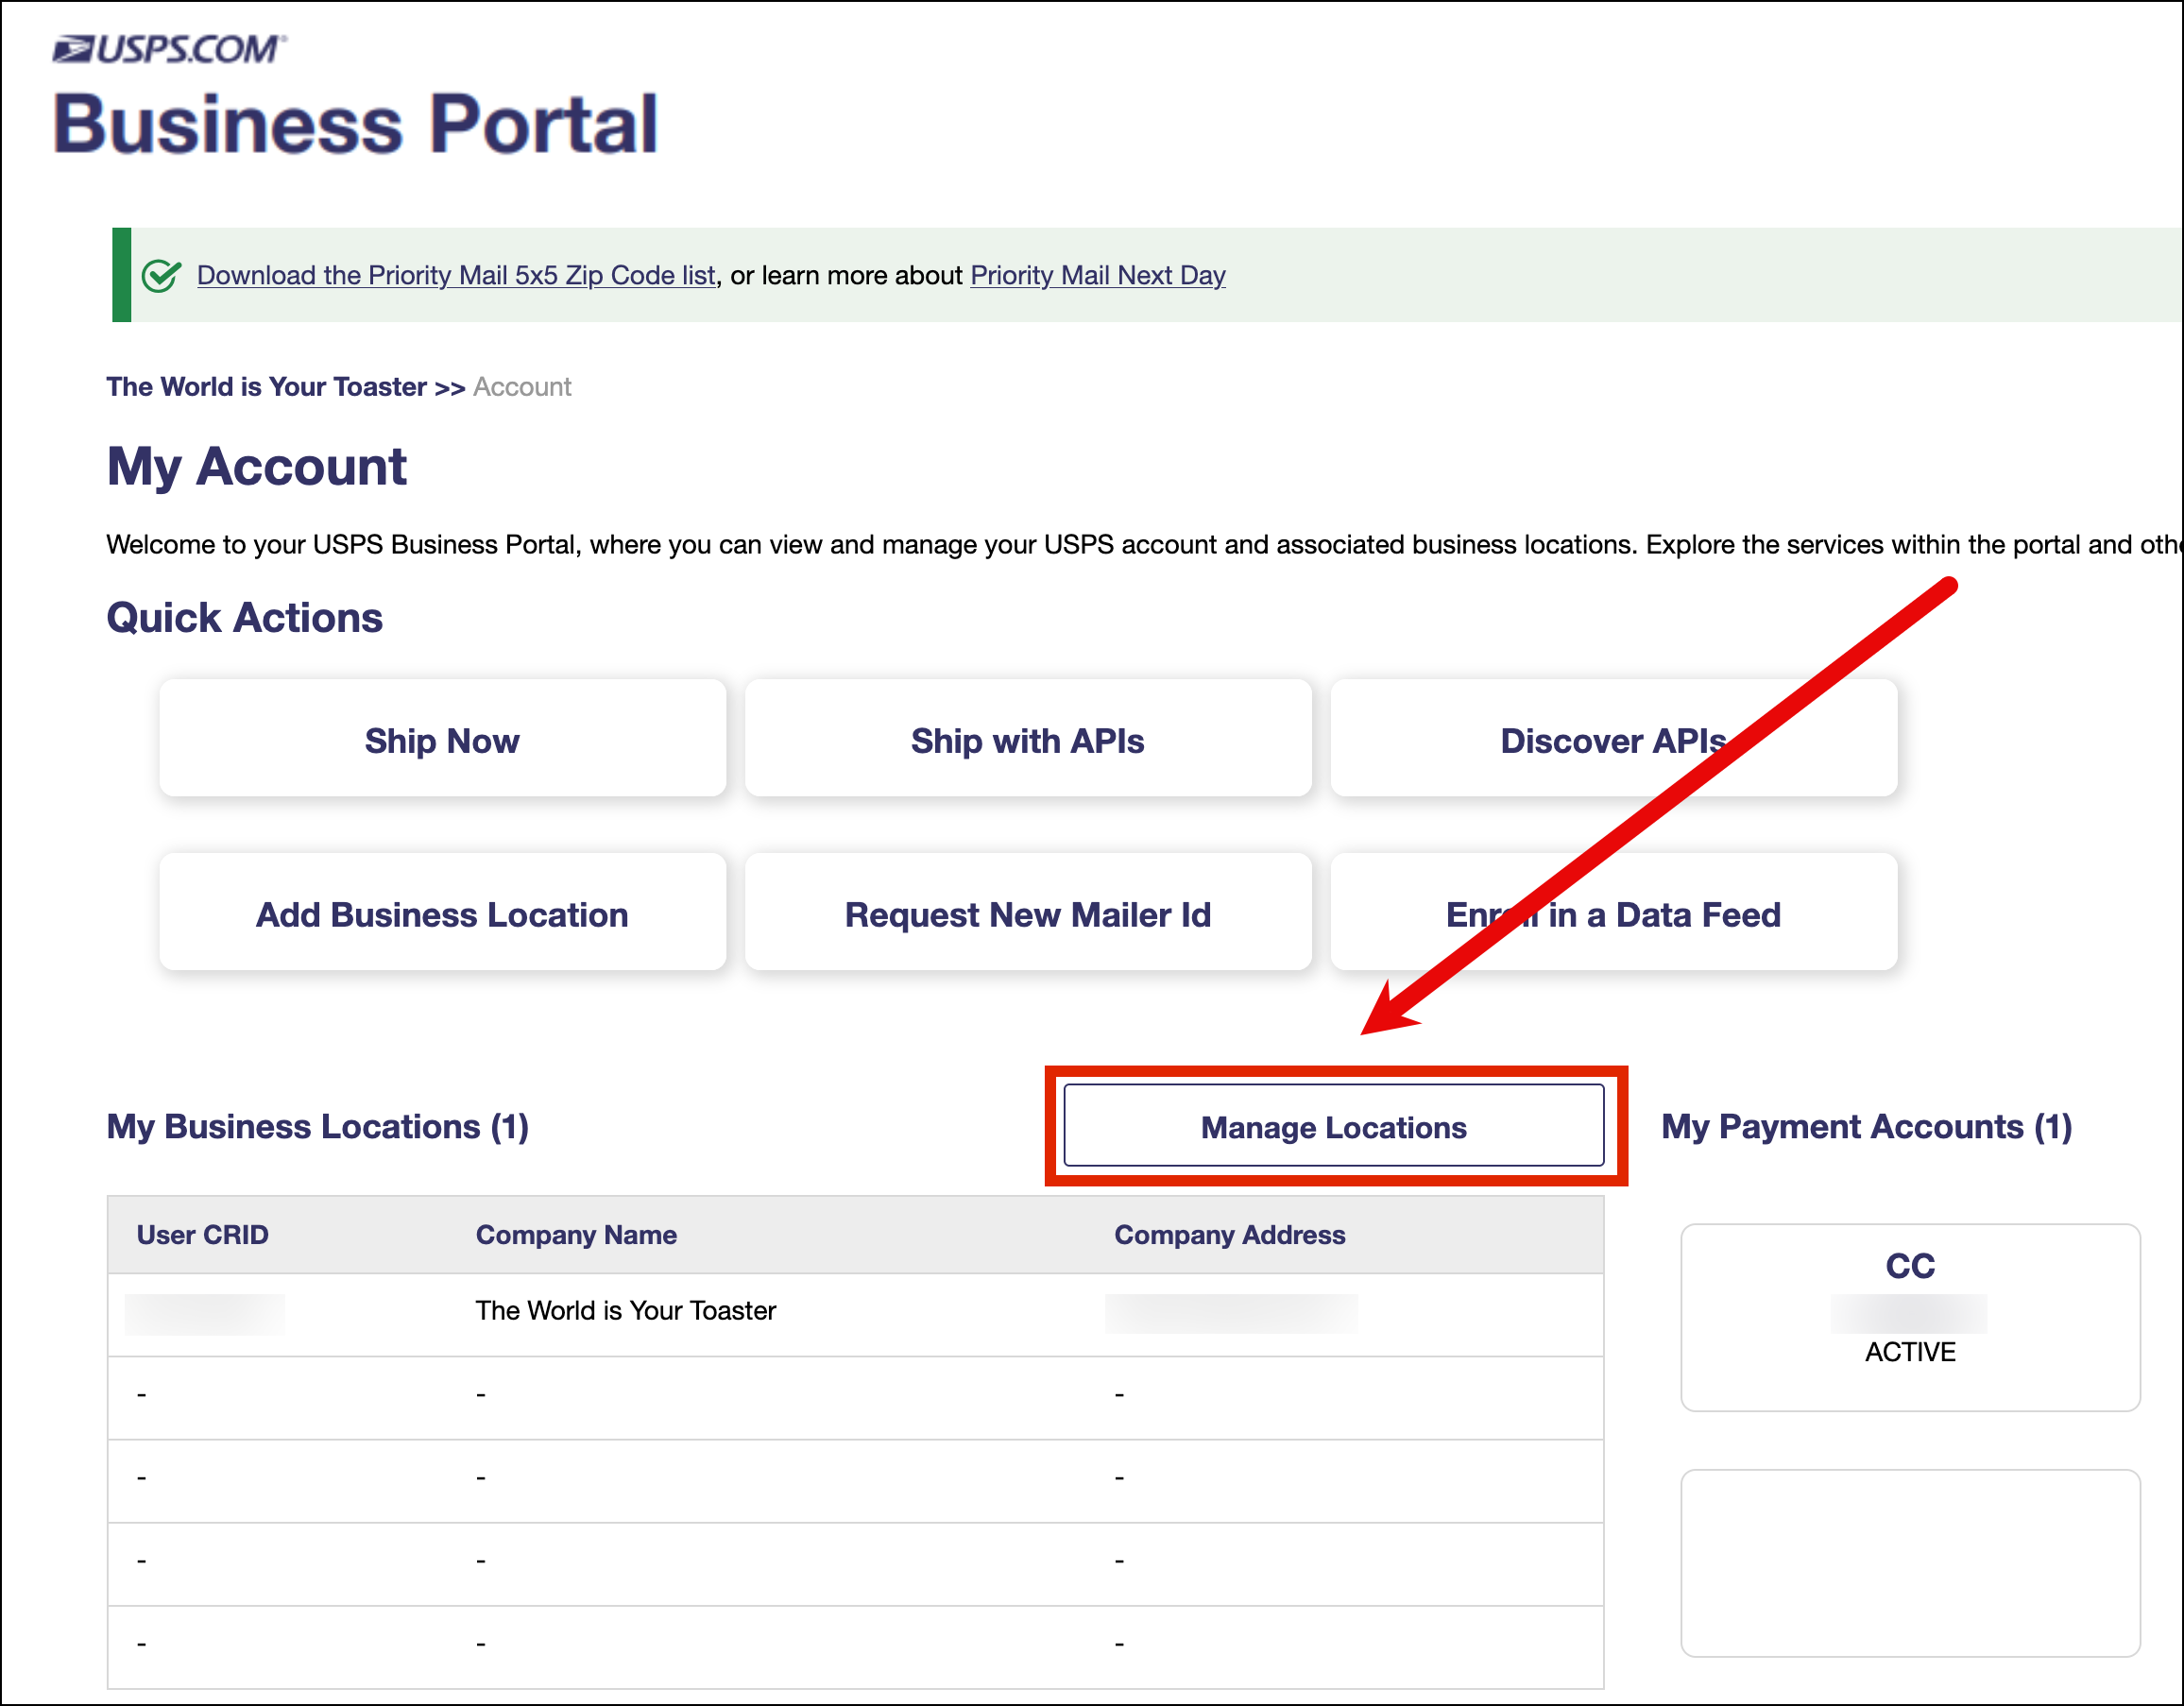
- Follow this link to go to the USPS Business Portal.
- Click Manage Locations.
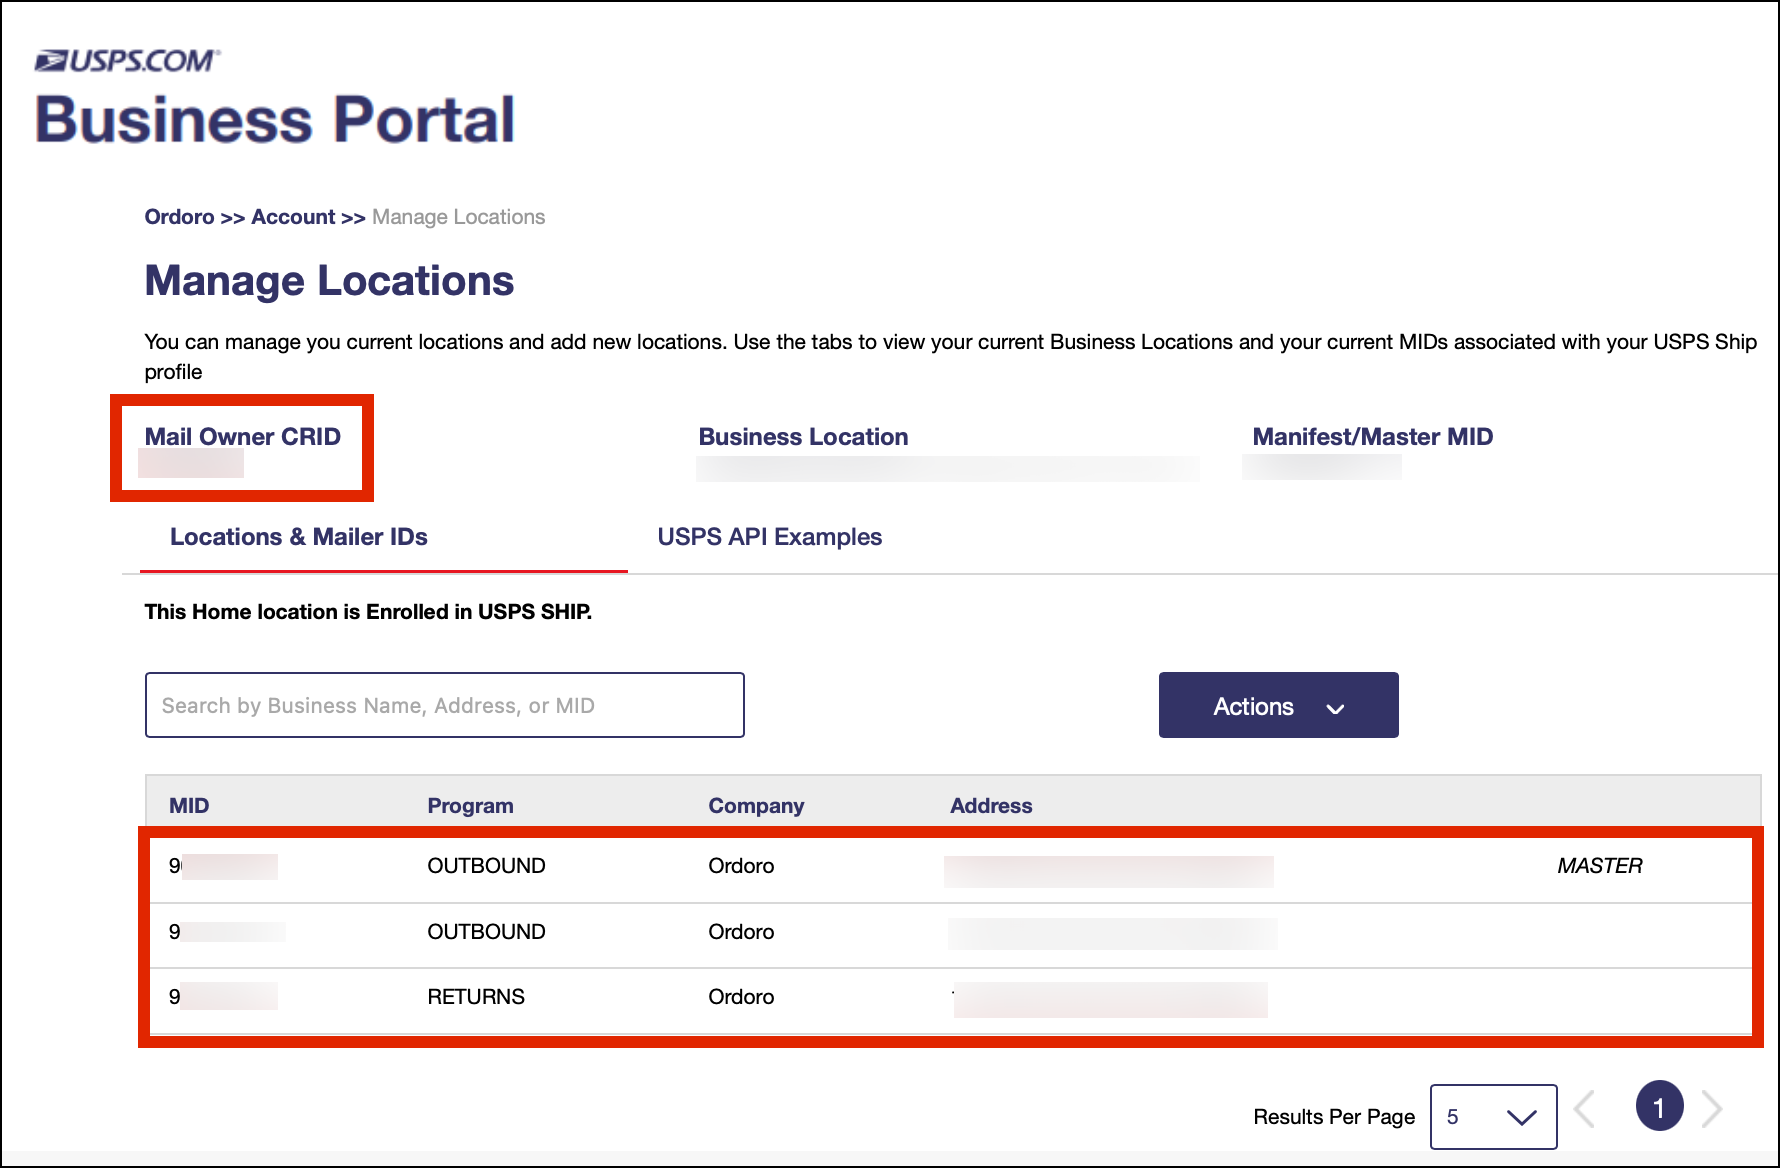
- On this page, you will find the following account numbers:
- Mail Owner CRID
- Master MID
- Outbound MID
- Return MID
Manage your Payment Methods
To view or update your saved payment methods:
- Log in to the USPS Business Customer Gateway.
- Click Enterprise Payment System in the Account Overview section.
- Click EPS Accounts.
- Select your account number.
- Click Manage Account.
- From here, you can:
- Add new cards or bank accounts.
- Remove outdated methods.
- Set a default payment method.
Reminder: USPS handles all billing directly. Ordoro does not store or manage USPS payment info.
View transaction and shipping history
- Log in to the USPS Business Customer Gateway.
- In the top-left corner, click Shipping Services.
- Find USPS Ship Reports and click Go to Service.
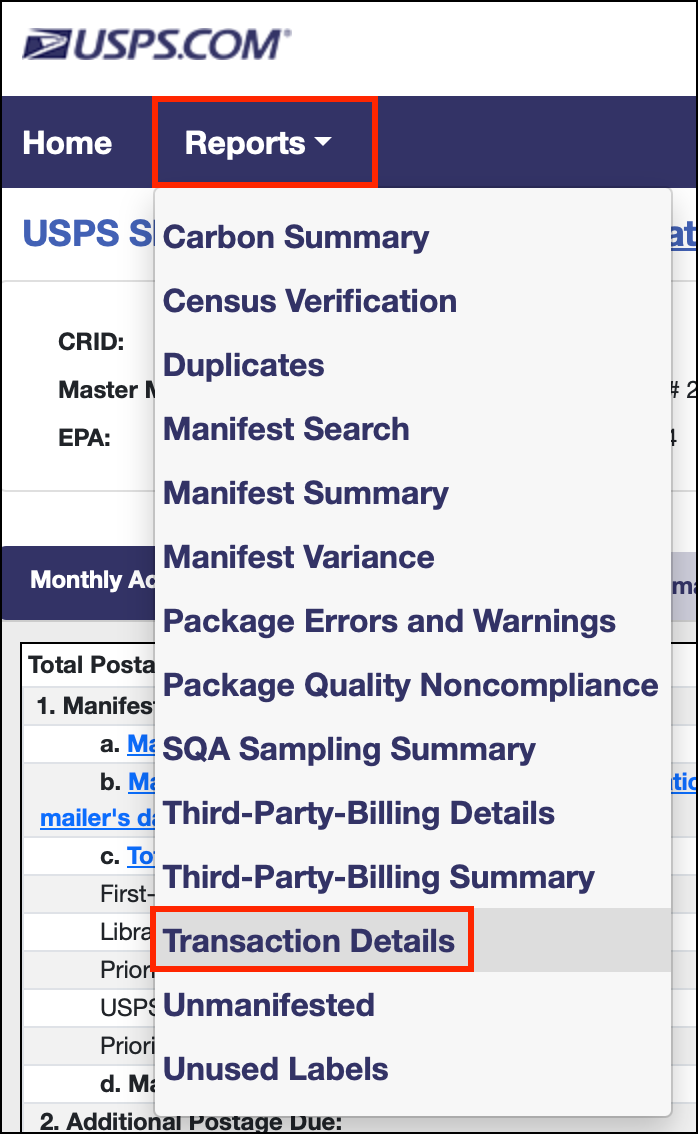
- Select Reports -> Transaction Details.
- Download the report as a CSV or Excel file, if needed. The file can be found by clicking the download arrow.

Adjust your multi-factor authentication (MFA) settings
- Log in to the USPS Business Customer Gateway.
- Go to Manage Profile.
- Click Edit by the User.

- Under MFA Status, click Change Multi-Factor Authentication.

- Choose to enable MFA for your email and/or mobile phone.

How does shipping internationally work with my USPS Business account?
Once your account is created, it can take one to four business days for USPS to upload international rates into your USPS Business account. If you have questions, please contact Ordoro Support at support@ordoro.com.