When you apply a shipping preset, Ordoro can handle it in one of two ways:
- Additive: Keeps what’s already selected and adds the preset on top.
- Override: Clears what’s already selected and replaces it with the preset selections.
This is helpful when you want to either compare multiple options side by side or enforce a specific carrier/package type every time.
Topics
Quick explanation
Additive
- Adds to what’s already selected.
- Choose Additive when you want to keep flexibility when comparing rates.
- Common use cases:
- You want to compare multiple carriers (USPS, UPS, and FedEx).
- You want to add one option without removing others.
- You compare rates as a “shopping” step before you buy the label.
- Example:
- USPS is selected.
- You apply a FedEx preset set to additive.
- Now both USPS and FedEx are selected, so you can compare rates.
Override
- Replaces what’s already selected.
- Choose Override when you want the preset to act like a rule: “This is what we ship with.”
- Common use cases:
- Your warehouse always uses a specific carrier or packaging type.
- You want to prevent staff from accidentally choosing the wrong box type.
- You want the preset to reset the selection back to your standard method.
- Example:
- USPS Flat Rate Box is selected.
- You apply a FedEx Medium Box preset set to override.
- Now only FedEx remains.
Things to know
- This works whether you apply a preset manually or through automation rules.
- All existing presets stay additive unless you edit them and enable override.
- Override can apply to one or both of these:
- Shipping carrier
- Package type
Tip: If you only override the carrier but not the package type (or vice versa), you can end up with a mixed selection. If you want the preset to fully “reset” the selection, enable override for both.
How to set this up
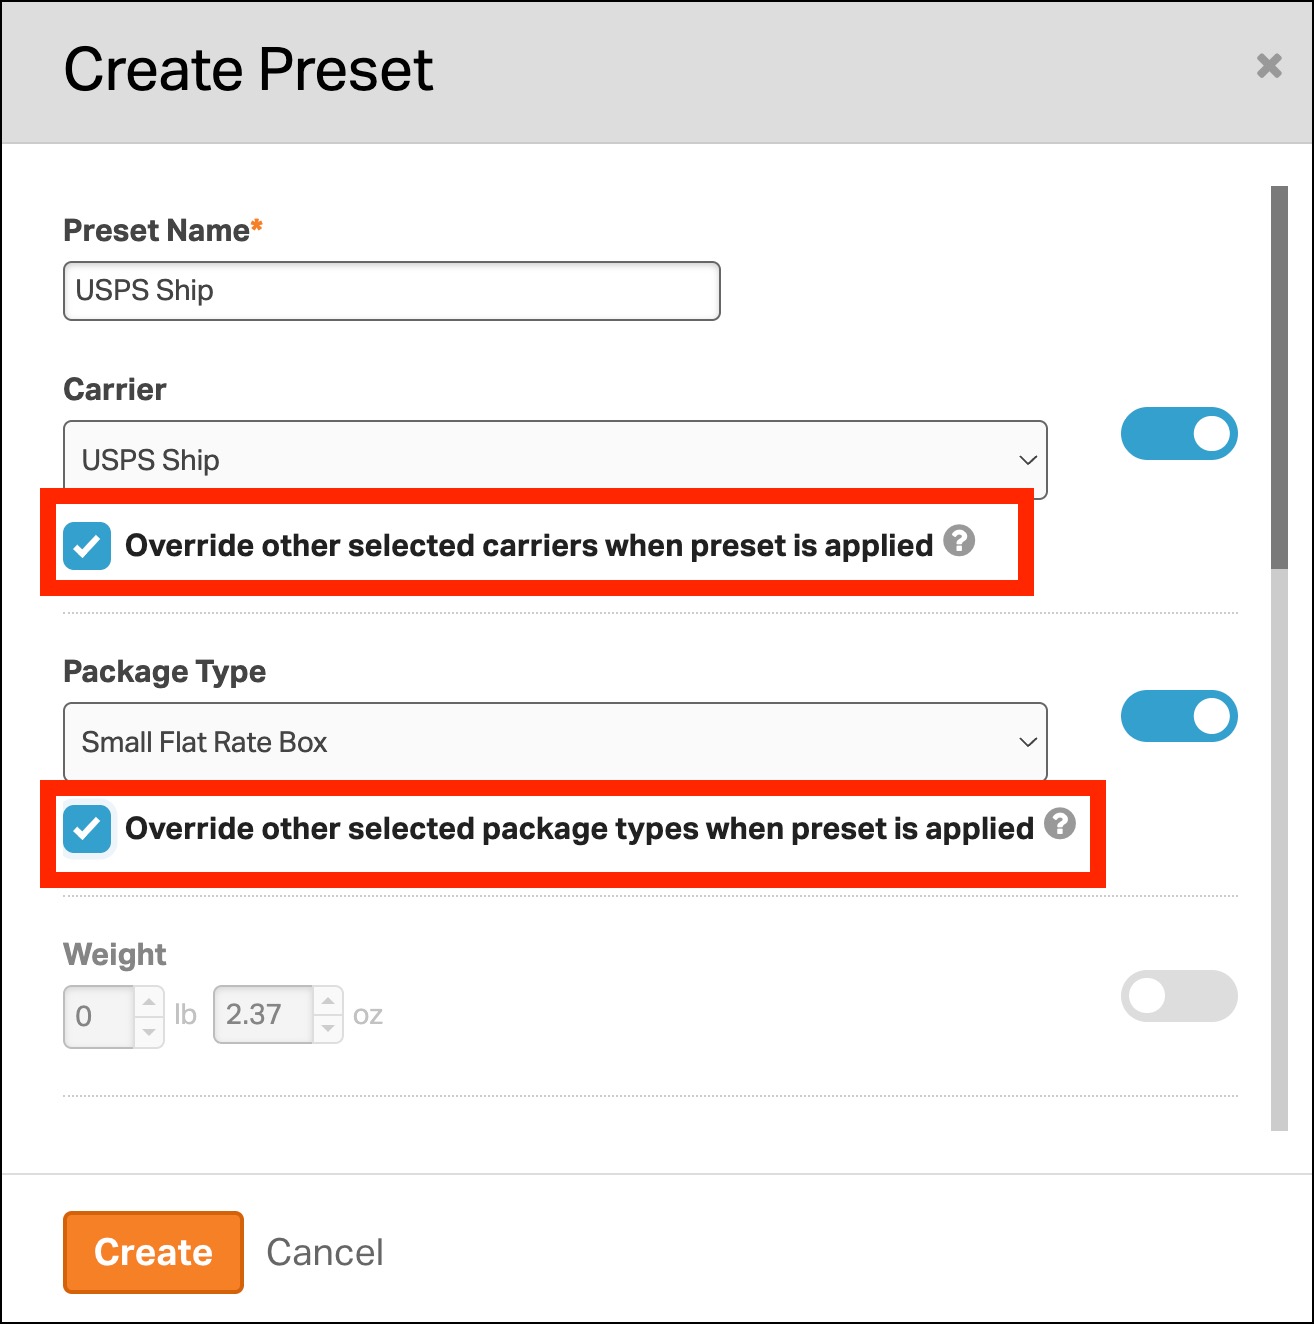
- Create a new preset or edit an existing one.
- In the Preset modal, choose whether to override:
- Override other selected carriers when preset is applied
- Override other selected package types when preset is applied
- Save your changes.
If you don’t check these boxes, the preset runs in additive mode by default.
Real world examples
Example 1: Override to enforce a standard workflow
Scenario:
- Your warehouse only ships in FedEx Large Boxes.
Preset settings:
- Carrier: FedEx (Override enabled).
- Package Type: FedEx Large Box (Override enabled).
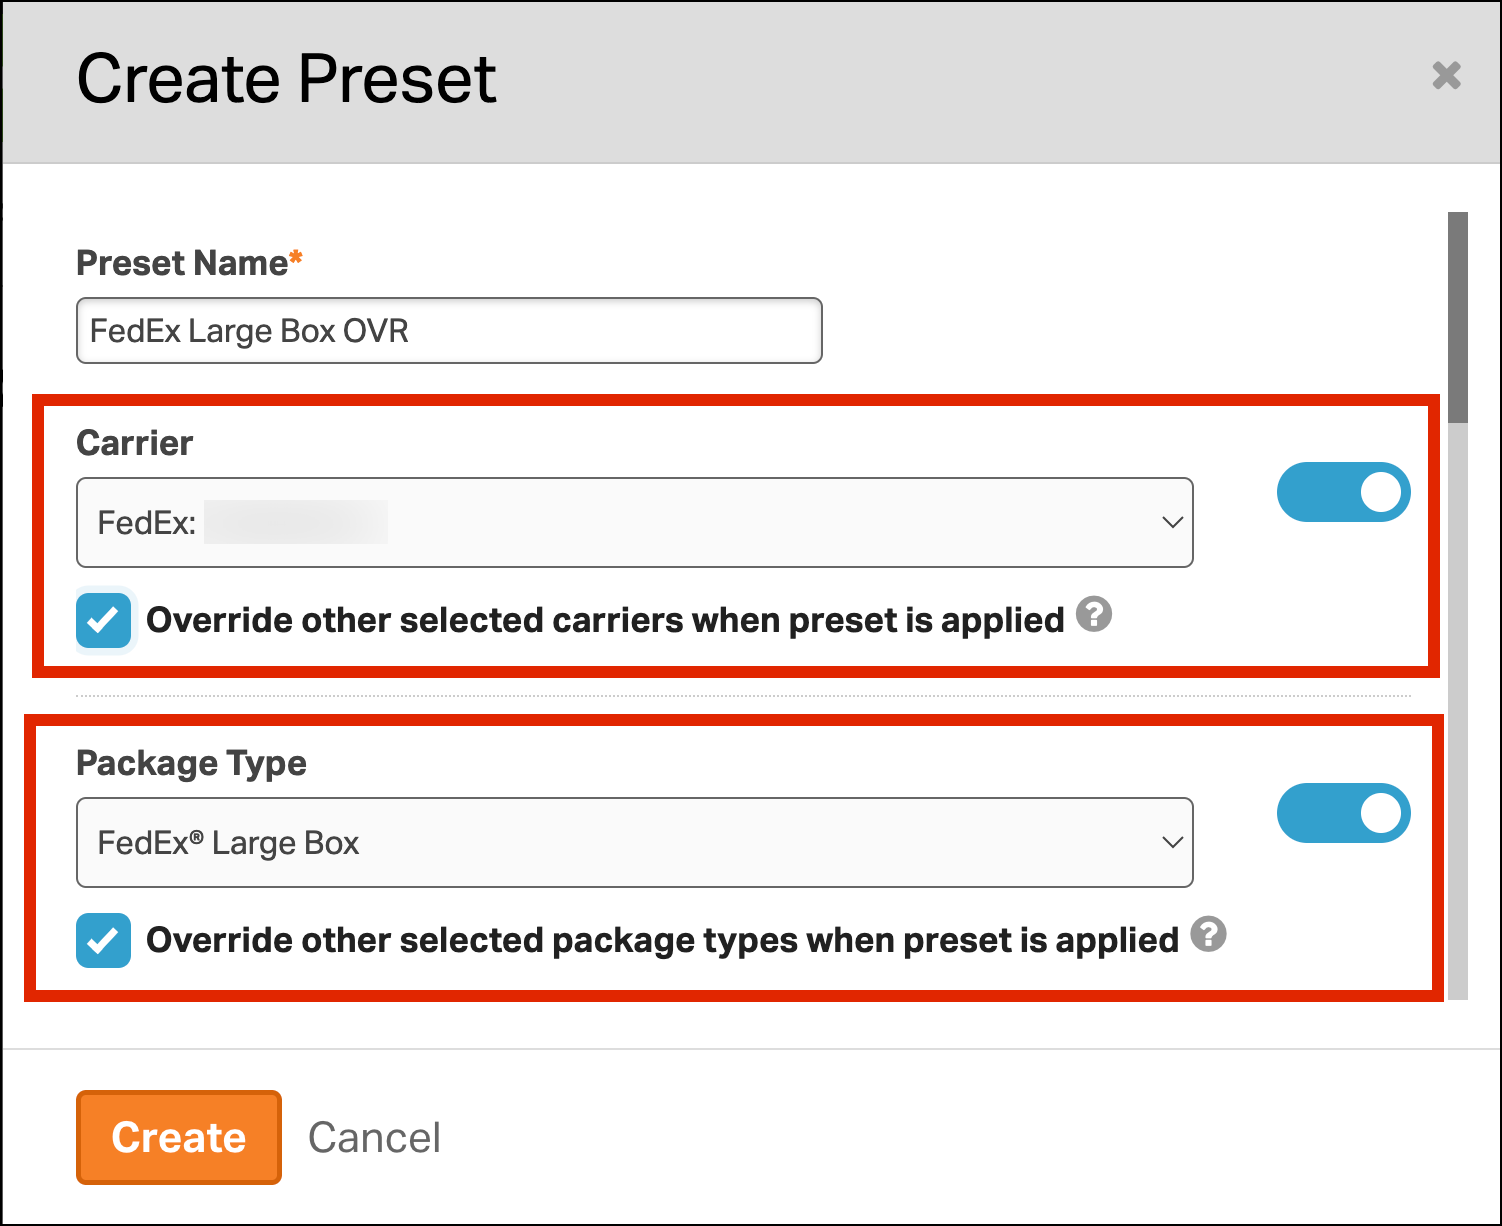
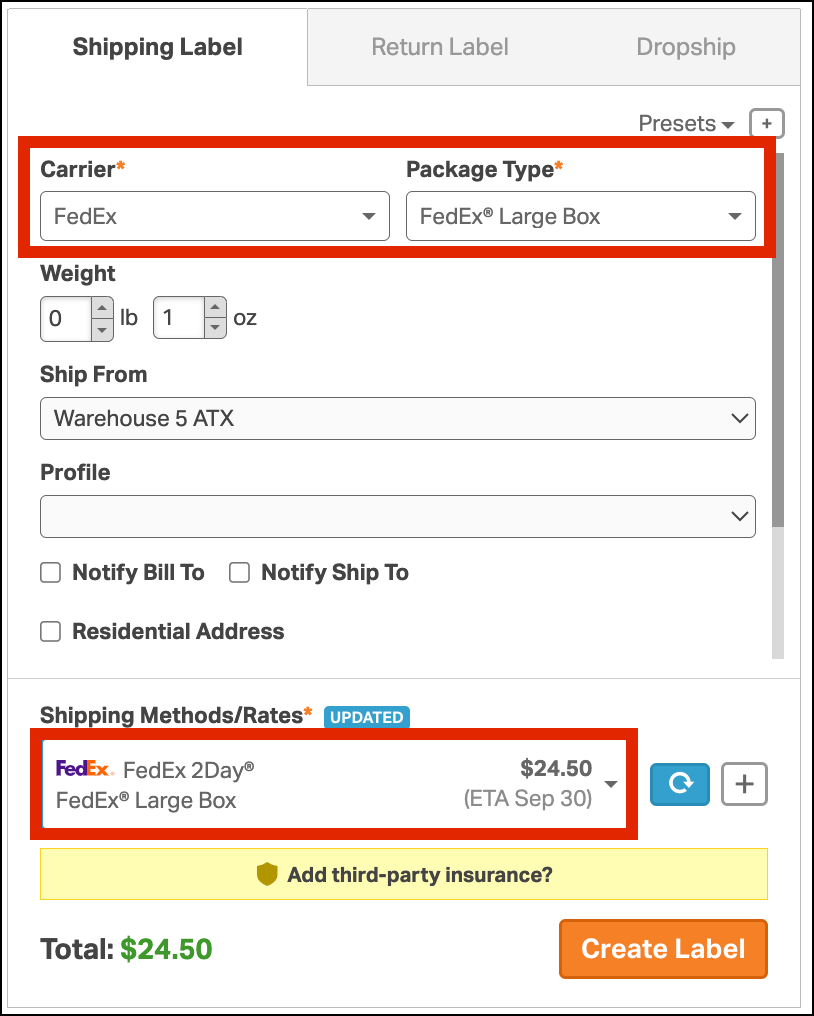
Result:
- When applied, the preset clears other carriers/package types so staff only see the correct option.
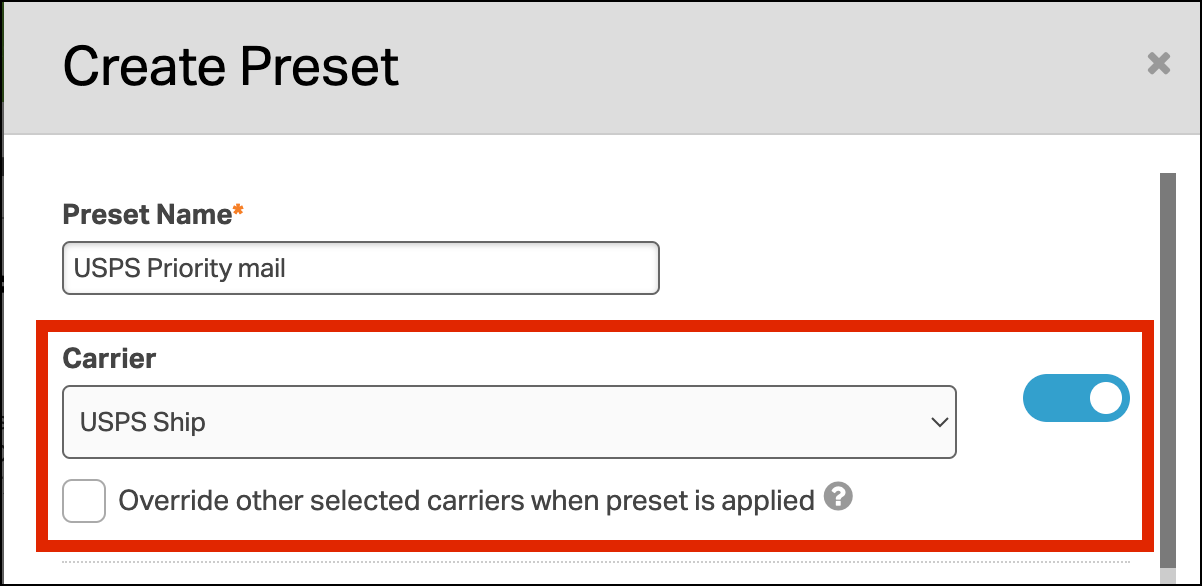
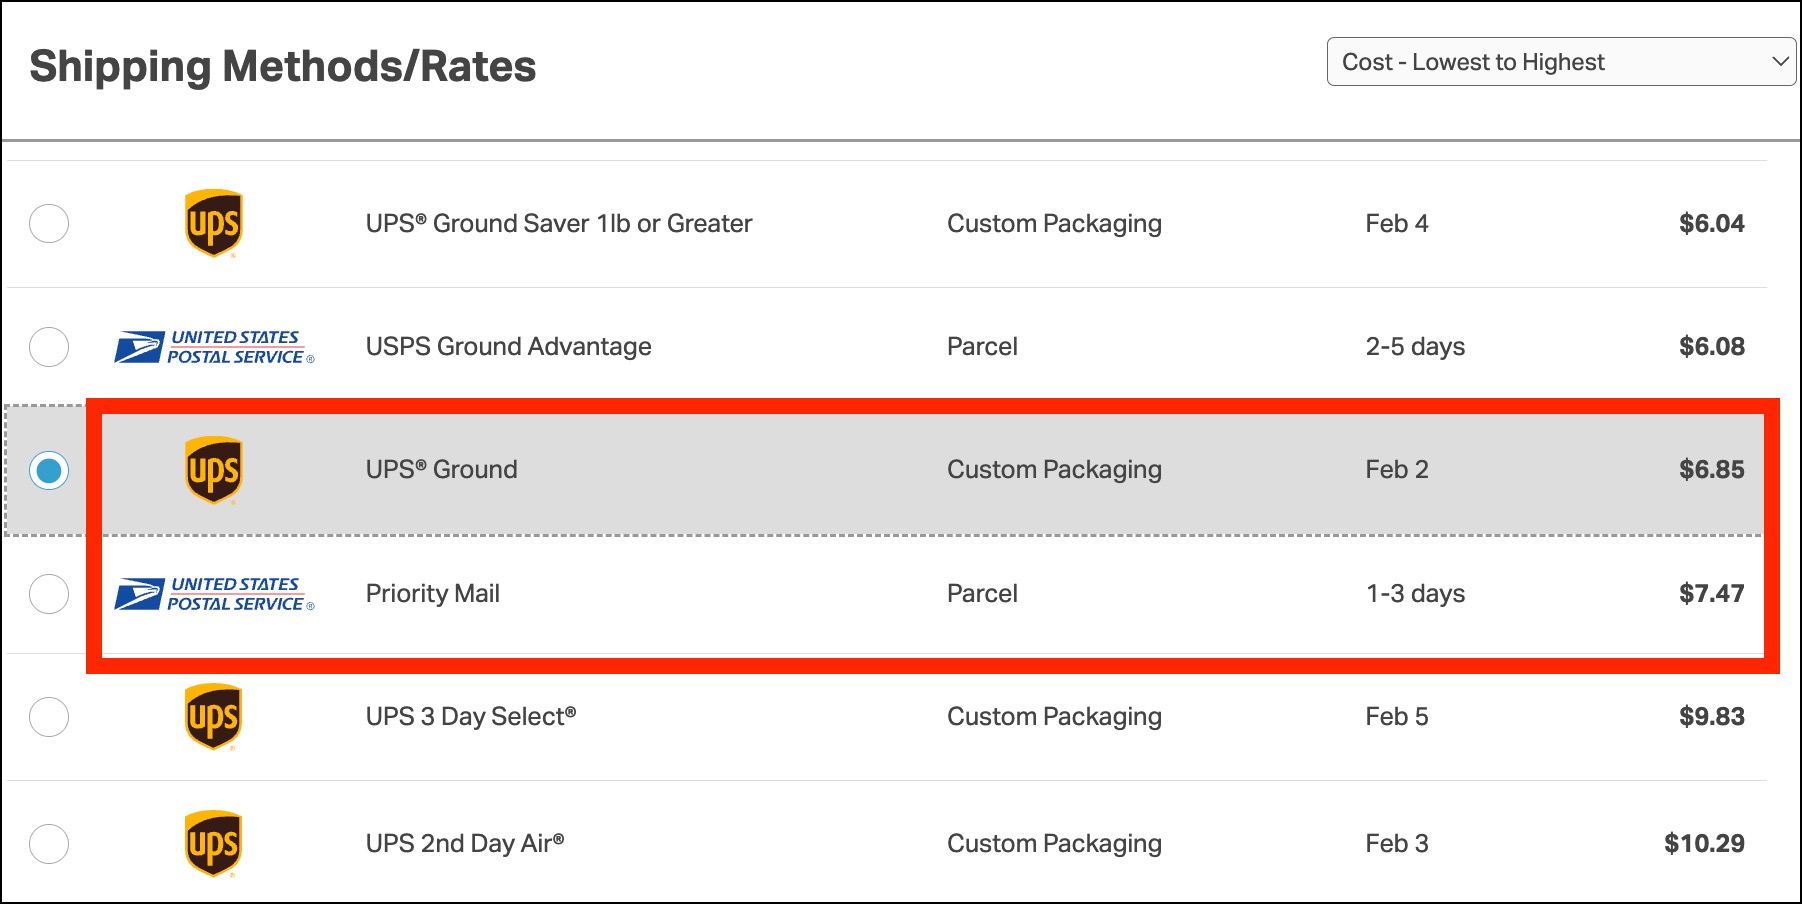
Example 2: Additive to compare two options
Scenario:
- You want to compare USPS Priority Mail and UPS Ground on certain orders.
Preset settings:
- Create two presets (leave override unchecked):
- USPS Priority Mail preset (Additive)
- UPS Ground preset (Additive)
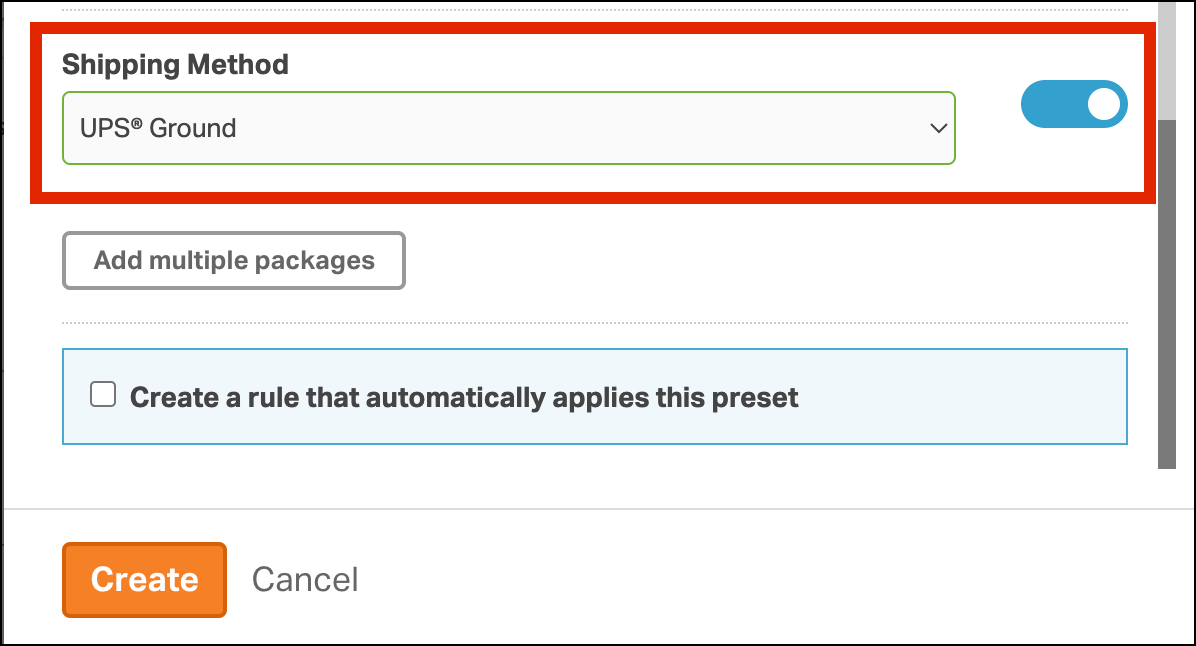
- Example: USPS Priority Mail preset (Additive), the override box isn’t checked

- Example: UPS Ground preset (Additive), the override box isn’t checked

- Apply both presets.
Result:
- Both options appear, so you can compare prices and delivery times.
Example 3: Mixed use in a real shipping team
Many teams use both modes:
- Override presets for daily “default” shipping workflows.
- Additive presets for exceptions, where you want to compare choices before buying the label.