Discover how Ordoro’s barcode scanning features can revolutionize your pick-and-pack workflow. No UPCs in Ordoro? No problem. Easily input them manually per product or utilize the Data Import function for efficient bulk UPC uploads.
Topics
How to enter UPCs per product
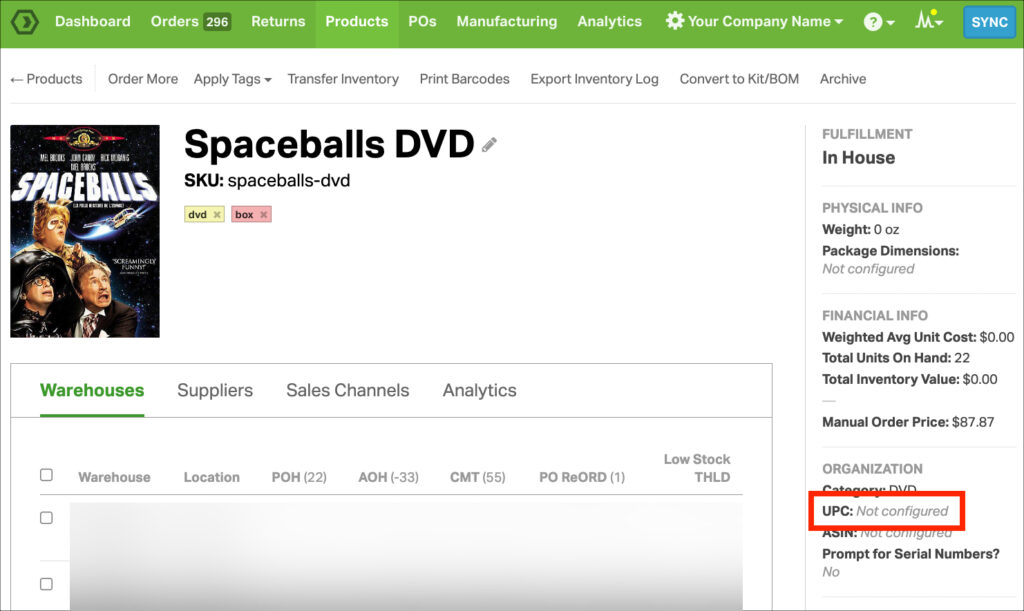
1. Go to the Product page in Ordoro.
2. Click on the item’s SKU to go to the Product Detail page.
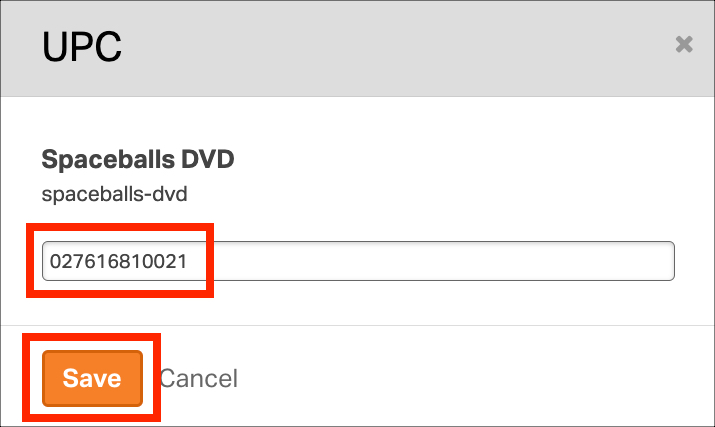
3. Click the UPC field to update it. A pop-up will appear.
4. Either enter the UPC manually or place your cursor in the field and use your scanner to populate the information.
4. Click Save.
Use Data Import to update multiple products’ UPCs
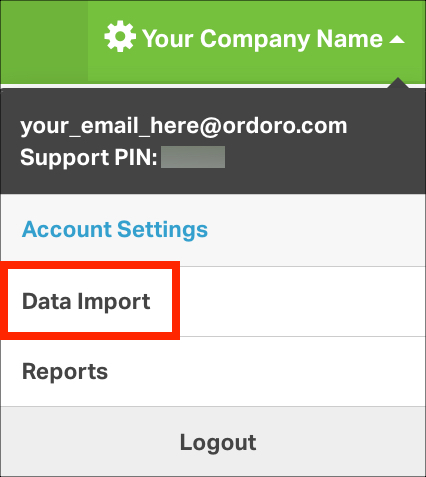
1. Go to your Company Name -> Data Import.
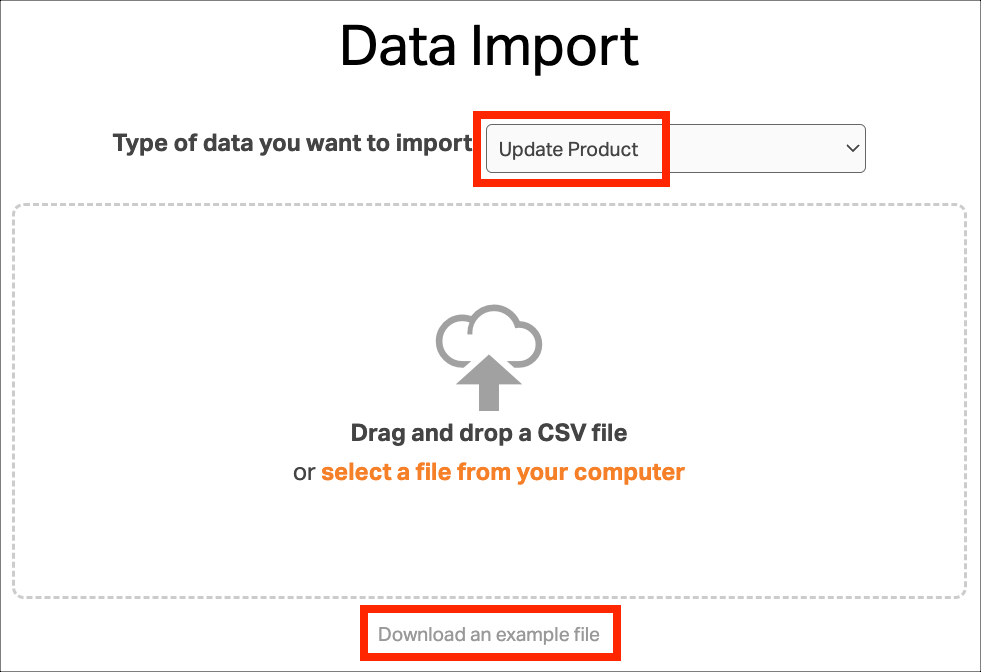
2. Select Update Products from the dropdown, then click Download an example file.
3. In the example file:
- Enter the SKUs and UPC values in the corresponding columns.
- If you’re only updating the UPC, delete all other columns besides the SKU column and UPC column. Ensure that you delete the entire column from the file.
- If the value is left blank, it will overwrite the information in Ordoro with a blank value.
- Verify that your SKUs and UPC values are not truncated via Excel formatting. See this support article to resolve this issue.
4. Save and upload the CSV file to Ordoro via Data Import. See this support article for more details on how to use Data Import.
Searching via UPCs
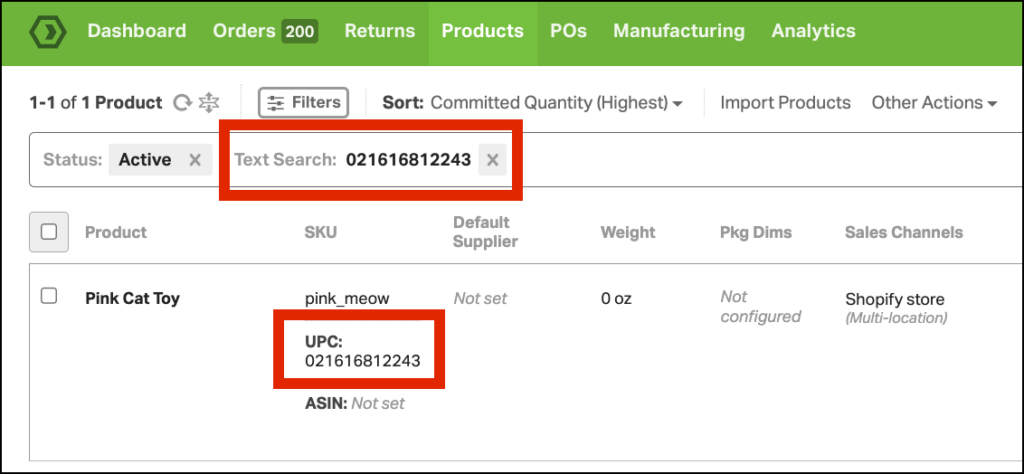
You can easily find products by UPC. Go to the Product List page, scan the item’s barcode in the search bar, and the corresponding product will appear.
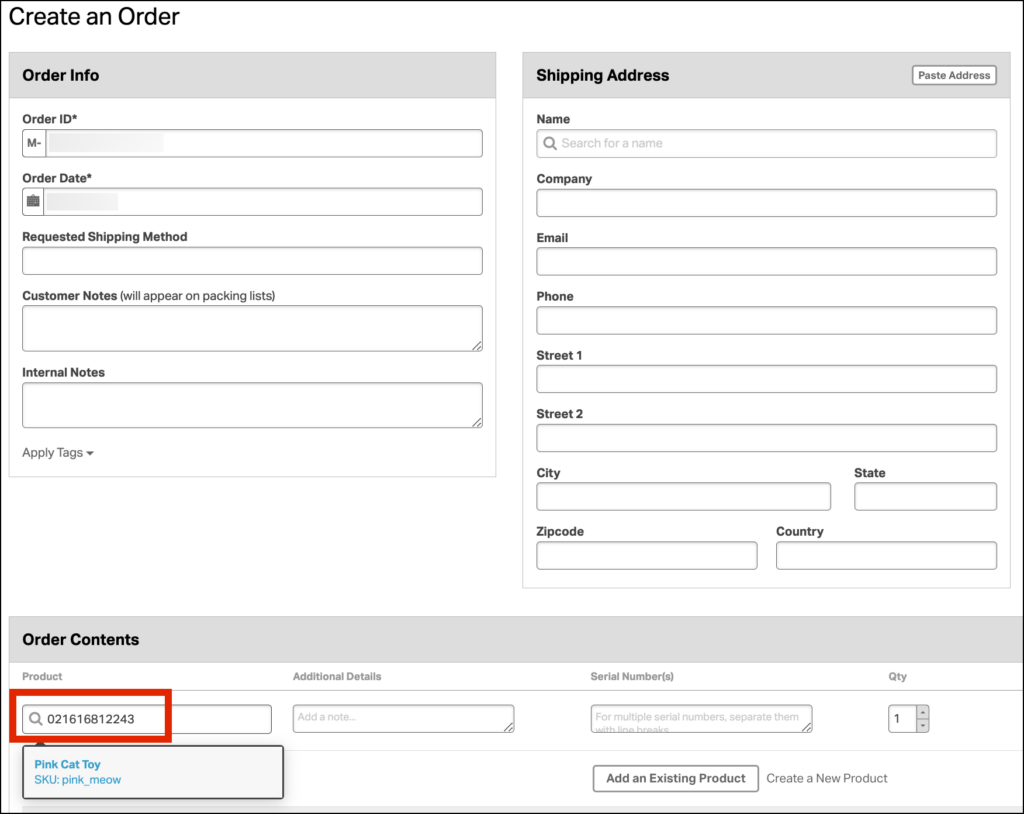
Also, you can add items using UPC while creating a manual order. Place your cursor in the Products field, scan the barcode, and locate the item quickly.

