Lead Time is the time from when you order a product from your supplier, until the receiving date. Many suppliers know their average Lead Time to get products into the hands of their clients. If not, you can calculate this time on your own, based on past behavior. For example:
- You send a Purchase Order for Product SKU A to your supplier on the first of the month.
- The Purchase order is received on the 15th of the month.
- For this supplier of SKU A, the Lead Time would be 15 days.
You can set the Lead Time on the product level in Ordoro so your POs will automatically populate your Lead Time. To set up your Lead Time in Ordoro, you’ll need to find the product you want to update.
You can do this two ways. Either manually in Ordoro, or via Data Import.
Topics
- How Lead Time appears in Ordoro
- How to update Lead Time manually
- How to update Lead Time via Data Import
How Lead Time appears in Ordoro
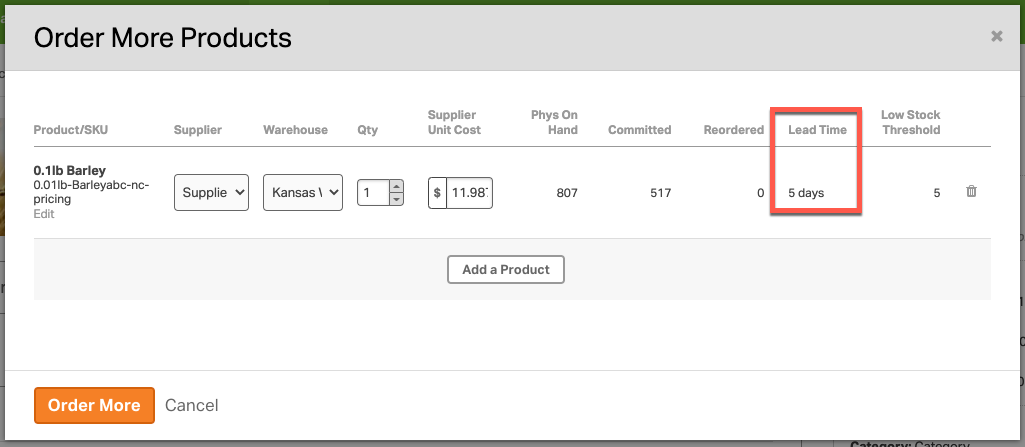
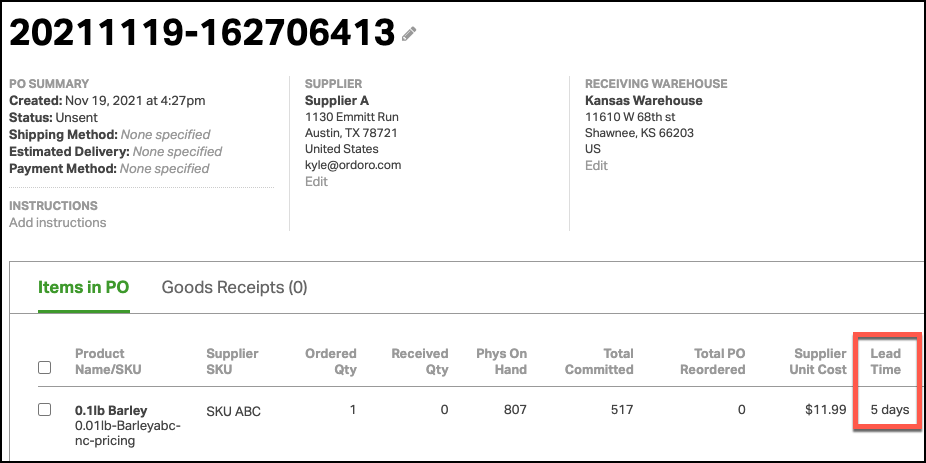
Once you assign a Lead Time to your product, it will automatically appear on your Purchase orders, and the Order More Products modal.
Order More Products Modal:
Purchase Orders:
How to update Lead Time manually
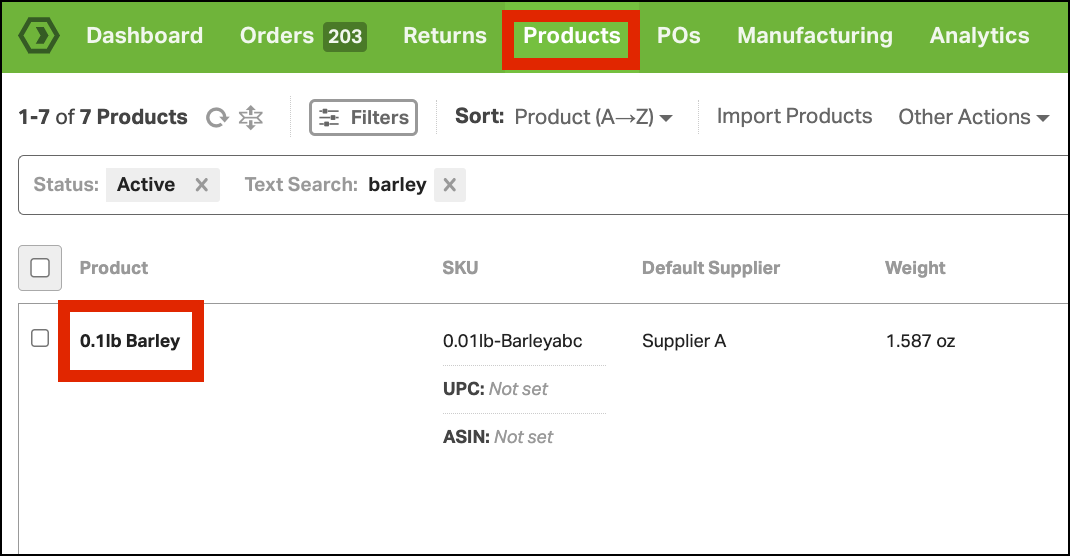
1. On the Products tab, search for the item you want to update and click on the product name. This will take you to the Product Detail page.
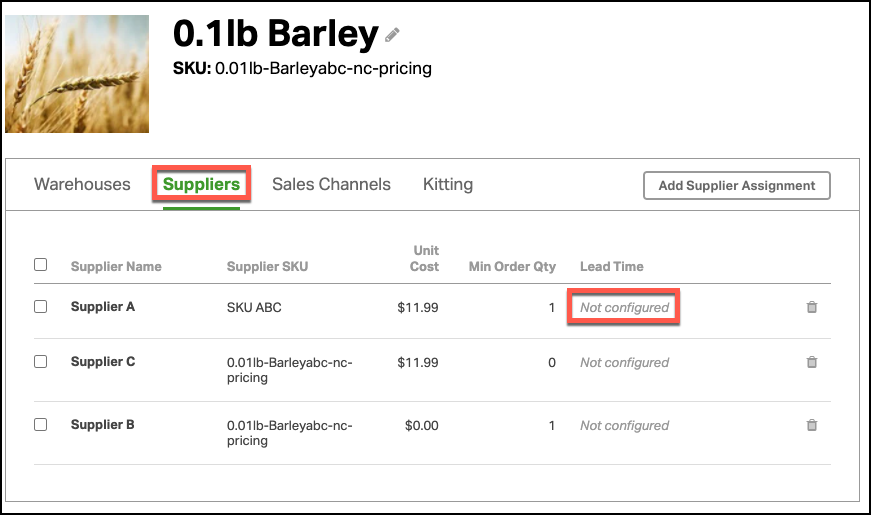
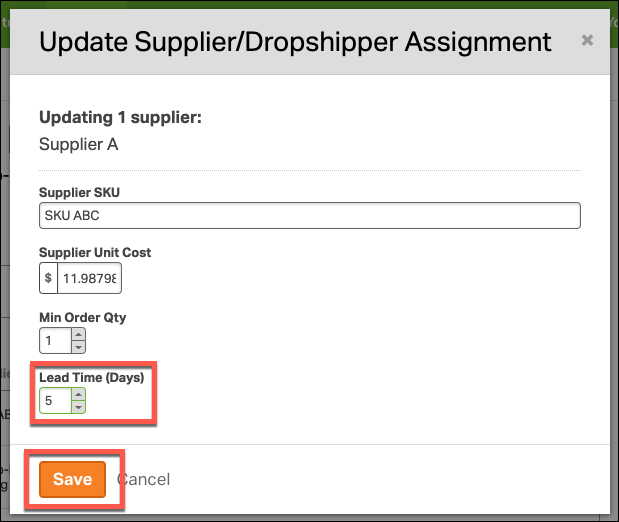
2. Select the Suppliers tab on the Product Detail page. Click Lead Time next to the supplier to update.
- Note:
- You can set a different Lead Time per supplier per product.
- One supplier may have a different Lead Time than the other, which could influence the supplier you choose to reorder from.
3. Update the Lead Time (set in the number of days for that supplier), then select Save.
How to update Lead Time via Data Import
If you’ve never used Data Import with Ordoro, click here for instructions on how to use this feature in Ordoro.
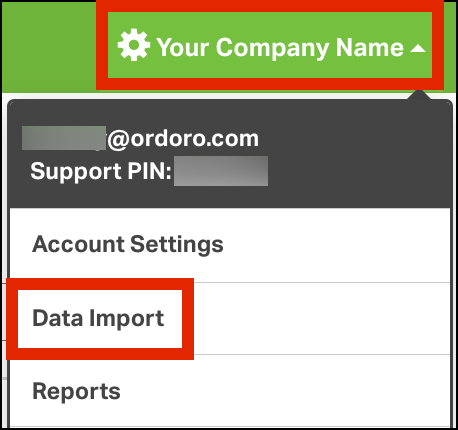
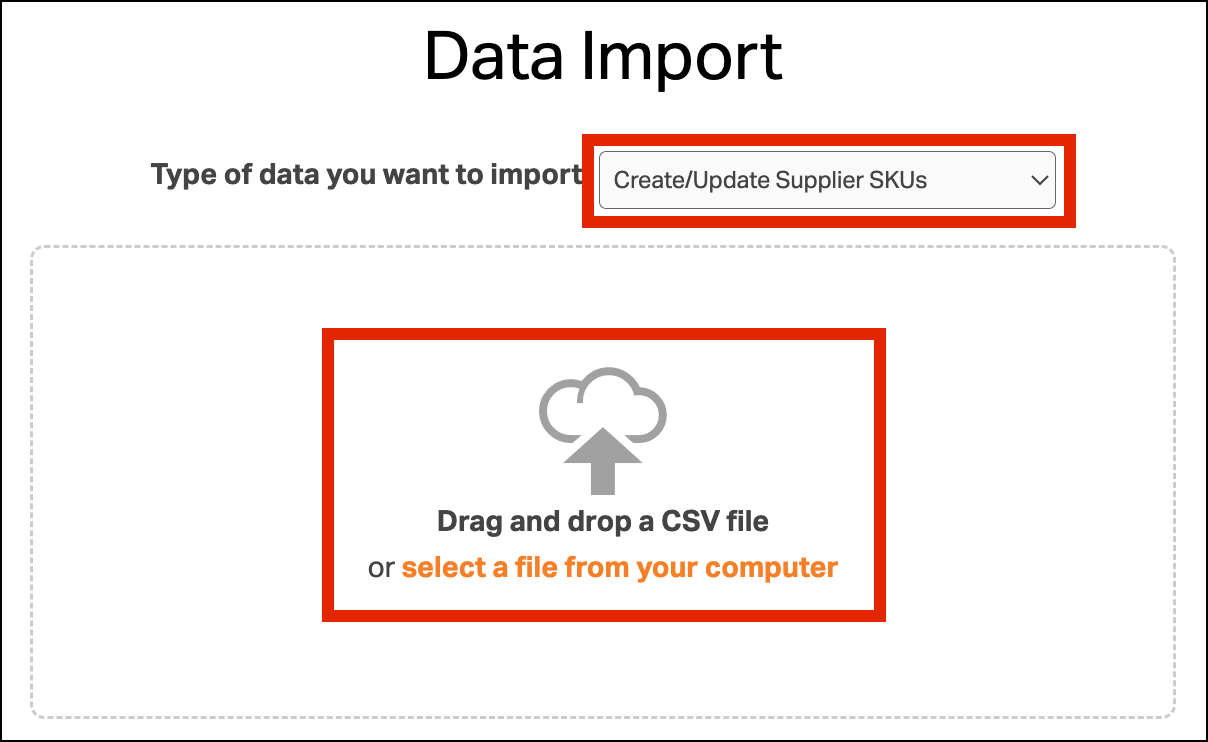
1. Click your company name, then select Data Import.
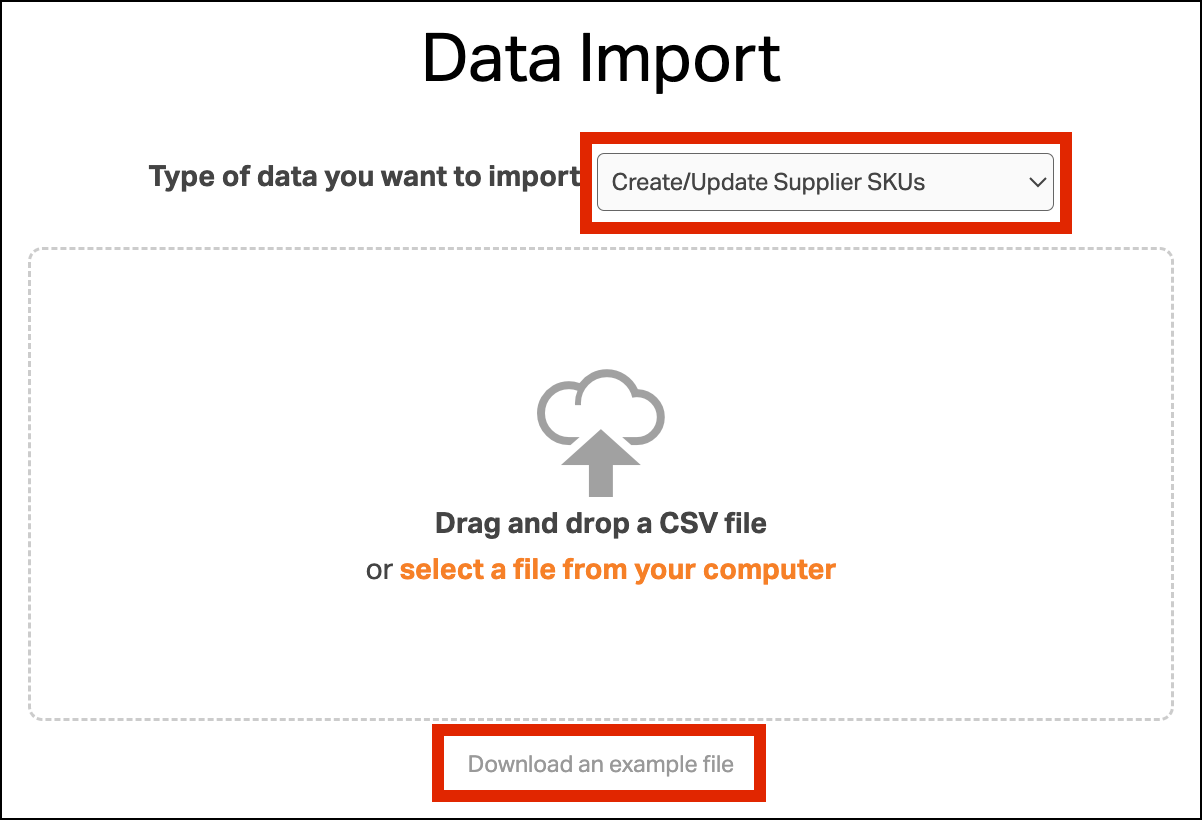
2. Select Create/Update Supplier SKUs from the dropdown. Then, click Download an example file.
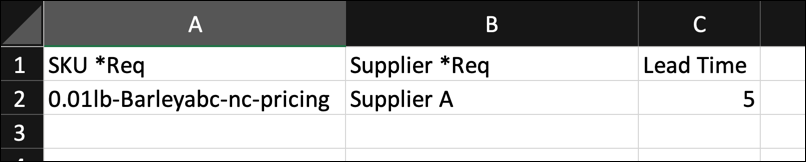
3. Open the downloaded file, and update the columns to only include SKU *Req, Supplier *Req and Lead Time. Fill in the information for each SKU, Supplier, and Lead time for your products.
IMPORTANT:
- It’s crucial to remove entire columns from the file if you’re not updating certain columns. Leaving them blank will result in overwriting with a null or zero value.
- It’s also important to maintain the exact order of columns for a successful CSV upload.
- Ensure that your SKUs or other values are not truncated via Excel formatting. See this support article to resolve this issue.
See an example below:
4. Save the file as a CSV file.
5. Return to the Data Import page. Select Create/Update Supplier SKUs from the dropdown upload the saved CSV file into Ordoro.
6. Verify the column titles from your file match the standard column titles in Ordoro.
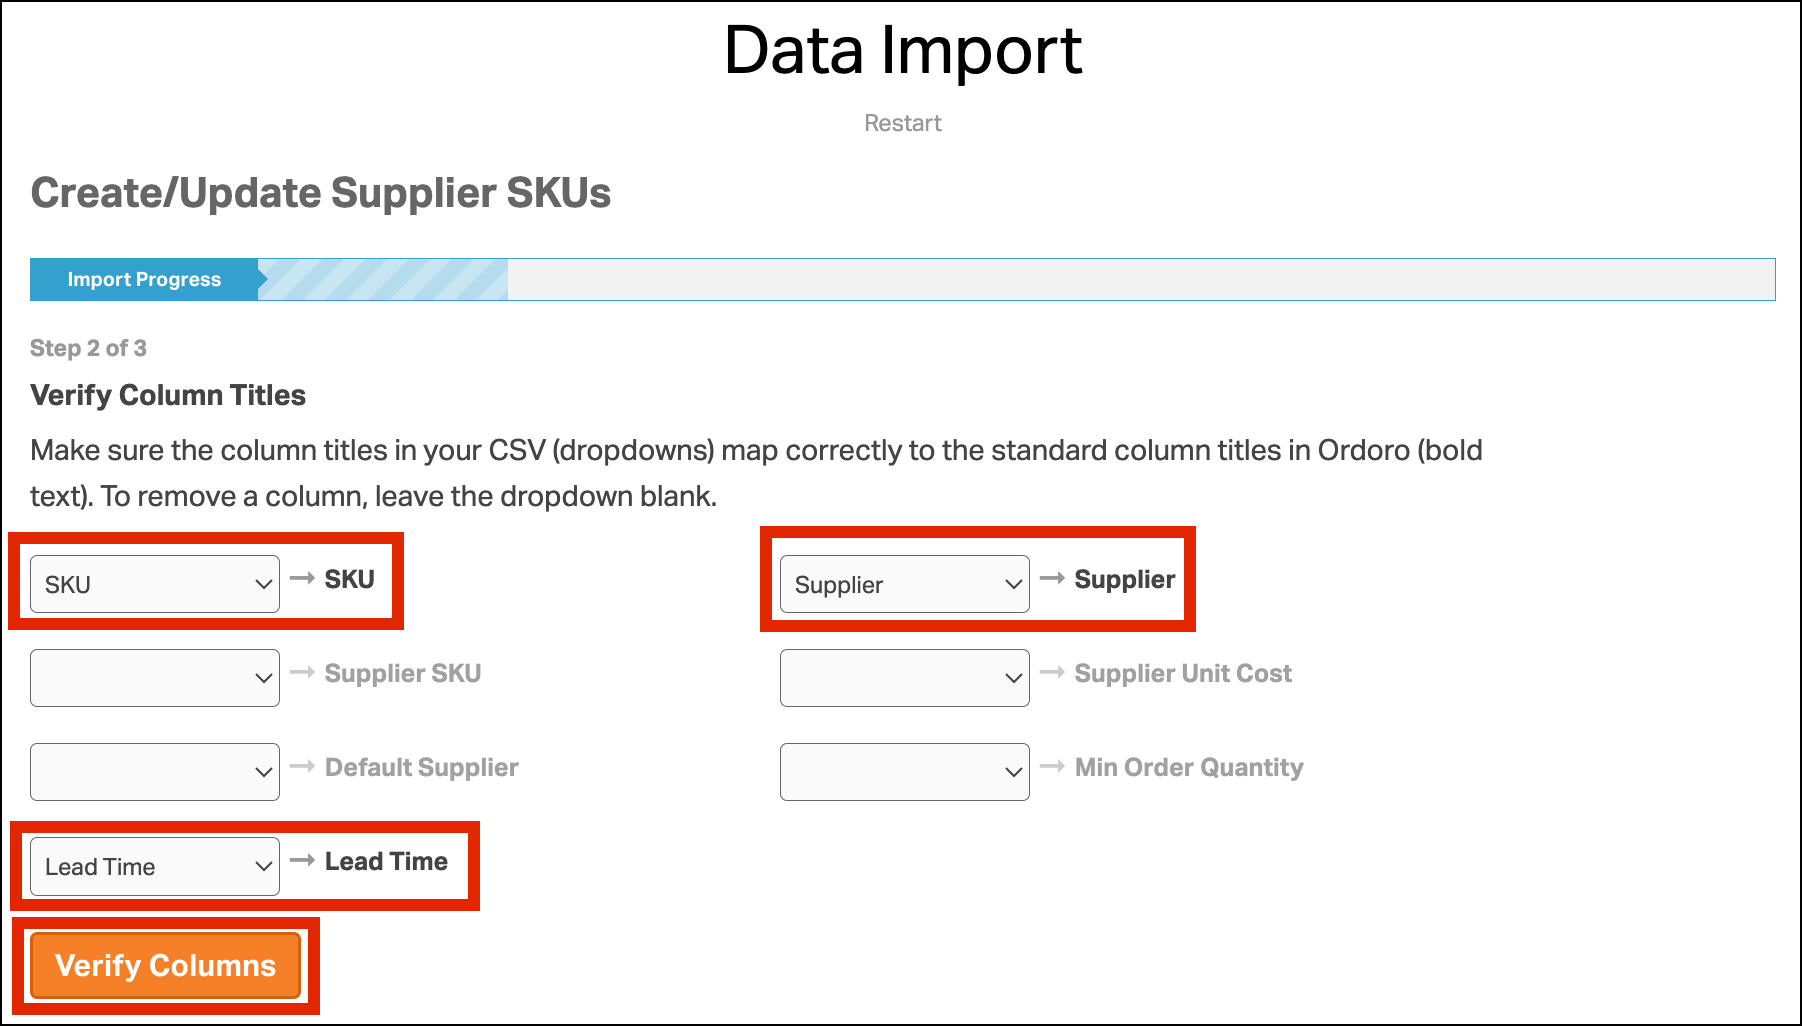
- If you need to cancel your data import, click Restart.

7. Click Save All.
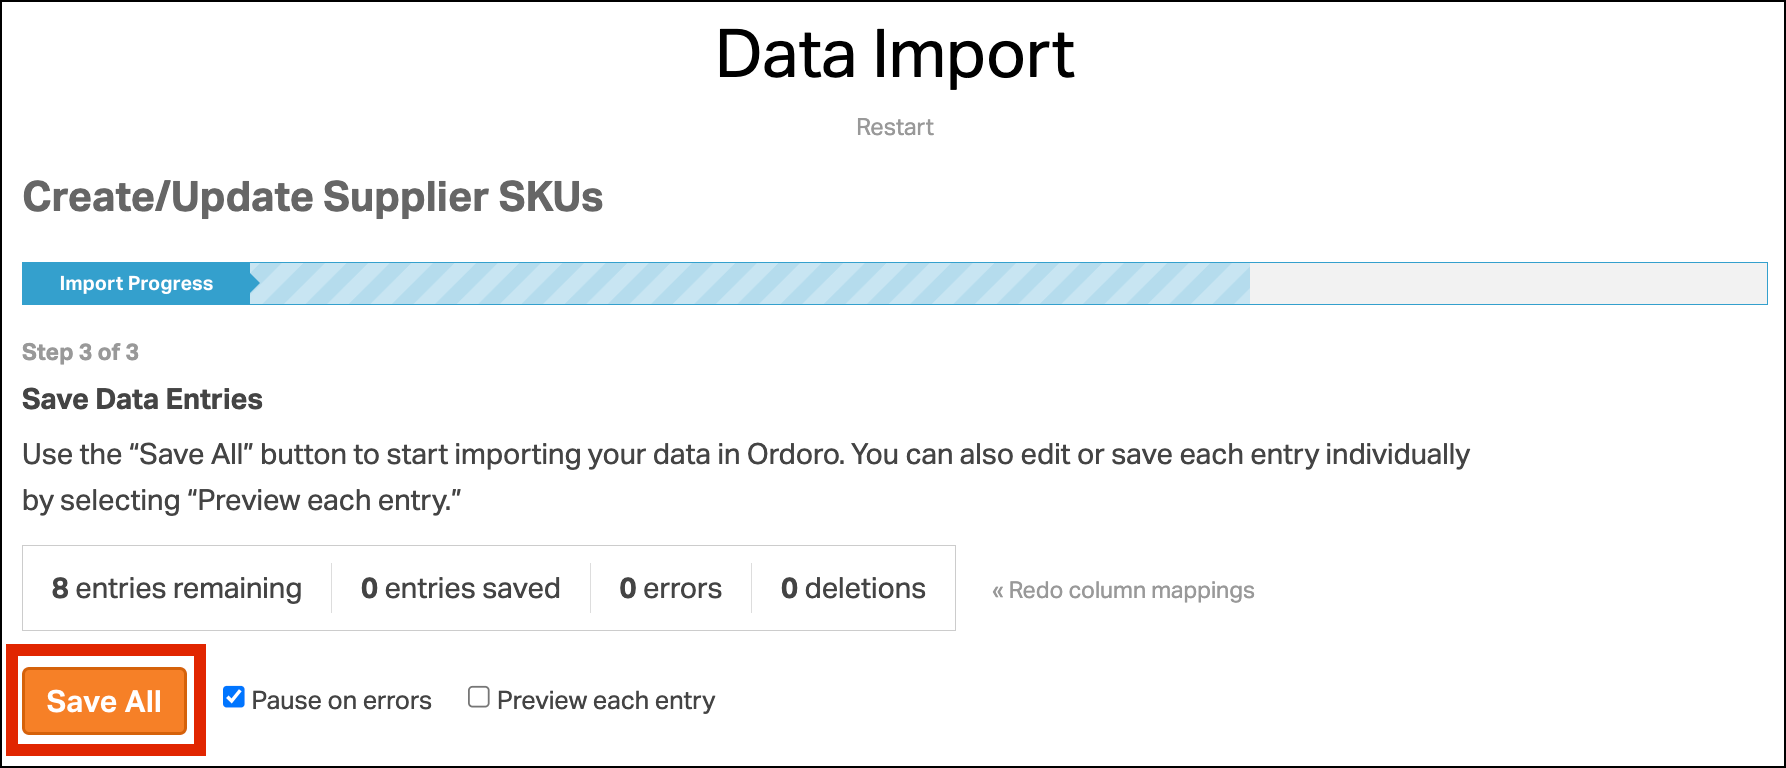
- You can preview and edit your entries before saving by selecting Preview each entry.