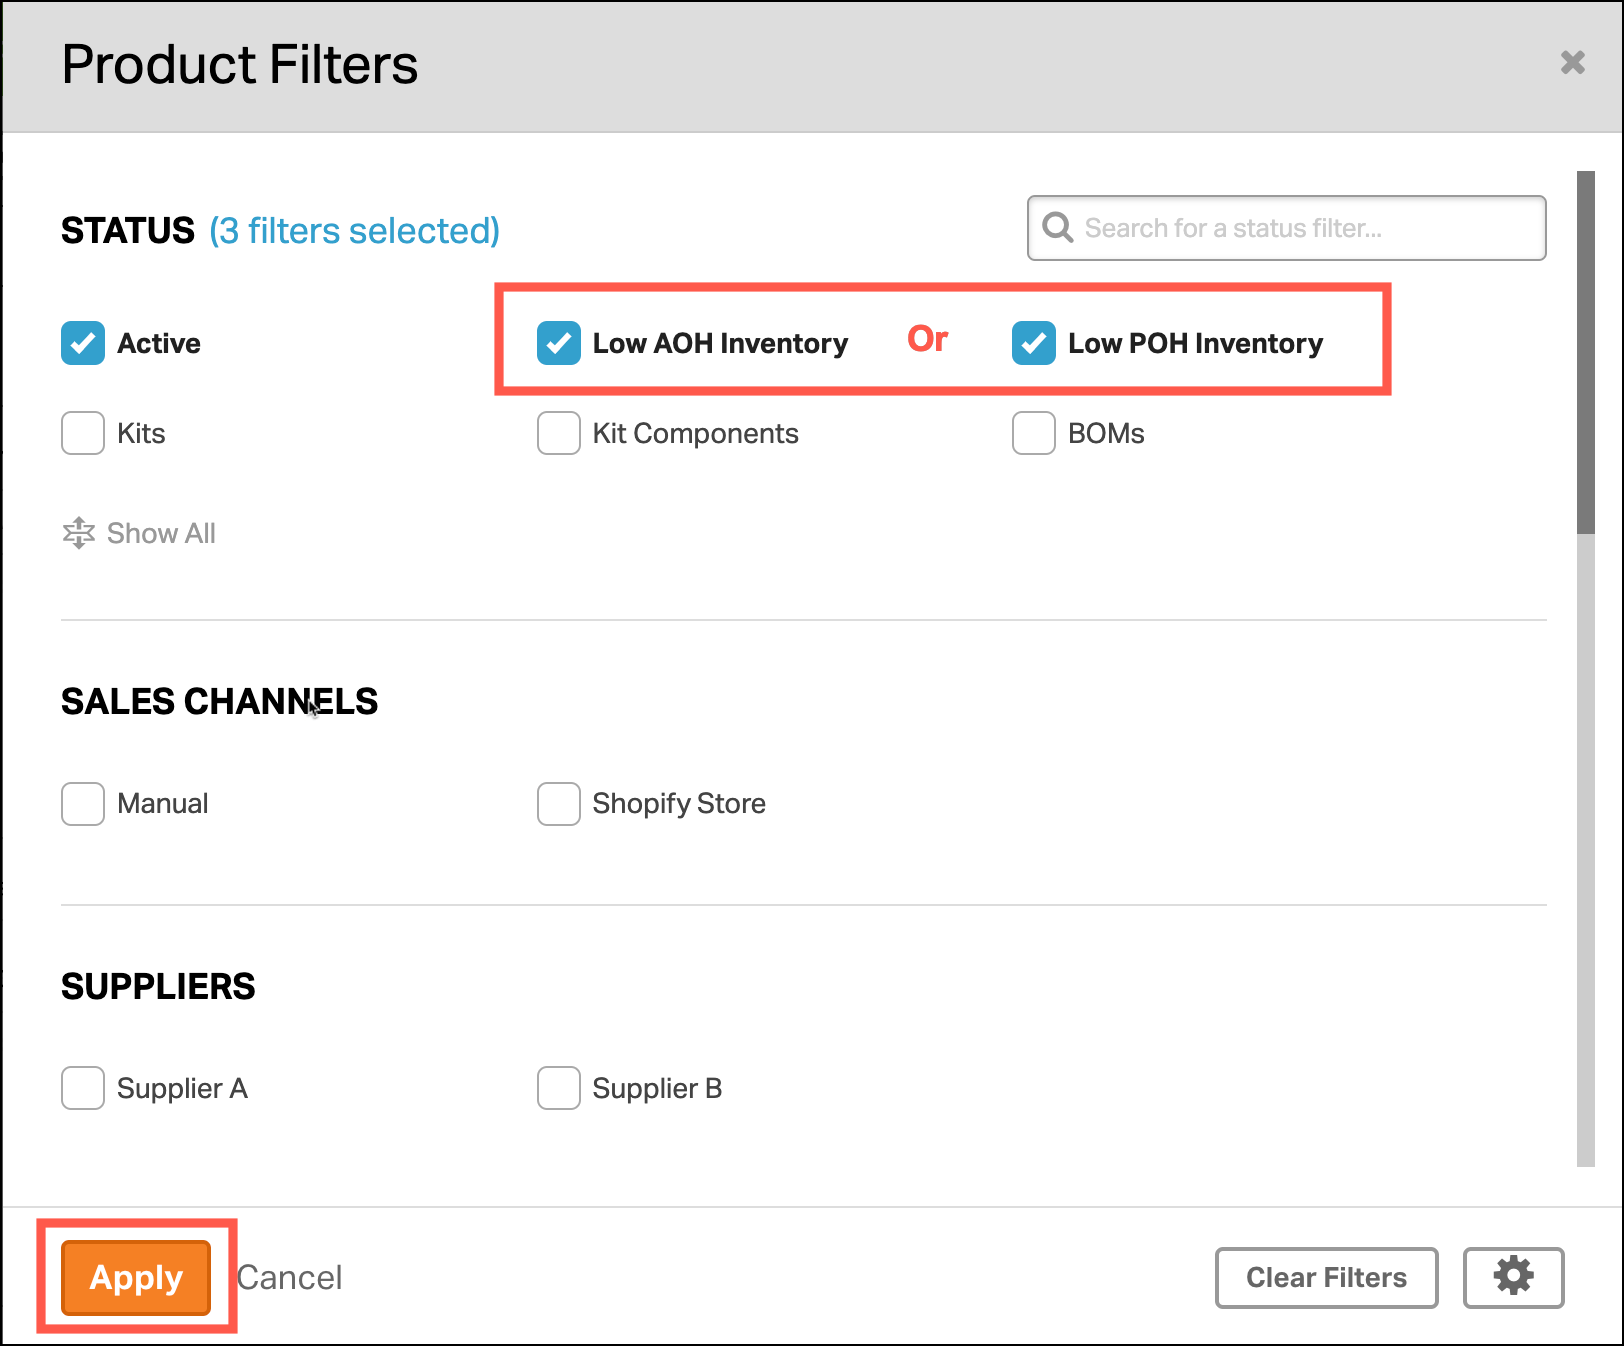
The Low Stock Threshold is a quantity you can set for each product and warehouse. When a product’s available inventory in any warehouse reaches (or drops below) its threshold, that product will appear in the Low Inventory filter on the Products page.
You can learn more about Product filters here.
Topics
- Set the Low Stock Threshold for one product
- Disable the Low Stock Threshold for one product
- Set or disable thresholds in bulk using the Data Import Tool
Set the Low Stock Threshold for one product
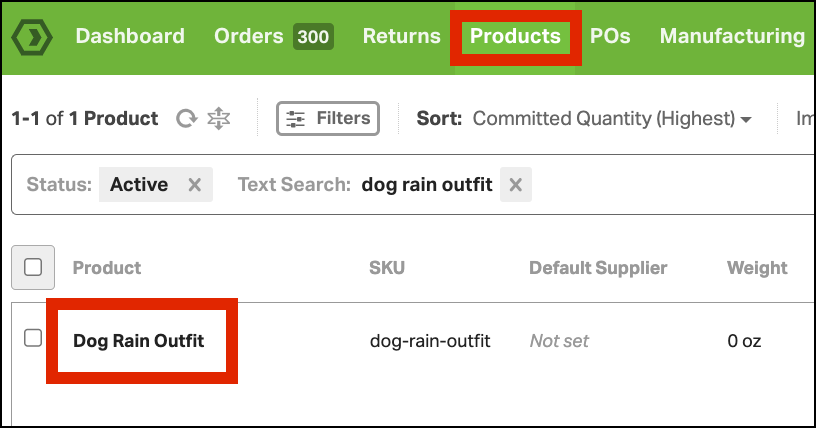
- Go to the Products tab and search for the SKU.
- Click the product name or SKU to view the Product Detail page.
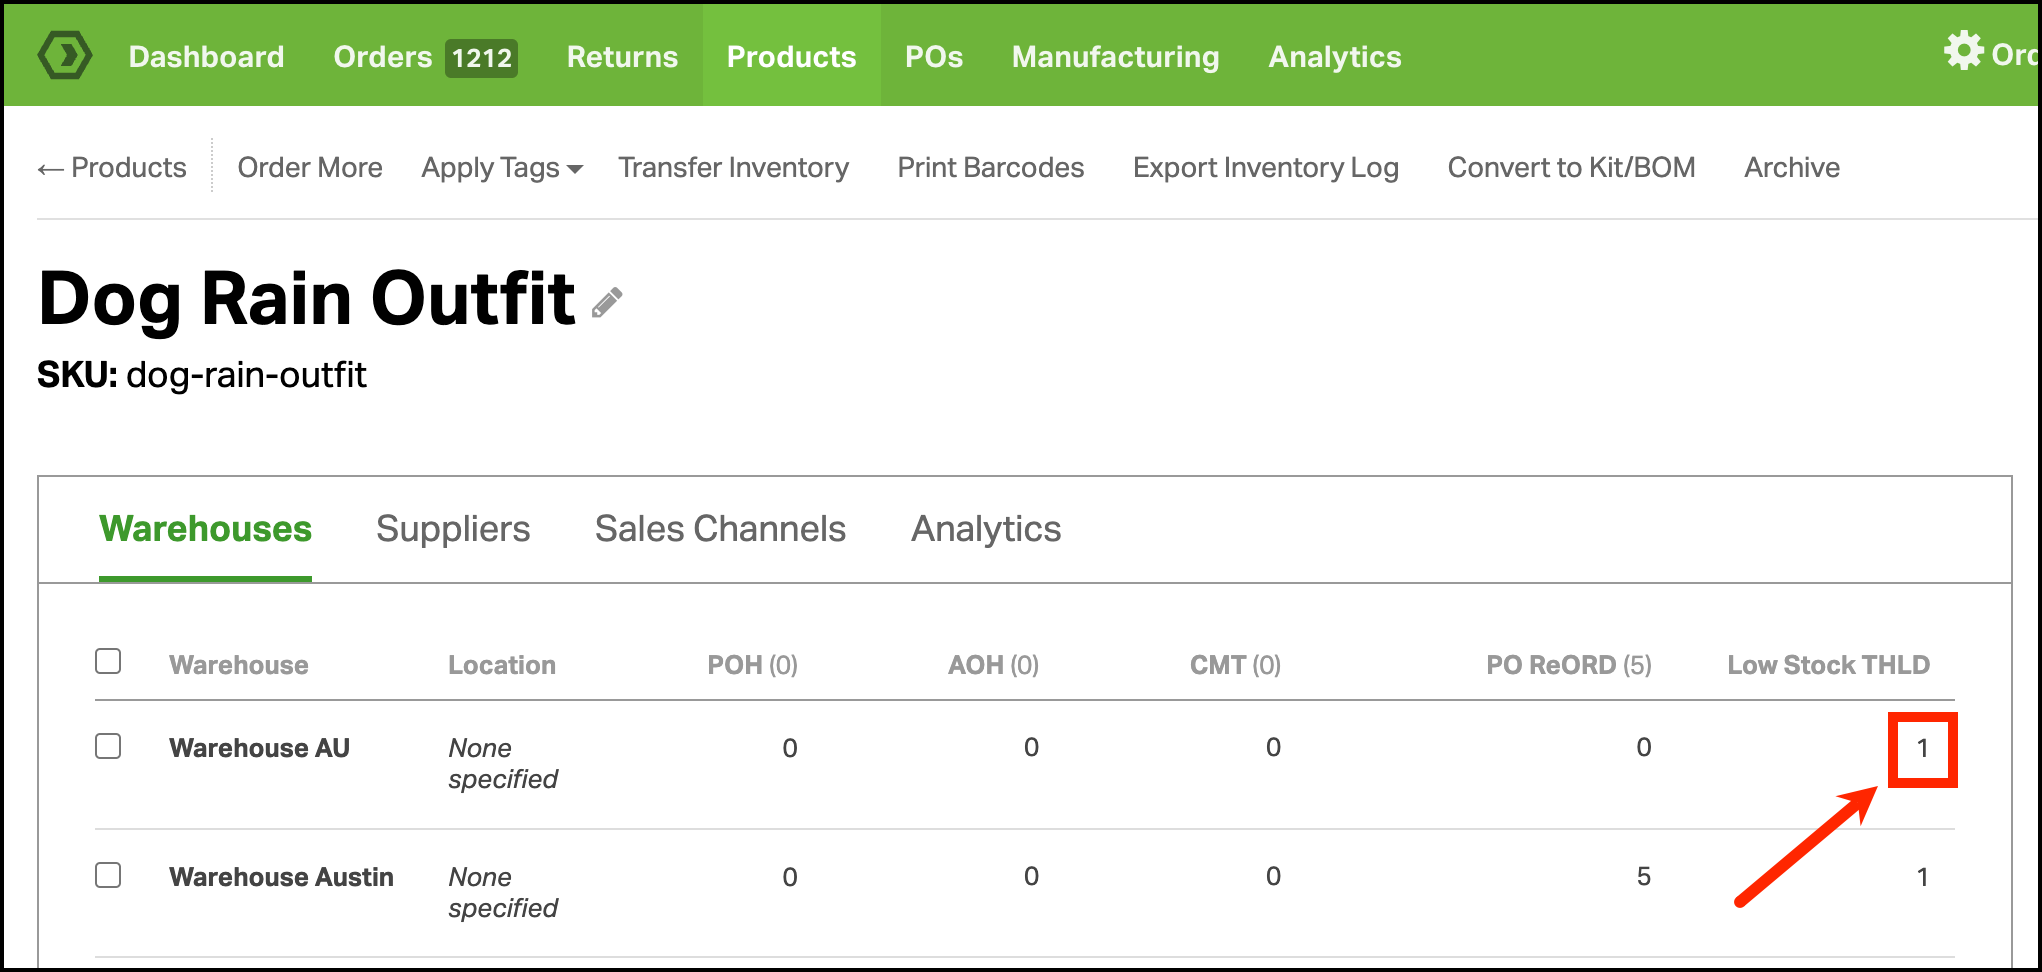
- Find the warehouse to update. In the Low Stock Threshold column, click on the quantity to change.
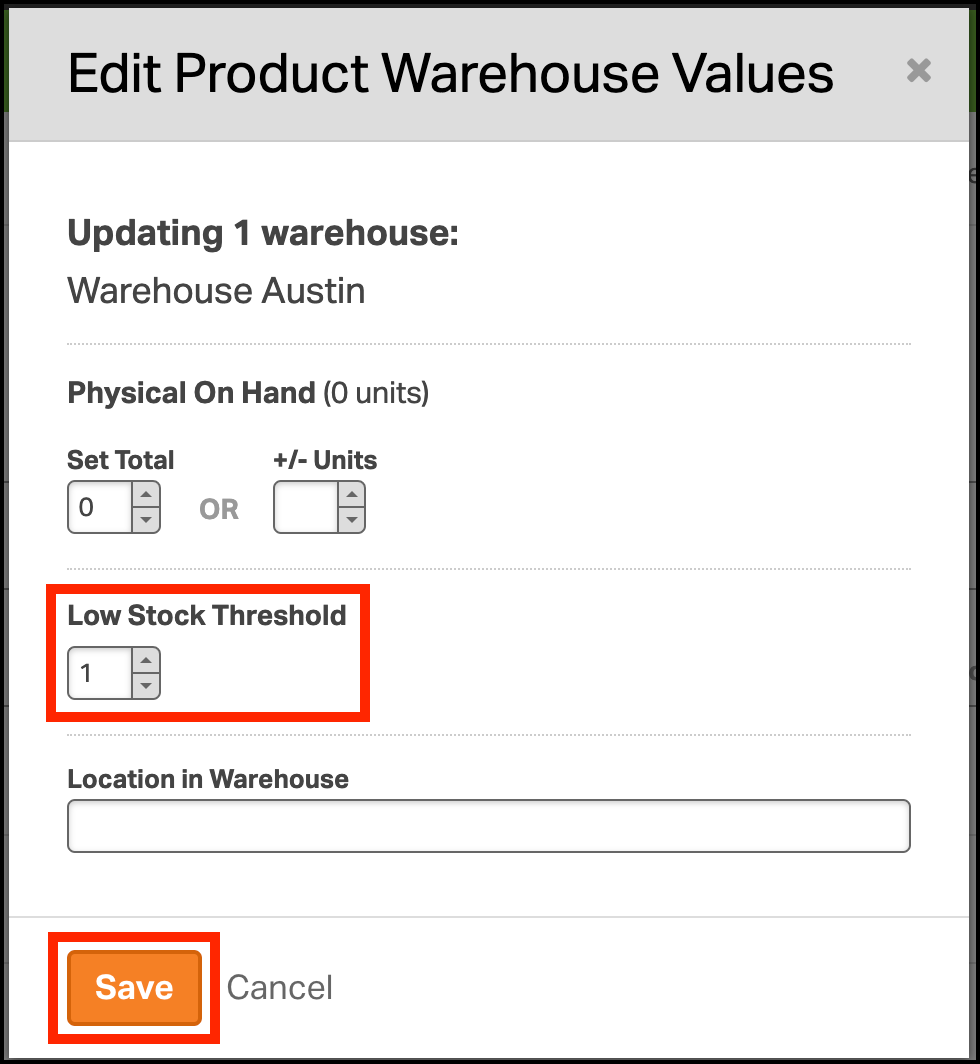
- In the pop-up window, enter the threshold quantity you want to use.
- Click Save.
Disable the Low Stock Threshold for one product
If you don’t want a product to trigger low stock alerts (or appear in the Low Inventory filter), you can turn it off. See how below.
- Go to the Products tab and search for the SKU.
- Click the product name or SKU to view the Product Detail page.
- Find the warehouse to update. In the Low Stock Threshold column, click on the quantity to change.
- In the pop-up window, leave the Low Stock Threshold field blank.
- Click Save.

After saving, you’ll see a dash (-) under Low Stock Threshold, which means the threshold is disabled for that product in that warehouse.

Set or disable thresholds in bulk using the Data Import Tool
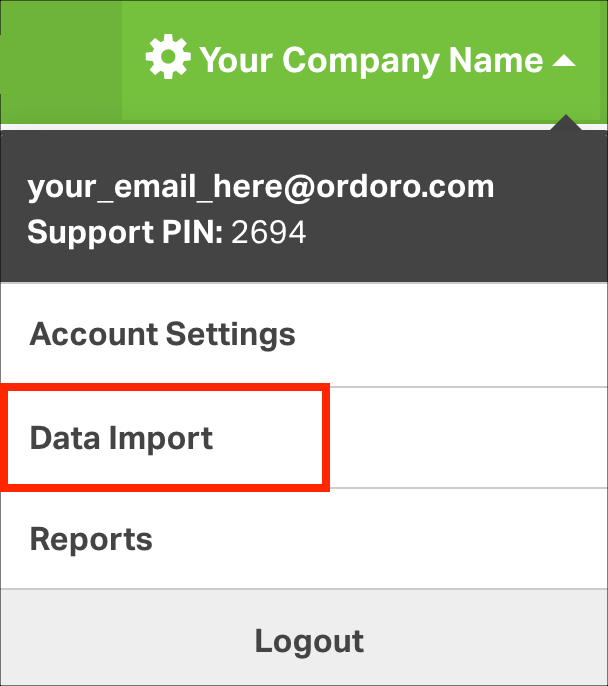
- Select your company name -> Data Import.
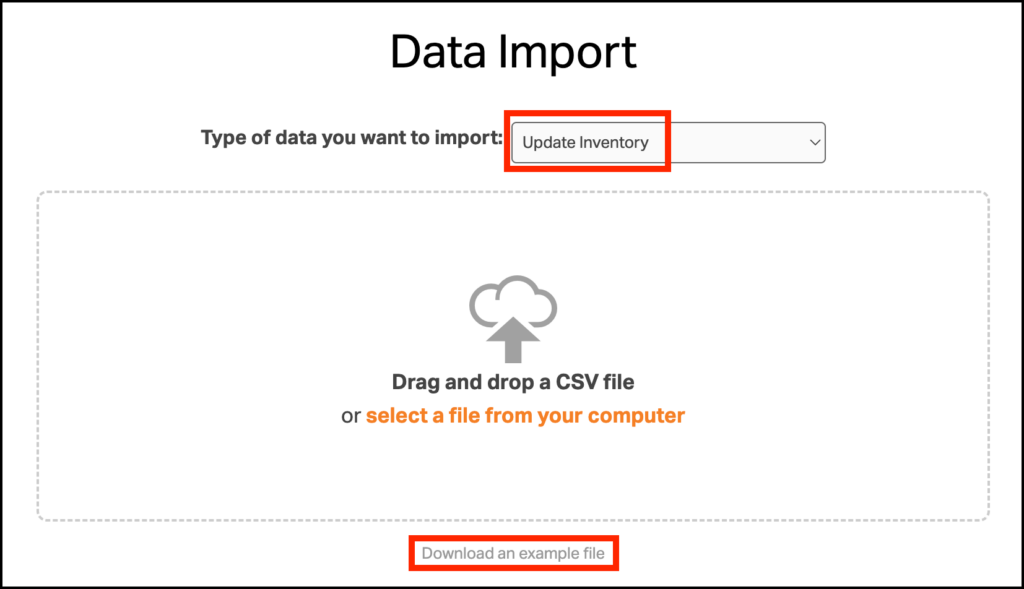
- From the dropdown, select Update Inventory, then download the example file.
- Update your CSV with these required columns:
- SKU
- Warehouse
- Low Stock Threshold
- Enter a number to set a threshold.

- To disable the threshold, leave the Low Stock Threshold cell blank.
- In the screenshot below, the Low Stock Threshold is set only for Warehouses 2 and 3 (Dallas).

- Go back to Data Import.
- Select Update Inventory, then upload your CSV.
- Follow steps 6–10 in How to Use Data Import to complete the upload.
