Ordoro will automatically import products from your sales channels. However, you may want to create products that only exist in Ordoro for a few reasons.
- To keep track of packaging materials (boxes, shipping labels, etc.)
- For product components not sold in your store.
- You only create manual orders in Ordoro, i.e., we don’t import orders from your store.
The steps below list how to create a single product in Ordoro or multiple products in bulk.
Note: Ordoro is not a listing creator. Ordoro will not create the items in your sales channels.
Topics
How to create a single product
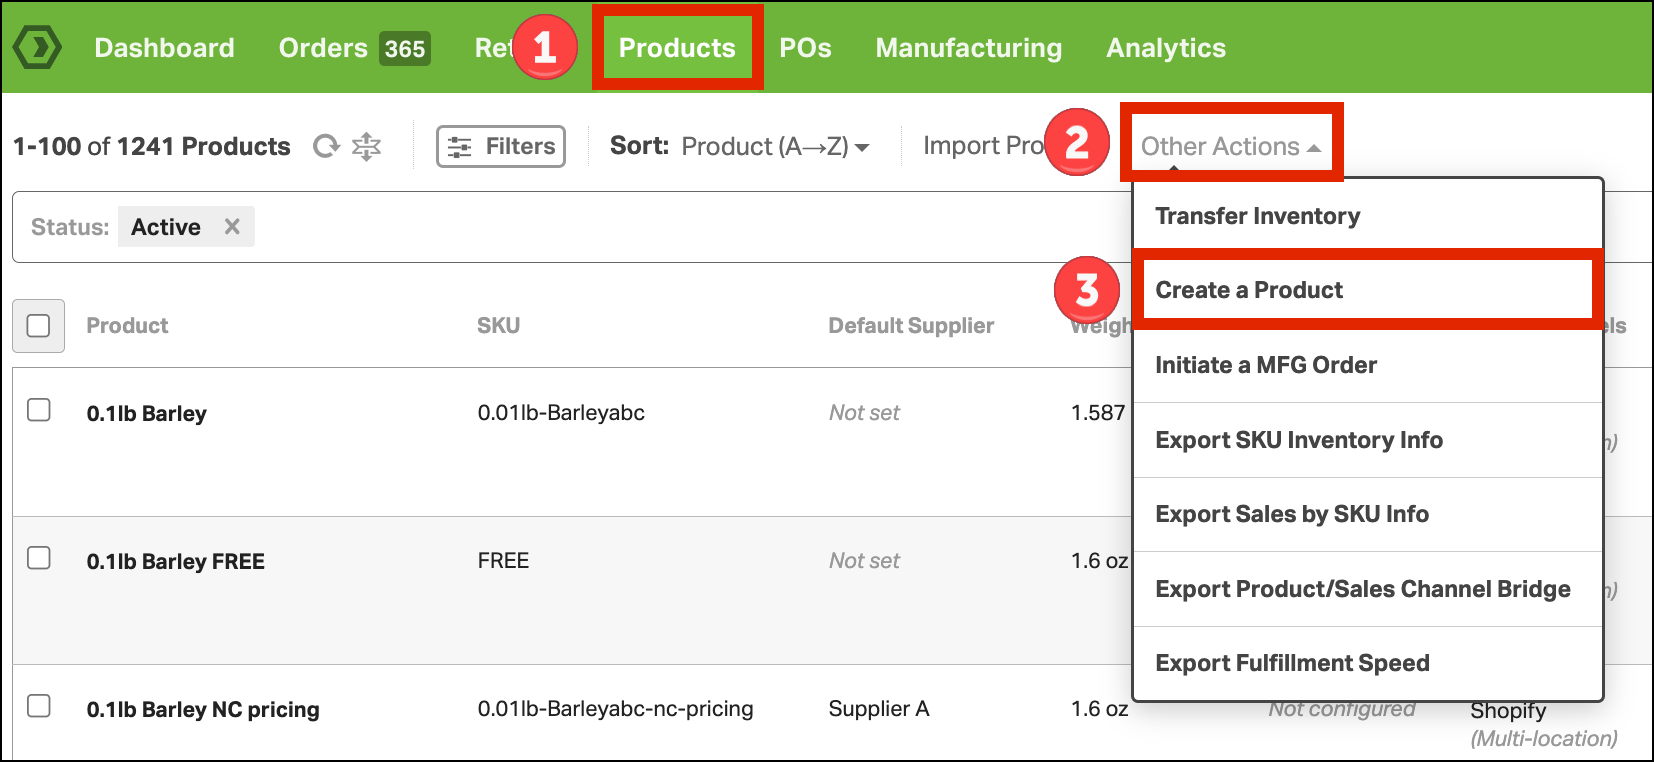
1. Go to the Products tab -> Other Actions -> Create a Product.
- Click the screenshot below to expand the image.
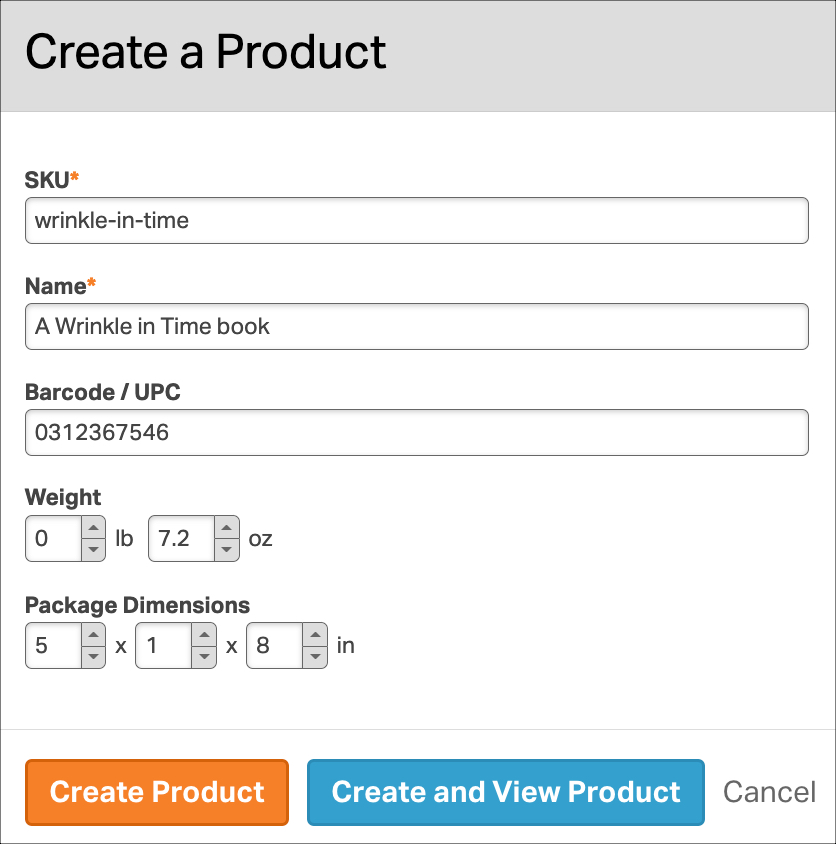
2. Enter the product information in the pop-up. Only SKU and Name are required.
- SKU* – required field
- Name* – required field
- Barcode / UPC
- Weight
- Package Dimensions
3. If the SKU already exists in Ordoro, a warning message will appear, and you cannot save the product.

4. Once all the information is entered, click either Create Product or Create and View Product.
- Create Product – Once saved, you’ll return to the Product List page.
- Create and View Product – Once saved, you’ll go to the new item’s Product Detail page.

How to create products in bulk
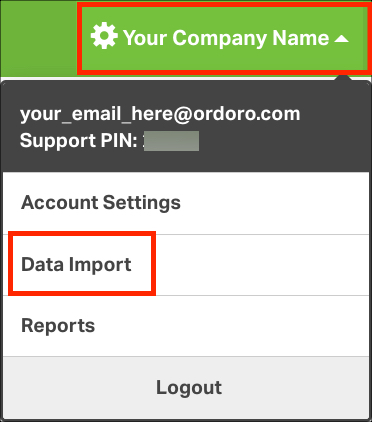
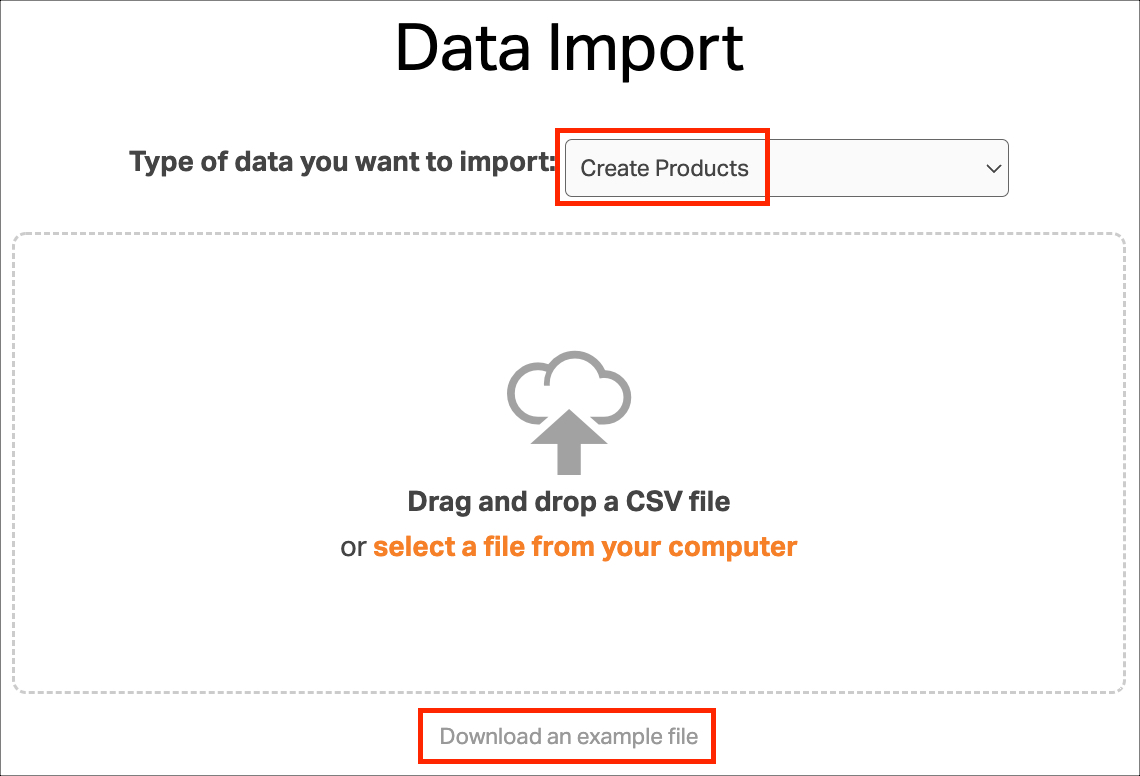
1. Go to Account Settings -> Data Import.
2. In the dropdown menu, select Create Products. Then download the example file.
3. The example file has the following column headings. Only SKU and Description are required.
- SKU *Req
- Description *Req
- Price
- Weighted Average Unit Cost
- Weight (lbs)
- Category
- Length (in)
- Width (in)
- Height (in)
- UPC
- ASIN
- Harmonized Code
- Country of Origin
- Customs Description
- Internal Notes
- Has Serial Numbers
4. Enter each product on a different row. See the sample document below.
- Click the screenshot below to expand the image.

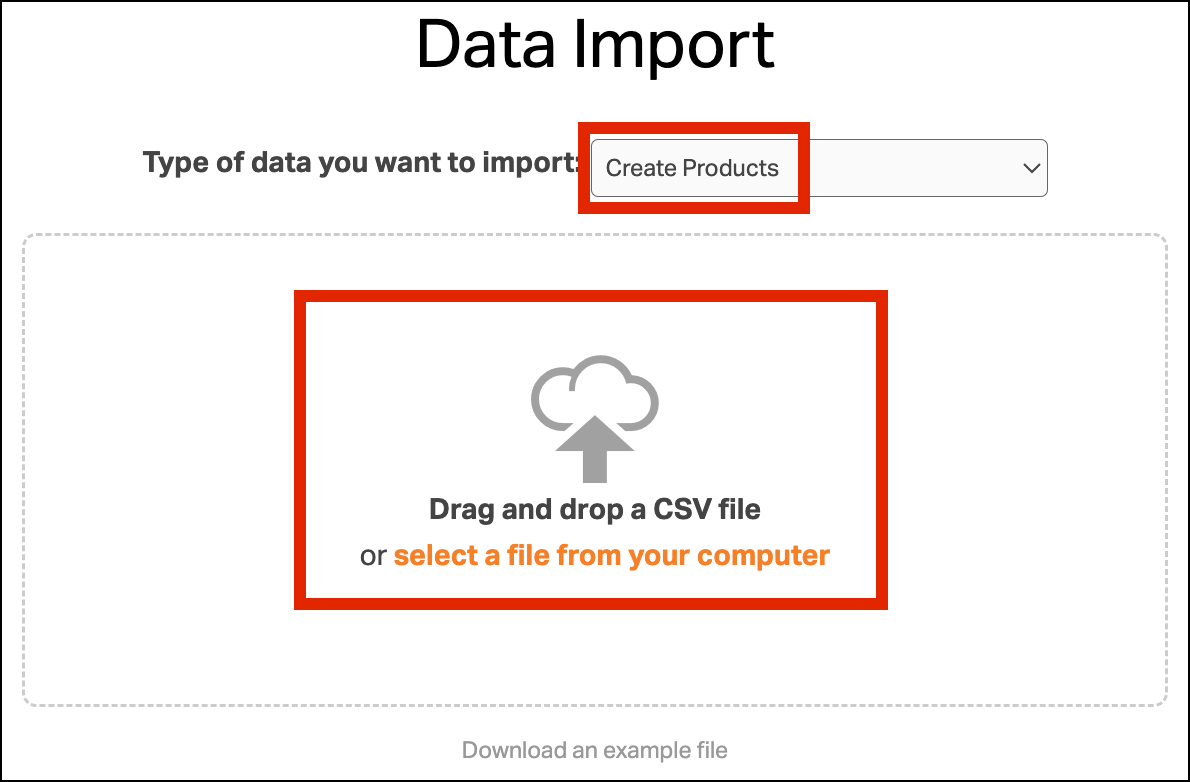
5. Upload the file using the drag and drop feature or select the file from your computer. Verify that you have Create Products selected from the dropdown.
6. Validate the CSV data is mapped correctly to upload to Ordoro. Click Verify Columns once ready.
- If there’s a column you don’t want to import, set the mapping to the blank value.
- Update any column mapping, as needed.
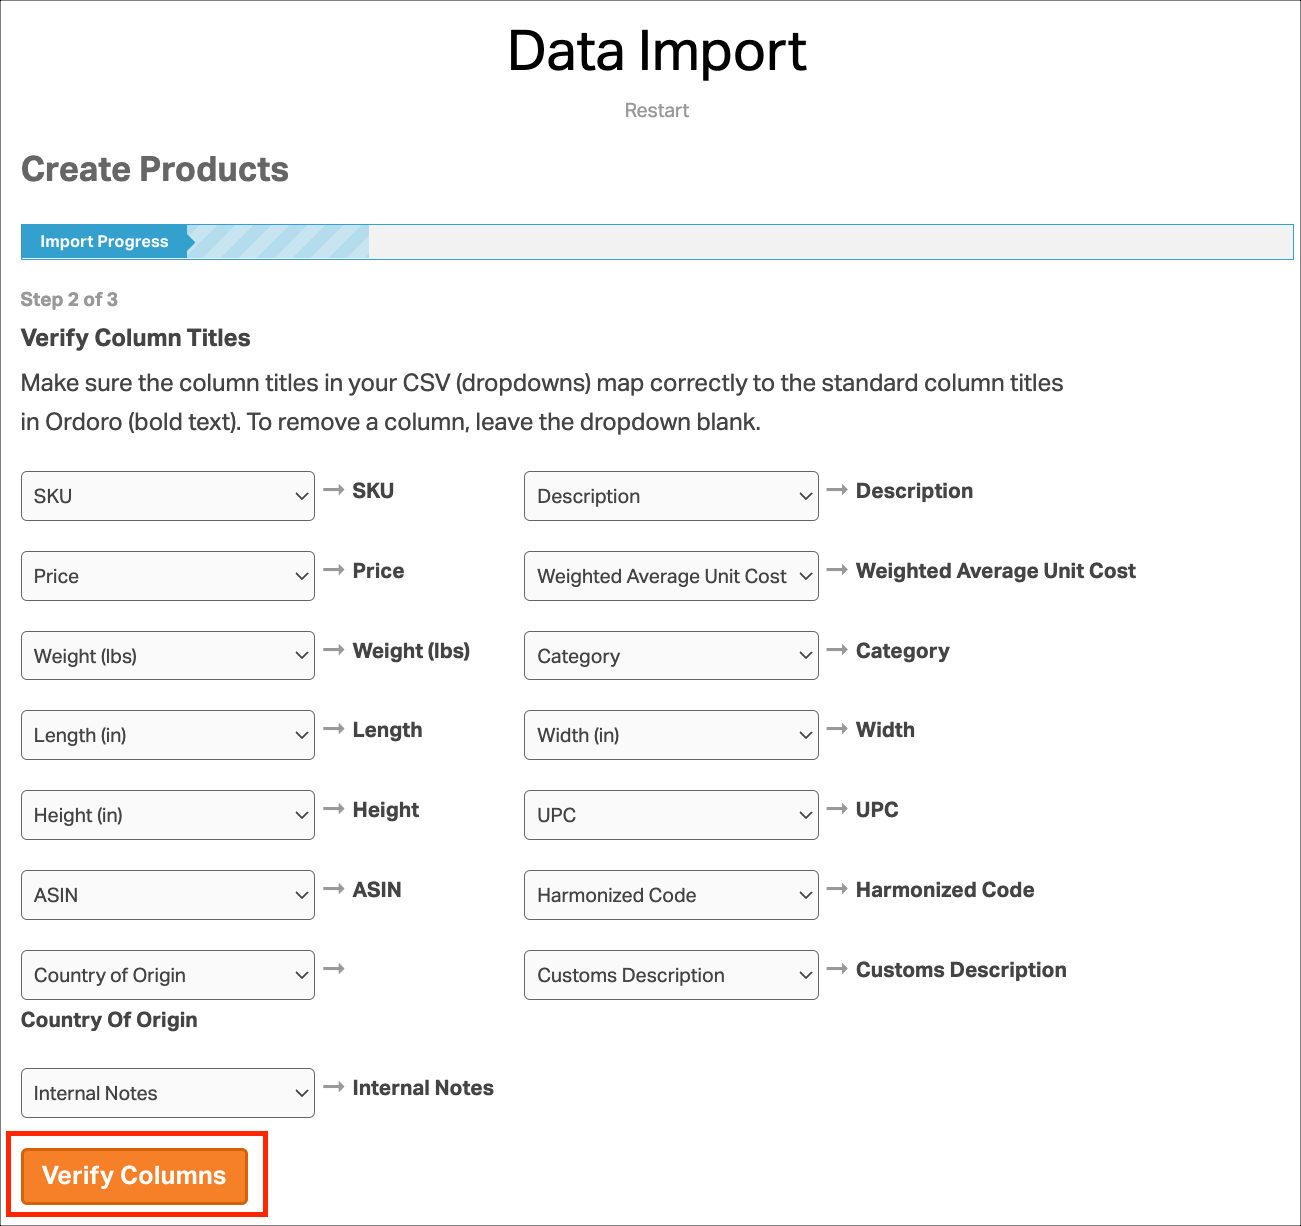
7. Click Verify Columns when you’re ready to upload the file.
- Important: Do not navigate away from the page while the import runs.
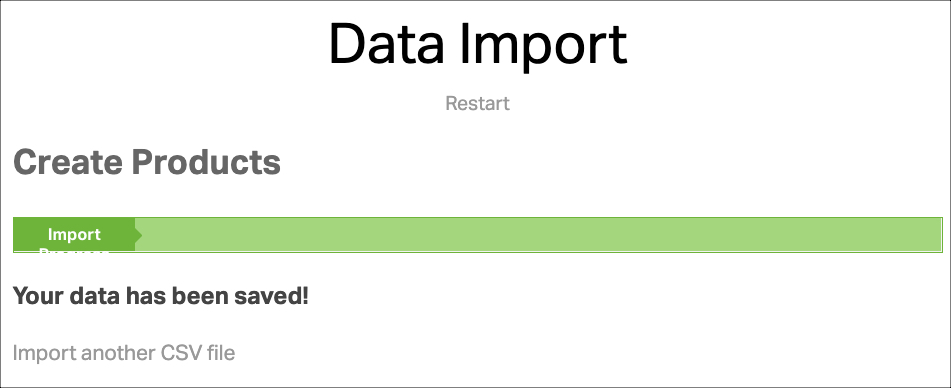
8. You’ll see a green bar once all products are saved.