In this article, we will explain the different components of the orders page.
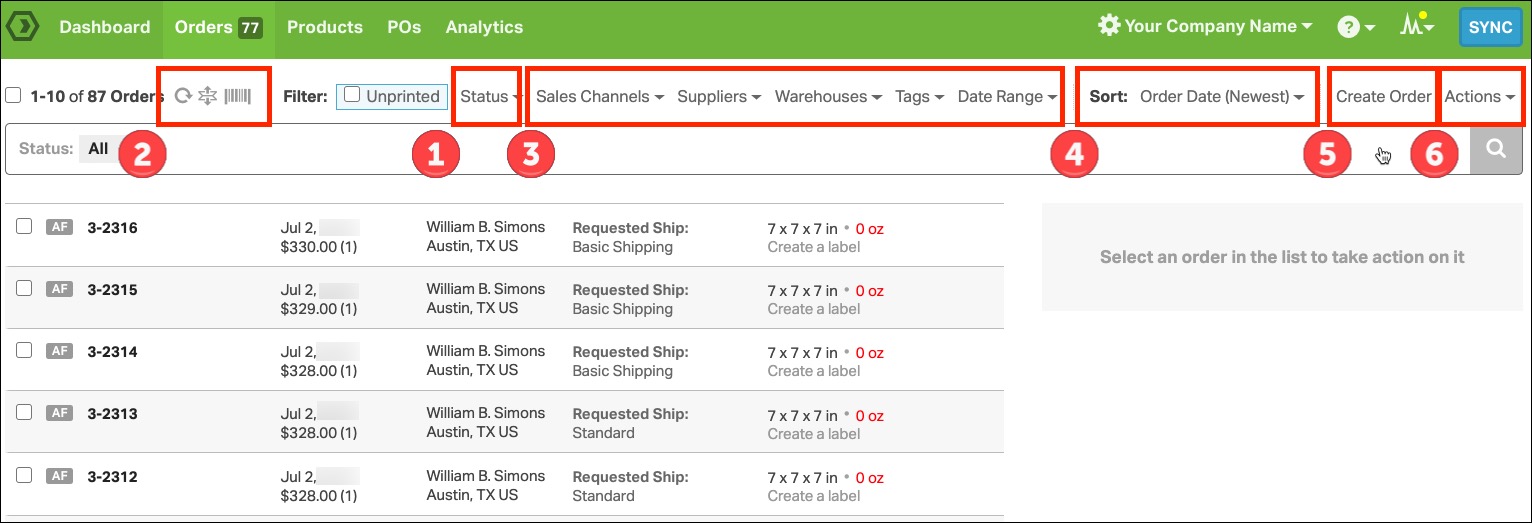
1. This section shows the number of orders in each STATE. See each STATE description below:
- Awaiting Fulfillment – When the order imports from your shopping cart and all automation is applied, the order appears in the Awaiting Fulfillment state
- Shipped – Once the order is wholly shipped out, it will automatically move to the Shipped state
Dropshipment Requested – Once an order is sent to a dropshipper for fulfillment, the order is moved to the Dropshipment Requested state
- Cancelled – When all the lines in the order are cancelled, the order moves to the Cancelled state
- All – This is a catch-all filter that shows all the orders across all different states
2. This section does three things:
- Refresh order list
- Expand/collapse the view of order list
- Barcode Scanning for quality assurance (See this article for more information)
3. This section allows you to filter your orders based on the sales channel, warehouse, tags, or in a given date range.
4. This section allows you to sort your orders based on: Order Date, Ship Date, Dropship Date, Order Value, Order ID, Order Status, Single Item Order, Requested Shipping Method, Shipping Address Name, Shipping Address Zipcode, Billing Address Name, Billing Address Zipcode, or Deliver By Date (only displayed if you have an Amazon or eBay order).

5. Click on the Create Order link to manually create an order in Ordoro (For more information, see this article.)
6. Other Actions changes depending on whether orders are selected or not:
- When no orders are selected, click on the Other Actions section to export all your order data into a CSV (Excel) file or create a Scan/End of Day Form.
- When orders are selected, this option becomes Order Actions and allows you to Mark as Shipped, Split Order, Clone or Cancel Order, etc.