Enhance your e-commerce efficiency by precisely updating product dimensions in Ordoro. Below, you’ll find detailed steps for modifying dimensions on both the Product List and Product Detail pages, crucial for accurate shipping calculations.
This guide focuses on adjusting the dimensions of a single product. If you need to update dimensions for multiple products at once, see our section: How do I update products in bulk?
Topics
- How does Ordoro use product dimensions?
- Update dimensions from the Product List page
- Update dimensions from the Product Detail page
- Additional features in the Dimension Update modal
How does Ordoro use product dimensions?
When an order consists of a single item with a quantity of one, Ordoro automatically uses the saved product’s dimensions and uses them to figure out the size of the package. This means your package sizes are always spot on for shipping, especially for those simple, one-item orders.
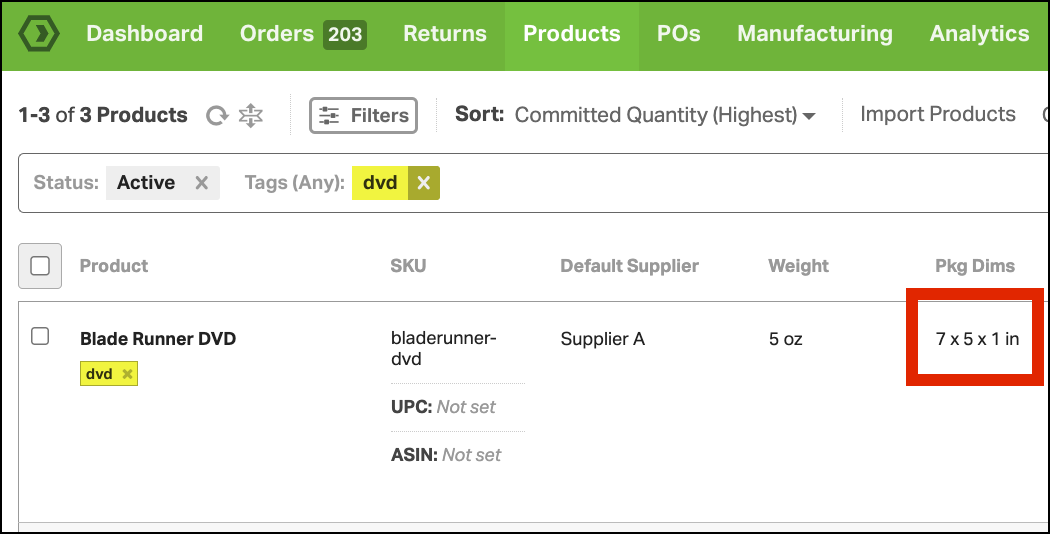
Update dimensions from the Product List page
- Go to the Products page in Ordoro. Search for the item you want to modify.
- Click the Package Dimensions to change it.
- Once you click the dimensions, a modal will appear to update it.
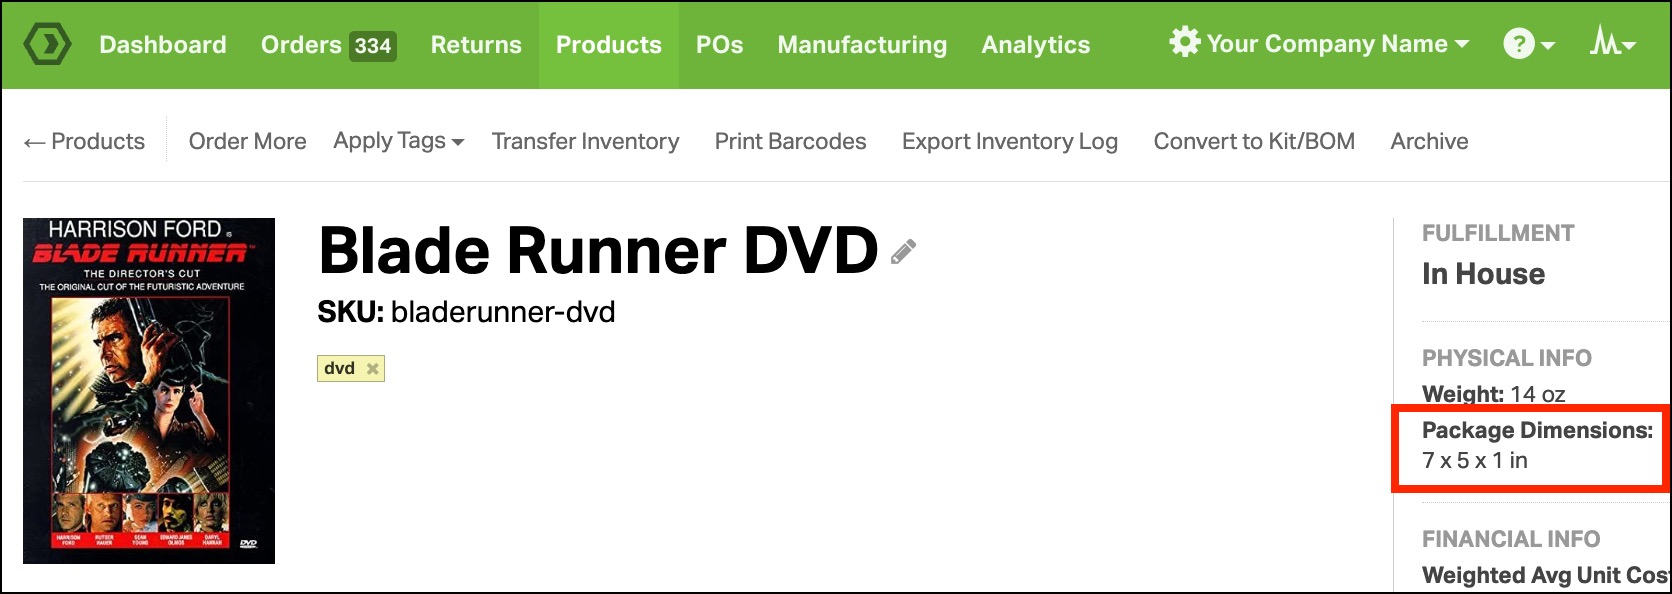
Update dimensions from the Product Detail page
- Go to the Products page in Ordoro. Search for the item you want to modify.
- Click the product name to pull up the Product Detail page.
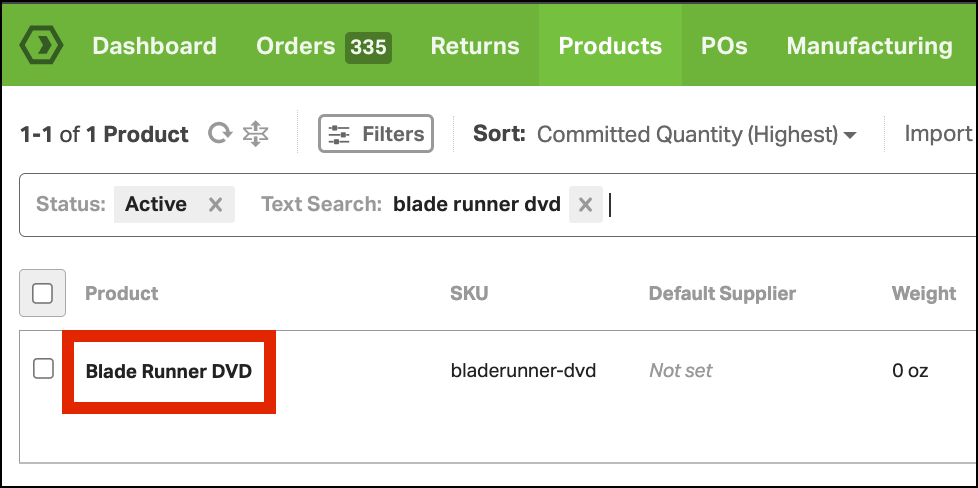
- Select the dimensions. Once you click it, a modal will appear for updating.
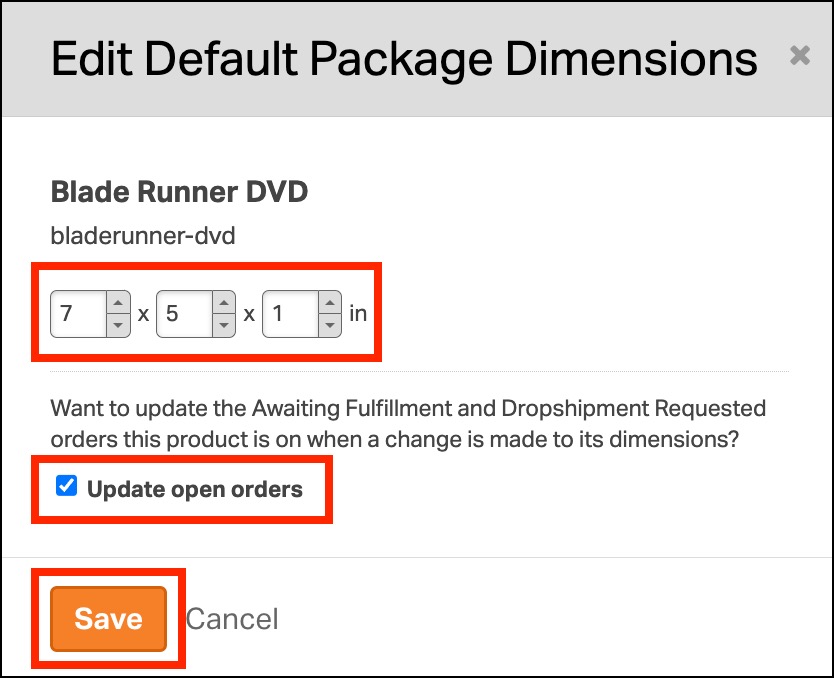
Additional features in the Dimensions Update modal
- In the update modal, there’s a message stating, “Want to update the Awaiting Fulfillment and Dropshipment Requested orders this product is on when a change is made to its dimensions?”
- If you select it, all single-item orders under the Awaiting Fulfillment and Dropshipment Requested filters will automatically use the new product dimensions.
- Example:
- A product had dimensions of 5 x 6 x 2.
- You updated the product dimensions to 7 x 5 x 1.
- All Awaiting Fulfillment + Dropshipment Requested orders with only one item will now change package dimensions.