Yes, you can scan barcodes when creating a goods receipt for a purchase order!
This guide walks you through scanning barcodes for PO goods receipts in Ordoro, adjusting the quantity per scan for bulk receiving, and quickly marking items as received so your purchase orders and inventory remain accurate and up to date.
Topics
Before you start
- Make sure the products on the PO have UPCs / barcodes saved in Ordoro.
- Connect your barcode scanner to your computer, and confirm it’s working in a text field (like Notes) before you start.
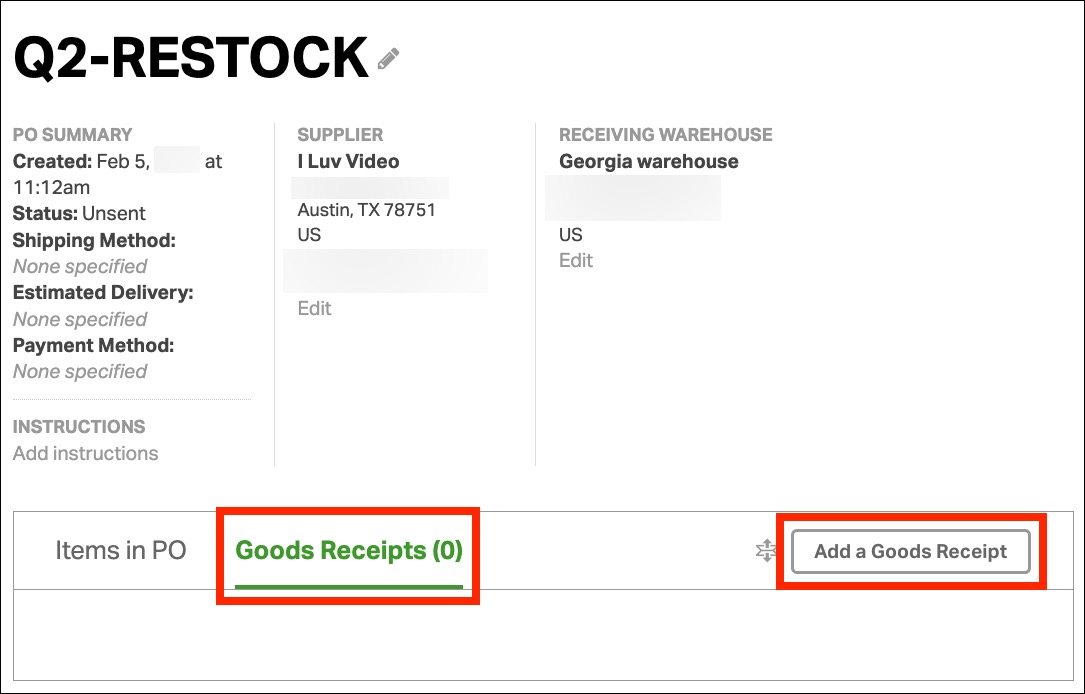
Scan barcodes on a goods receipt
- Go to Purchase Orders.
- Click the PO ID you want to receive.

- Click the Goods Receipts tab.
- Click Add Goods Receipt.
- Scan the barcodes for the items you received.
- When the scan is successful, a confirmation will appear in the top right corner.
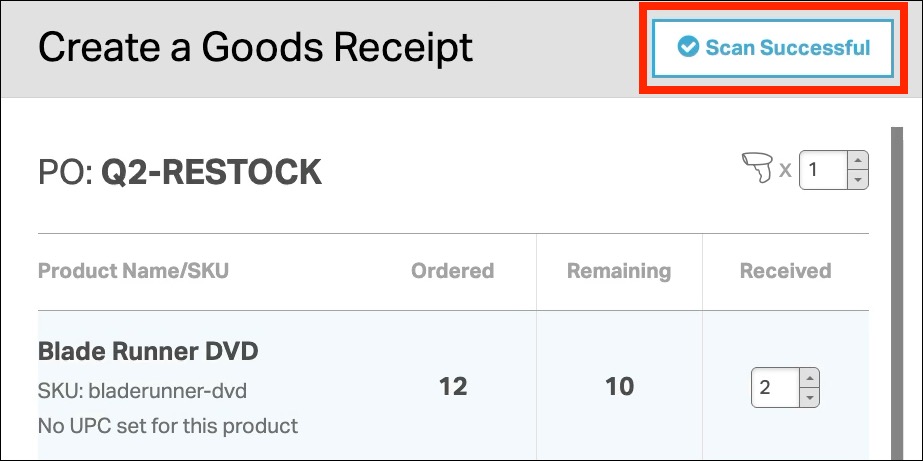
- If you need each scan to add more than one unit, update the quantity per scan next to the barcode scanner icon.
- This controls how many units each scan adds.
- The default is 1 (one scan adds 1 unit).
- Example: set to 5, and each scan adds 5 units.

- When you’re done receiving items, click Save.

- Your goods receipt is saved under that PO and can be reviewed later from the Goods Receipts tab.

Optional: Receive all items at once
If you want to mark everything on the PO as received without scanning:
- In the goods receipt, select the checkbox next to Received.
- Click Save.
