Creating return labels in Ordoro is a straightforward process that allows you to generate labels for domestic shipments across major carriers such as USPS, UPS, FedEx, DHL, and Canada Post (for commercial contract accounts only). This support article guides you through the steps to create a return label and addresses billing concerns related to these labels.
For international return labels, please read this support article.
Topics
Creating a Return Label
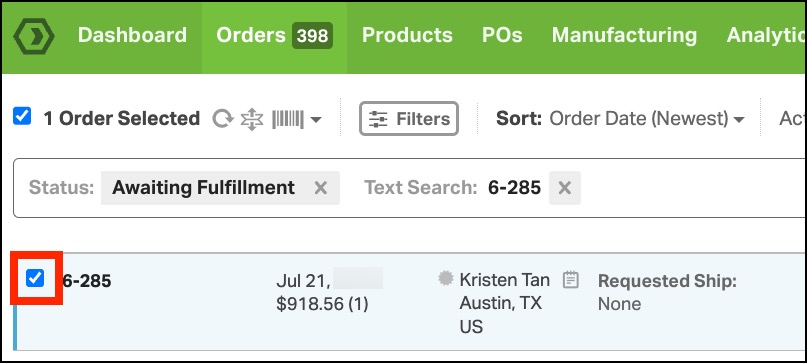
- In the Orders tab, select the order you wish to create a return label for.
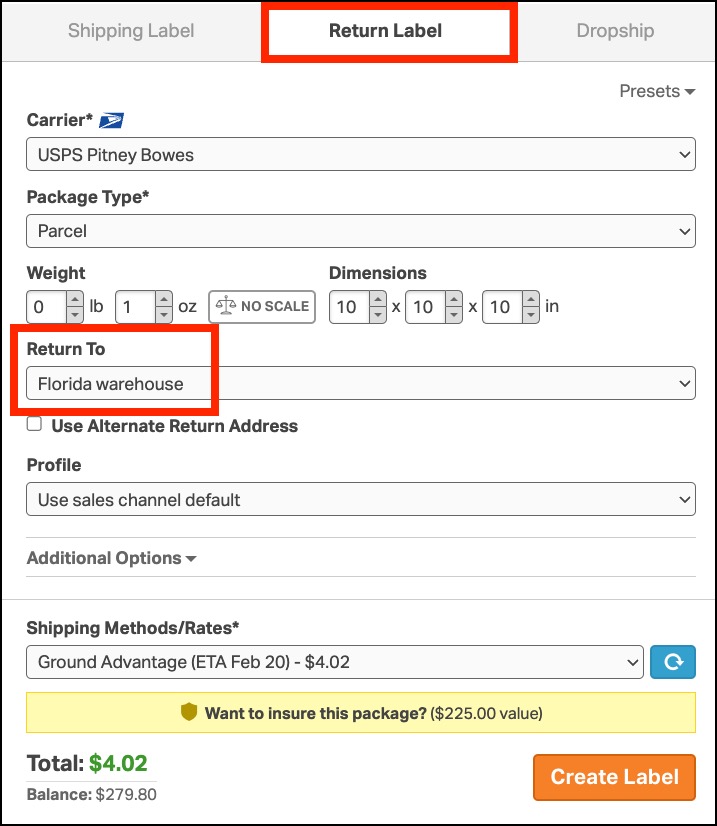
- In the Shipping Label panel, switch to the Return Label tab.
- Here, you can set the shipping parameters for the return label.
- If your business operates from multiple warehouses, you have the option to assign a different Return To warehouse, rather than having the item shipped back to the originating warehouse.
3. Click Create Label to generate the label.
4. Select the Print option, then View the label PDF to open the return label.
- You can save this label to your desktop and email it to your customer.
- Alternatively, access the return label later by navigating to the specific order and clicking on View Return Label.
When will I be charged for a Return Label?
- UPS, FedEx, Canada Post, and DHL: You will be invoiced for the return label only once it is used by the customer.
- USPS: You will be charged upon label creation, regardless of whether the label is used by the customer or not.
FAQs
Q: Can I create international return labels in Ordoro?
A: For information on creating international return labels, please read this support article.
Q: What if I want the return to go to a different warehouse?
A: When setting up the return label, you can choose a different Return To warehouse if you prefer not to have the item sent back to the originating warehouse.


