With barcode presets, processing orders is now faster and simpler than ever! This tool allows you to create and print scannable barcodes that apply your favorite presets instantly with just a scan; say goodbye to extra clicks! Here’s a quick guide to setting up and using barcode presets to make order management a breeze.
Topics
Create the Barcode Presets
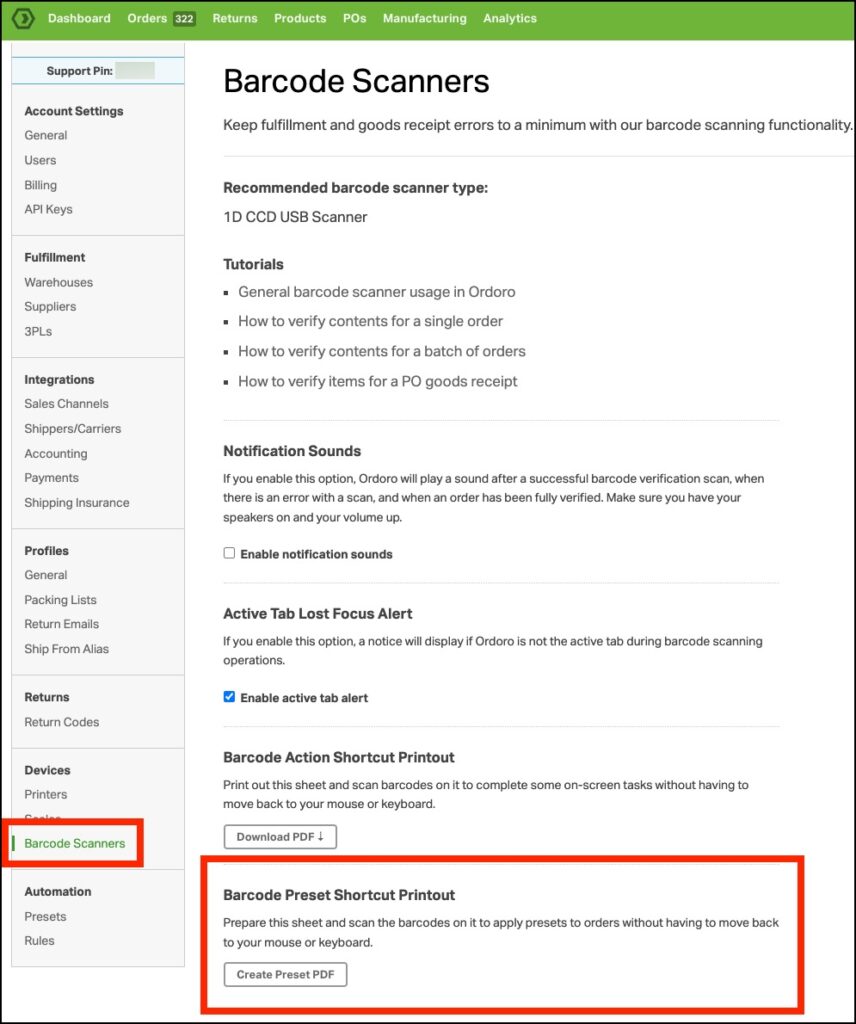
- To get started, head to Settings -> Barcode Scanners. Then, view the section titled Barcode Preset Shortcut Printout.
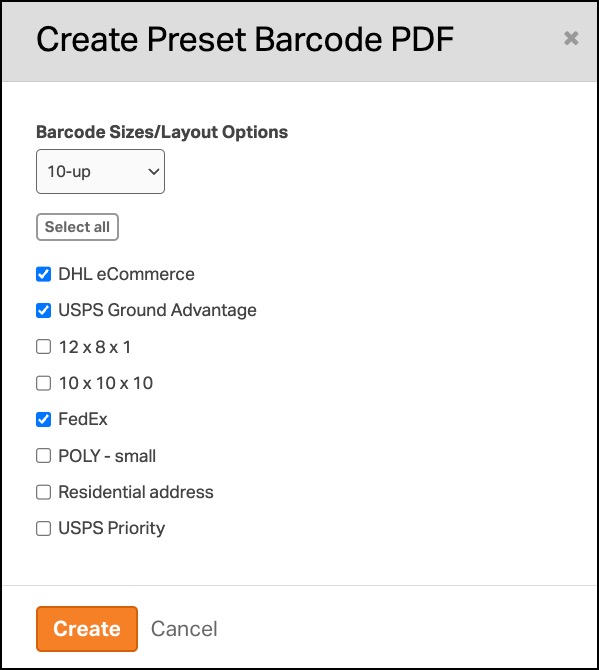
- Once you click Create Preset PDF, a pop-up window opens where you can customize your barcode printout. You can choose your preferred barcode sizes, and the presets you want to include.
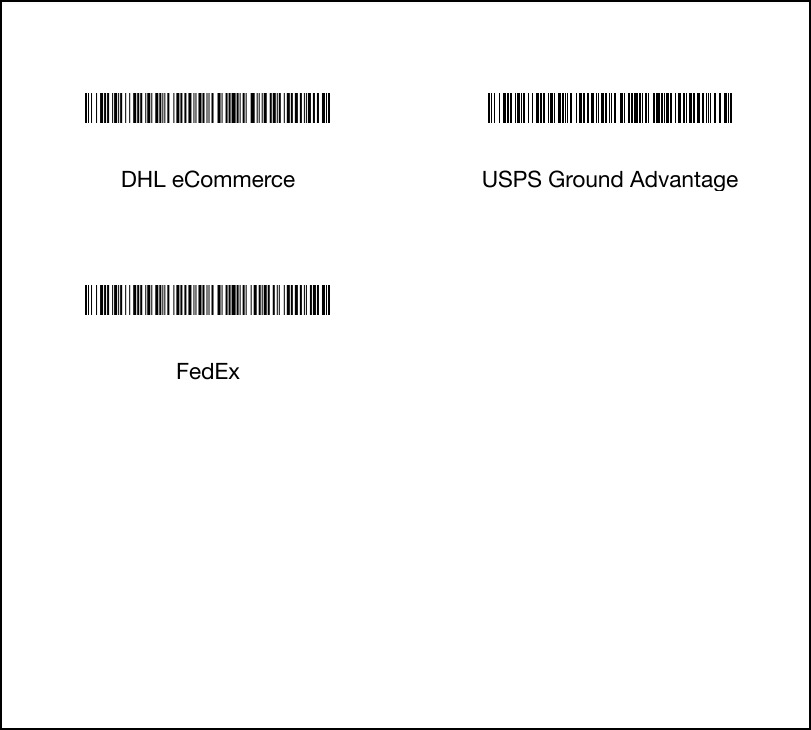
- When ready, click Create, and a new tab will open with all your selected barcodes ready for printing. On the Orders page, scanning these barcodes allows you to apply actions to an order or group of orders instantly!
Frequently Asked Questions (FAQ)
1. Can I arrange the order of the preset barcodes?
Yes! Select the presets in the order you’d like them to appear on the printout, and they’ll be arranged that way.
2. What happens if I delete a preset?
If you scan the barcode for a deleted preset, the order will not be affected since the preset no longer exists.
3. What happens if I rename a preset?
The renamed preset will still work as expected when scanned. However, to avoid any confusion, we recommend regenerating a new printout.
4. What happens if I modify a preset’s settings but not its name?
The updated settings automatically apply when you scan the barcode, so you’re good to go!


