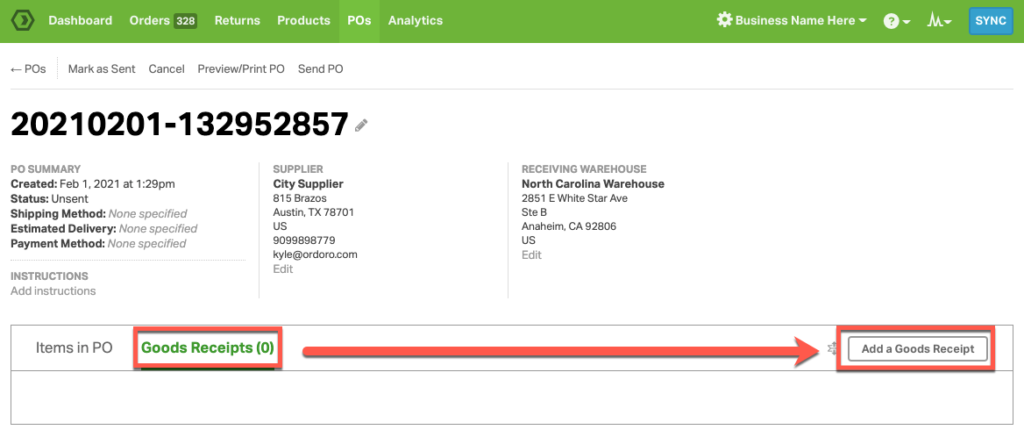
After you’ve sent the PO to your supplier and received the products, you can create a goods receipt. The goods receipt will help close out the PO as well as update your inventory quantities.
1. To create a goods receipt, go back to the PO detail page and select the Goods Receipts tab and then select Create Goods Receipt.
2. To mark a product as received, enter the quantity received in the goods receipt modal.
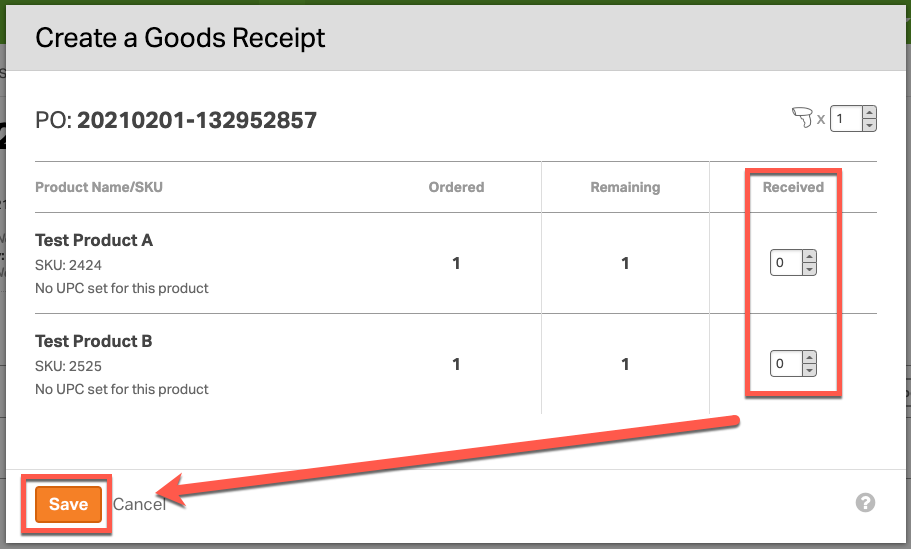
- If all product quantities ordered are entered in the goods receipt, then the PO status will change to “Received”.
- If some of the product quantities ordered are entered in the goods receipt, then the PO status will be “Partially Received”.
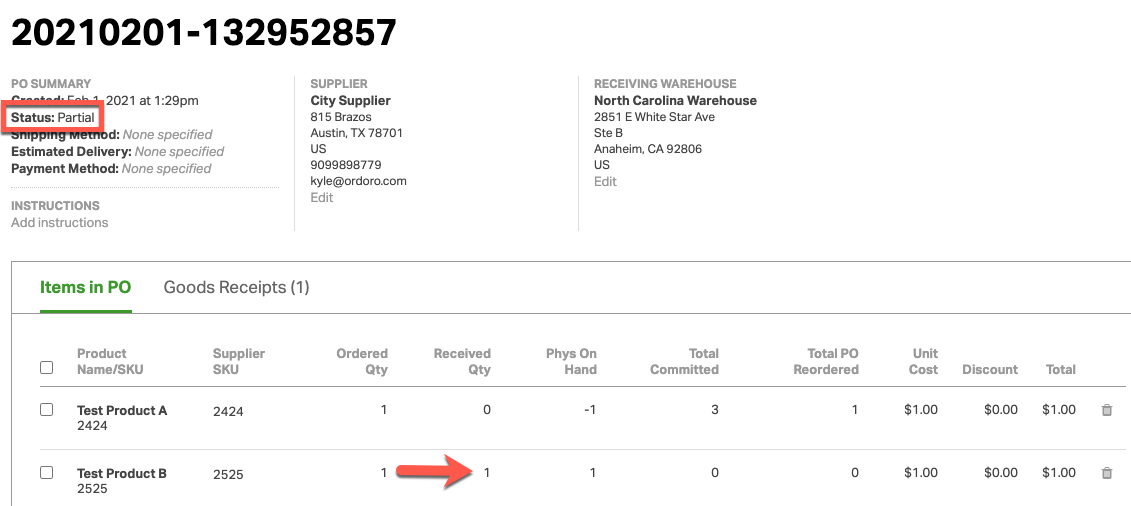
3. You can also add additional goods receipts if items are received at a later date.
If you have any questions, please feel free to contact us. Thanks!