Managing your Bill of Materials (BOM) efficiently is crucial for inventory control. In Ordoro, you can create or update BOM products and their components in bulk using a CSV file. This streamlined process allows you to add, modify, or remove child SKUs with ease. Follow this guide to learn how to bulk update your BOMs in Ordoro.
Topics
- Accessing the Data Import Page
- Downloading the Example File
- Understanding the SKU Field
- Updating BOMs in Bulk
- Uploading Your Updated File
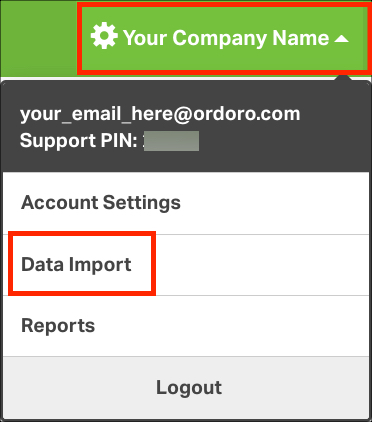
Accessing the Data Import Page
- Click on your business name in Ordoro.
- Select Data Import from the dropdown menu.
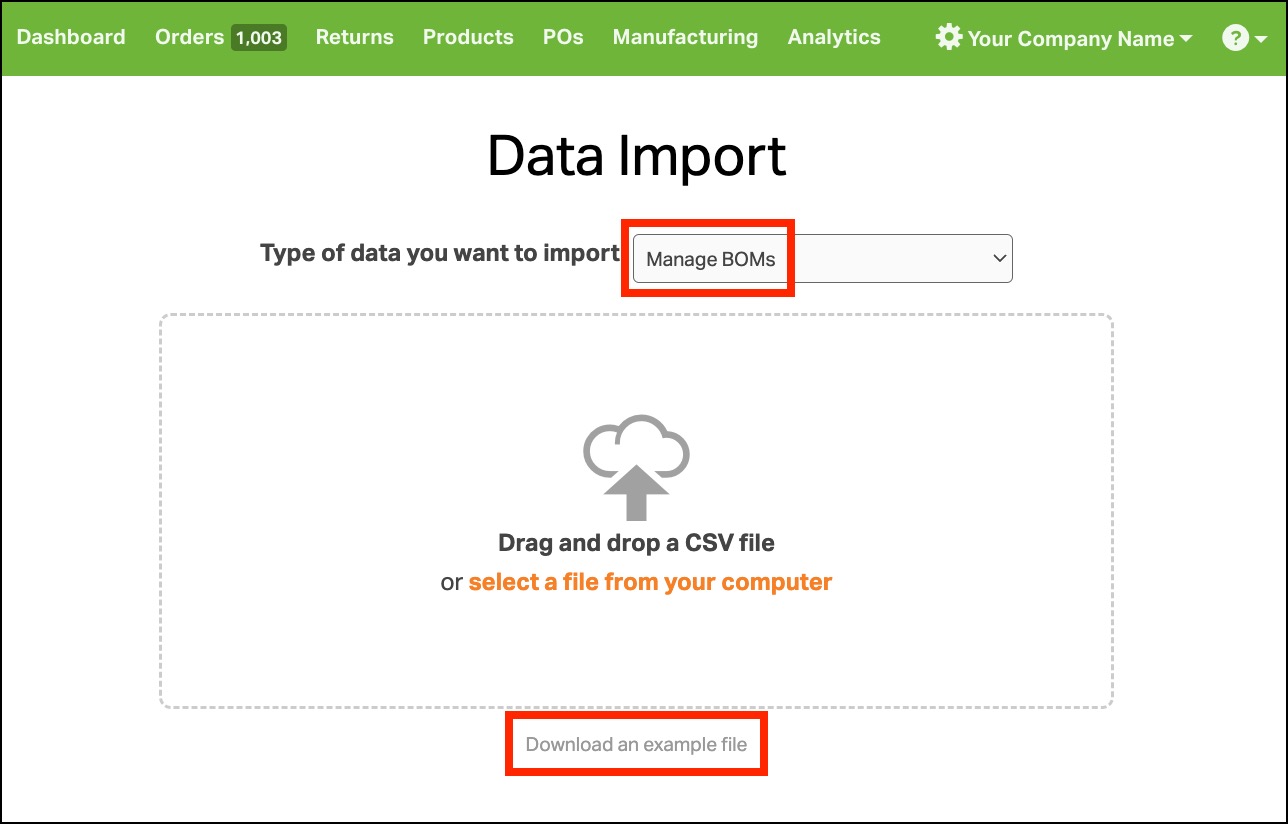
Downloading the Example File
- On the Data Import page, select Manage BOMs from the dropdown list.
- Click Download an example file.
- Open the downloaded file, which is a template for updating your BOMs in bulk.
Understanding the SKU Field
- The SKU field is required for all actions while updating BOMs.
- This field refers to the BOM SKU (Parent SKU) in Ordoro.
- You must ensure that each SKU is correctly referenced in the file.
Updating BOMs in Bulk
There are three primary actions you can take when updating BOMs in bulk:
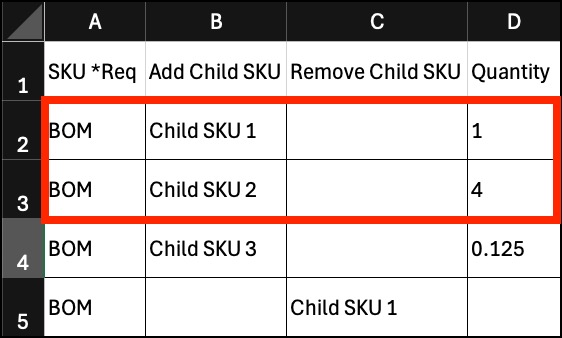
Creating a BOM Connection
- To create a BOM or add a component to an existing BOM, add a row with:
- BOM SKU (Parent SKU)
- Child SKU
- Quantity required
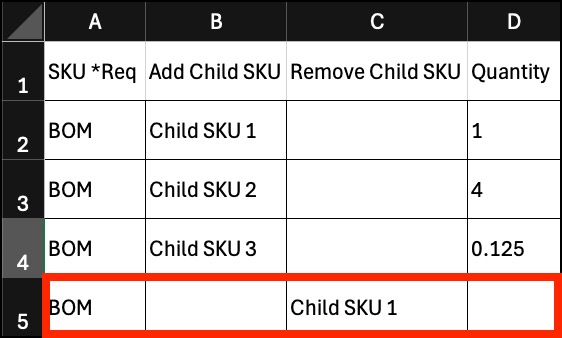
- Example:
- Row 2: Creates a BOM with Parent SKU = BOM and Child SKU = 1 (Quantity = 1).
- Row 3: Adds Child SKU 2 to the same BOM.
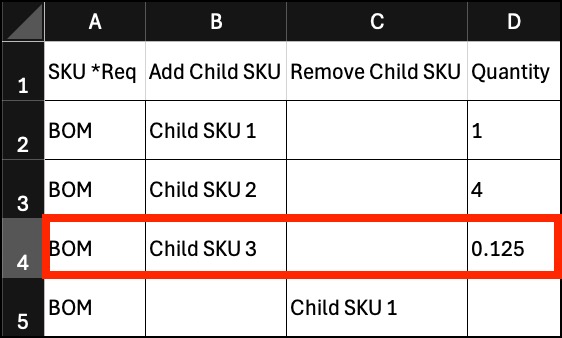
Updating Quantity Required
- You can modify the quantity required for a component.
- Example:
- Row 4: Updates Child SKU 3 quantity from 1 to 0.125.
Removing a Component
- To remove a component from a BOM:
- Enter the BOM SKU (Parent SKU) and Child SKU to be removed.
- Ensure the Add Child SKU and Quantity fields are left blank.
- Example:
- Row 5: Removes Child SKU 1 from Parent BOM SKU.
Uploading Your Updated File
- Save your updated file as a CSV file.
- Return to the Data Import page.
- Ensure Manage BOMs is selected in the dropdown before uploading.
- Use the drag-and-drop feature or manually select the file from your computer.
Verifying and Saving the Data
- Double-check column titles in the black bar.
- Click Verify Columns.
- Choose your saving method:
- Save All: Upload the data without previewing.
- Preview Each Entry: Review each row before saving.
- Save Entry: Save individual rows manually.
Handling Errors
- If there are errors, affected rows will be highlighted in red.
- Click Show Errors at End to view issue details.
- Click Start Over if you need to edit and re-upload the CSV file.
- Refresh the Ordoro page to see the updated BOMs.