The Advanced plan in Ordoro has access to the following Data Import options. To see which fields are available to update for each option, see this support article. To learn how to use the Data Import Tool, see this support article.
- Create Products
- Update Product
- Create Orders
- Create Tracking Numbers
- Update Inventory
- Create Addresses
- Archive Products
- Unarchive Products
- Update Product/Sales Channel Bridge
- Update Product Image
- Manage Product Tags
How to use the Data Import Tool
See below to learn how to use the Data Import Tool with the Update Inventory option.
- Click on the company name in the top-right corner of Ordoro and select Data Import in the dropdown menu.

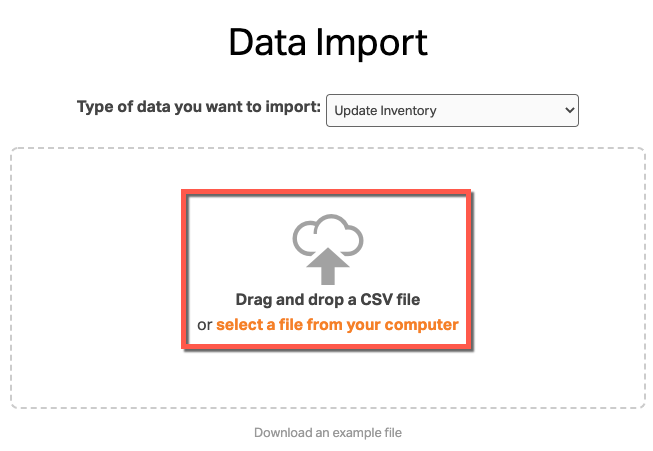
2. Select Update Inventory from the dropdown menu. Click on Download an example file.

3. Open the example file in Excel or Google Sheets. Set the SKUs, Warehouse, and Location In Warehouse in the CSV file. Save the file as a CSV.
IMPORTANT: If you are not updating certain columns, delete the entire column from file. If the value is left blank, it will overwrite the information in Ordoro with a blank value.

4. Upload the file into the Data Import Tool.
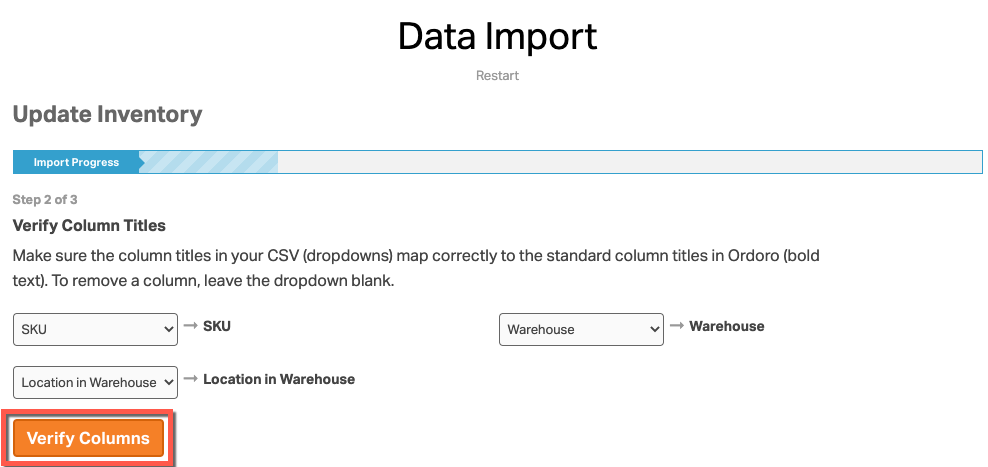
5. Map the columns headers to the fields in Ordoro. Click Verify Columns.
6. If you want to save your data without previewing it, click Save All.
- To see each row before saving, click Preview Each Entry.
- To save one entry at a time, click Save Entry while previewing.
- To see the errored information at the end of the upload, click Show Errors at End.
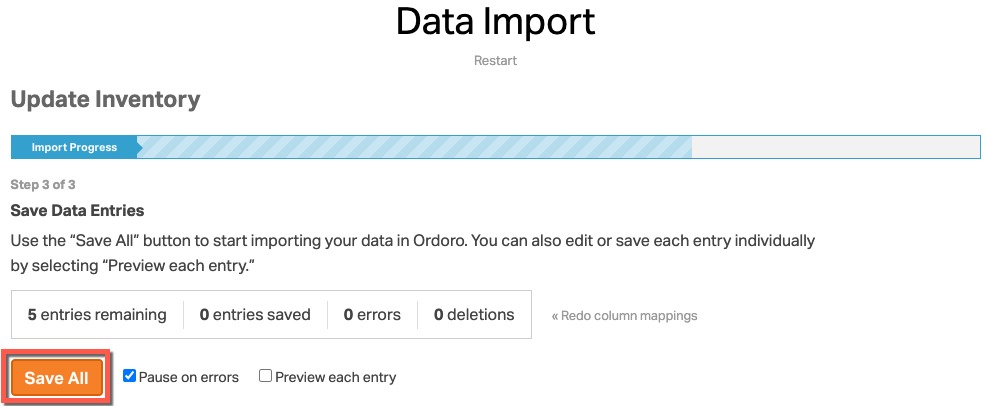
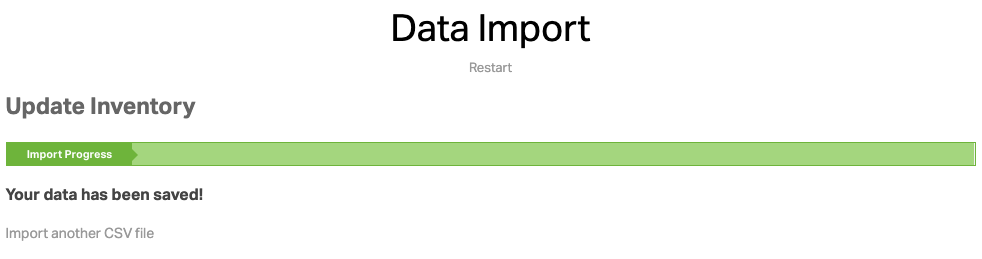
7. The data import is complete when this screen displays.
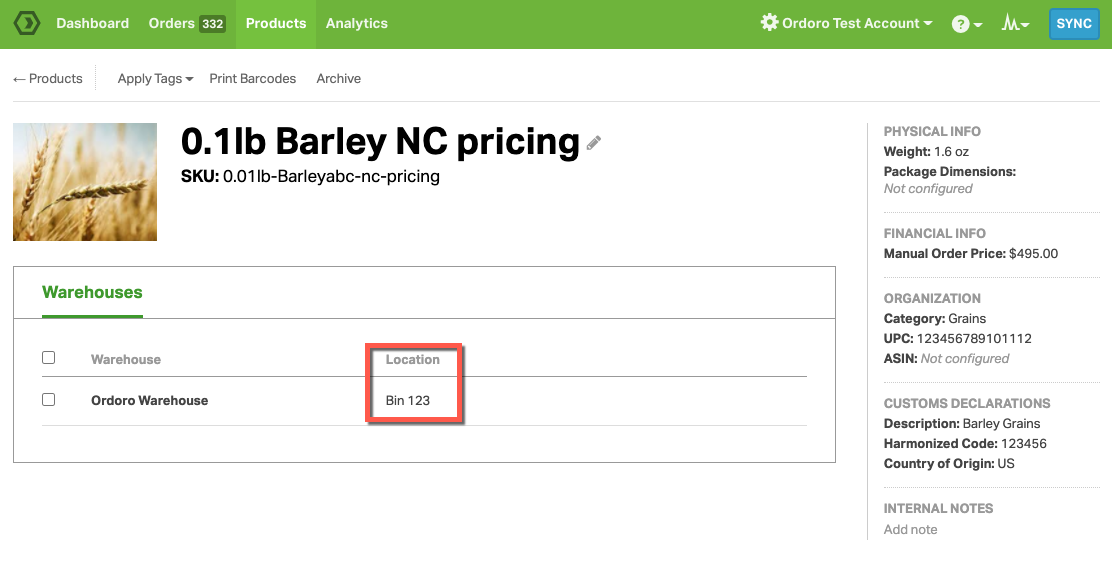
7. You will see that the product’s Location In Warehouse will updated on the Product Detail Page.