You can update and customize your packing lists in Ordoro to help equip your customer-facing documentation.
Topics
- How to set up your Packing List Profile
- How to add more Profiles
- How the Packing List appears with your settings
- How to select Packing Lists when shipping orders
How to set up your Packing List Profile
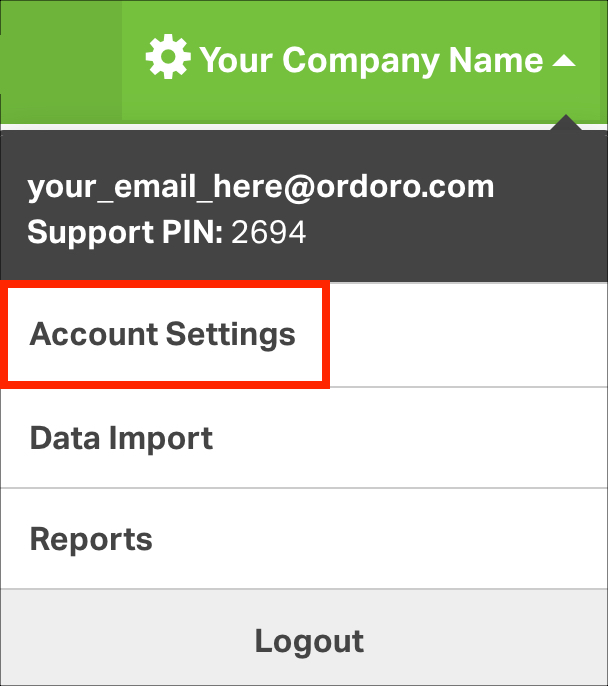
1. Click on your Company Name -> Account Settings.
2. Go to Profiles -> General or directly to this link.
3. Click Edit next to the existing Packing List or Create a new profile if you’d like to add a second profile.

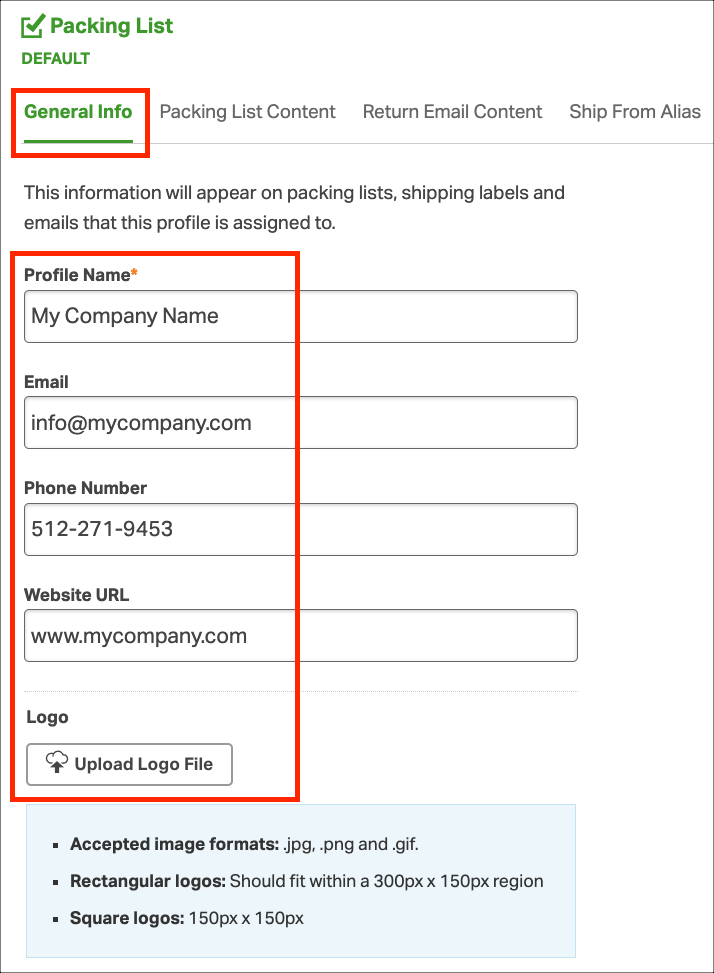
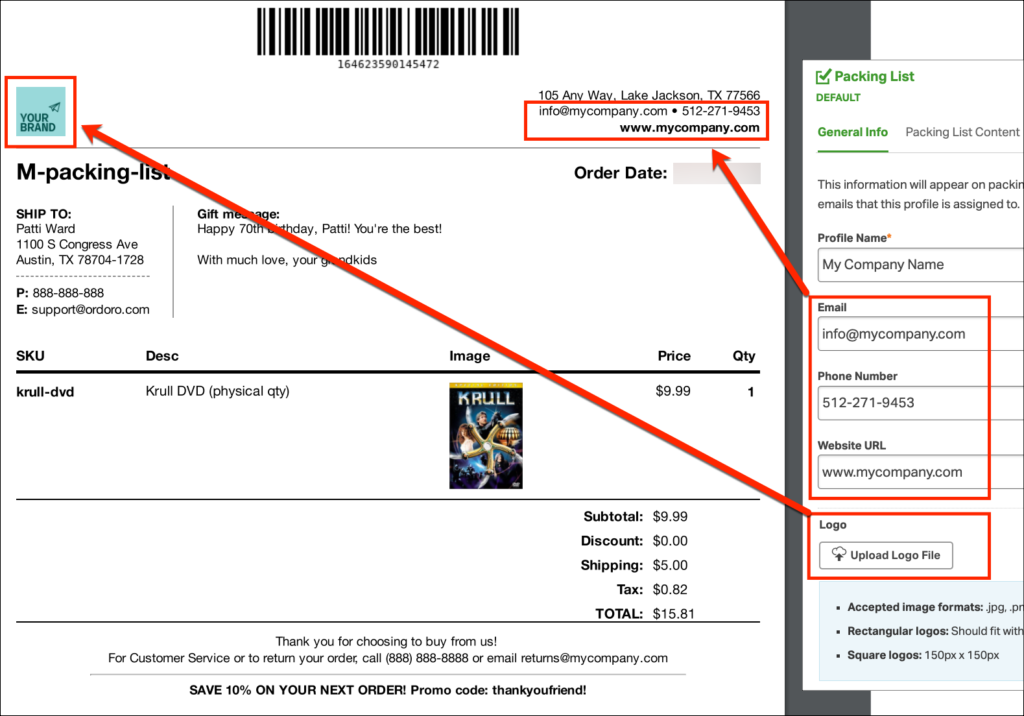
4. Enter the General Info.
This is standard info for the Profile and may also appear on the Packing List.
- Profile Name: This is how the Profile is referenced in Ordoro. It does not appear on the Packing List.
- Email, Phone Number, Website URL: These will appear on the Packing List.
- Logo: This logo will appear on the Packing List and shipping label if selected.
- See this support article for details about how the logo appears on the label.
- Accepted image formats: .jpg, .png, and .gif.
- For optimal scaling:
- Rectangular logos: Should fit within a 300px x 150px region.
- Square logos: Should fit within 150px x 150px.
- Click Save.
- See how this information will appear here.
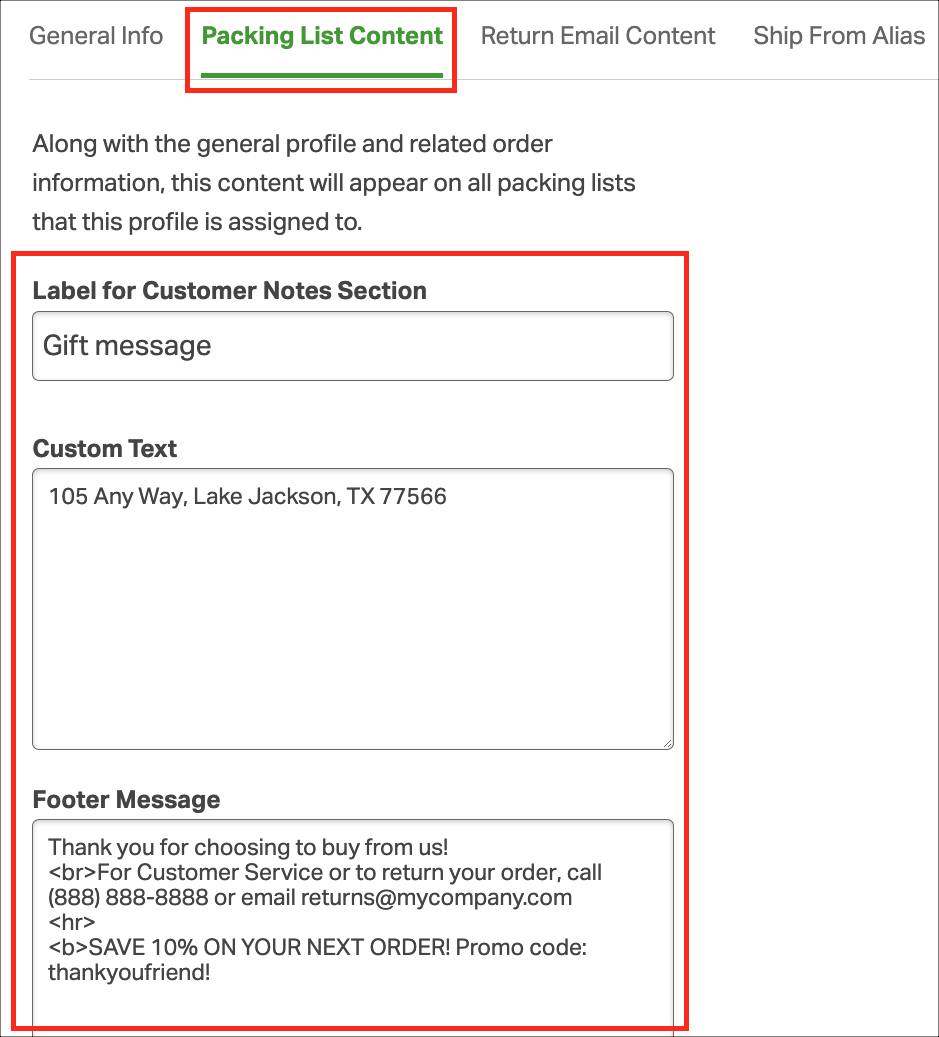
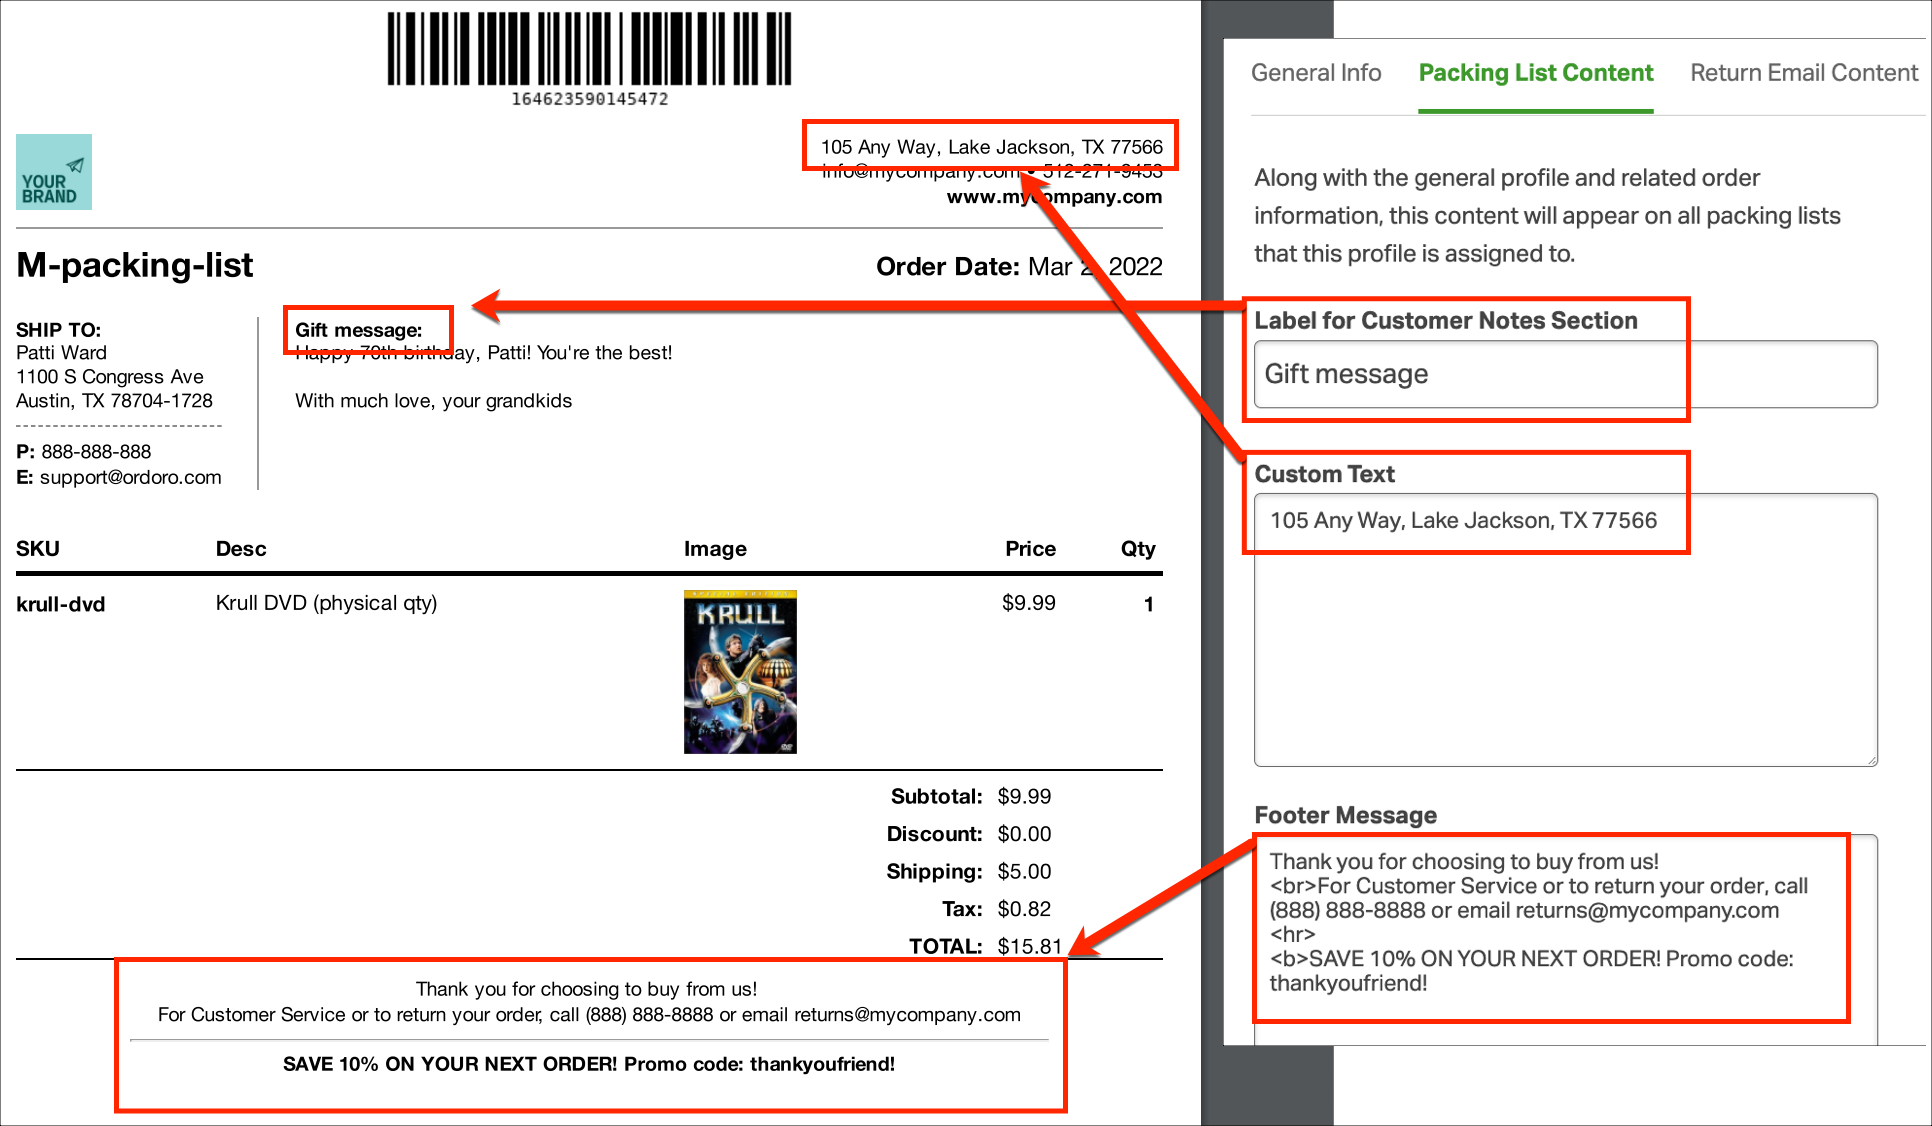
5. Enter Packing List Content.
This is optional content that will appear on the Packing List. Both the Custom Text and Footer Message support basic HTML. See details here.
- Label for Customer Notes: This replaces the Customer Notes field on the packing slip with the text you enter here. For example, you may want to change this to “Gift Message.”
- Custom Text: This will appear at the top of the Packing List.
- Suggested text: Your company tagline, address, etc.
- Footer Message: This will appear at the bottom of the Packing List.
- Suggested text: Customer service phone/email, return instructions, etc.
- Click Save.
- See how this information will appear here.
How to add more Profiles
1. To create additional Packing Lists for other sales channels, click Create a new profile. See the screenshot below.
2. At least one Packing List must be the default and is automatically assigned to all orders. Rules and sales channel settings can change this.

How the Packing List appears with your settings
How the General Info appears. Click to expand the image.
How the Packing List Content appears. Click to expand the image.
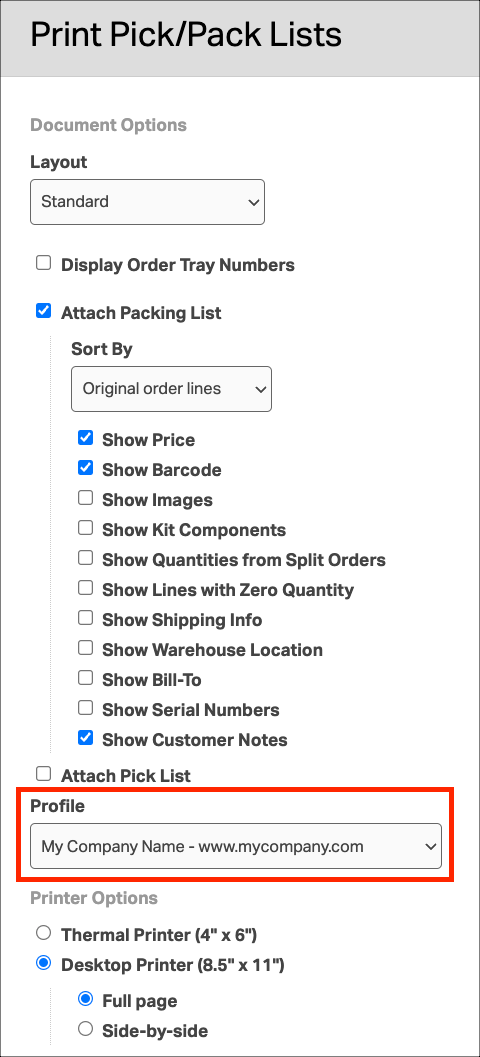
How to select Packing Lists when shipping orders
If you have more than one Profile, you can select which one to apply to orders. There are two ways to choose. You may want to default your packing list to specified Sales Channels if you market to your sales channels differently. Click here for instructions.
1. When creating the shipping label, click the Profile in the dropdown.

2. When printing Packing Lists, choose the Profile before generating the PDF.