Overview
Setting the Low Stock Threshold is a key part of monitoring inventory for reordering products. If you have an inventory management Ordoro Account, you can schedule Low Inventory reports to be emailed automatically.
Refer to this help article for instructions on how to set the Low Stock Threshold for your products.
Topics
What will be contained in the report in the notification email?
- Email subject line: [Low Stock Report] ### products have low inventory
- ### = number of products in low inventory.
- The report will include a row per warehouse per product that has met the Low Inventory threshold.
- If the item is in multiple warehouses, there will be a separate row for each product + warehouse that is less than the threshold.
- Only handled in-house products will be included (not dropshipped, or automatically dropshipped.)
- By default, Kit SKUs are not included, but there is an option to add them.
- The emailed report will be in .csv format with the following headers.
- SKU
- Product Name
- Physical On Hand
- Available On Hand
- Committed
- Reordered
- Default Supplier
- Warehouse Low Stock Threshold
- Location In Warehouse
- Warehouse Name
- Product Tags
How do I set up a Low Inventory report?
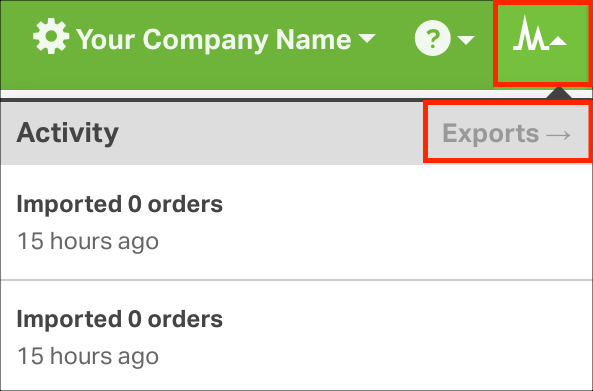
1. Go to your Activity Menu -> Exports.
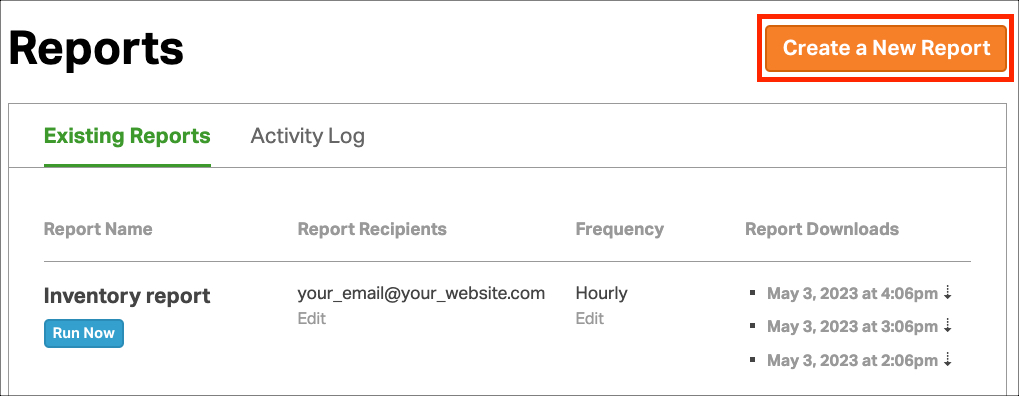
2. Click on Create a New Report.
3. Under Report Type select Export Low Inventory.
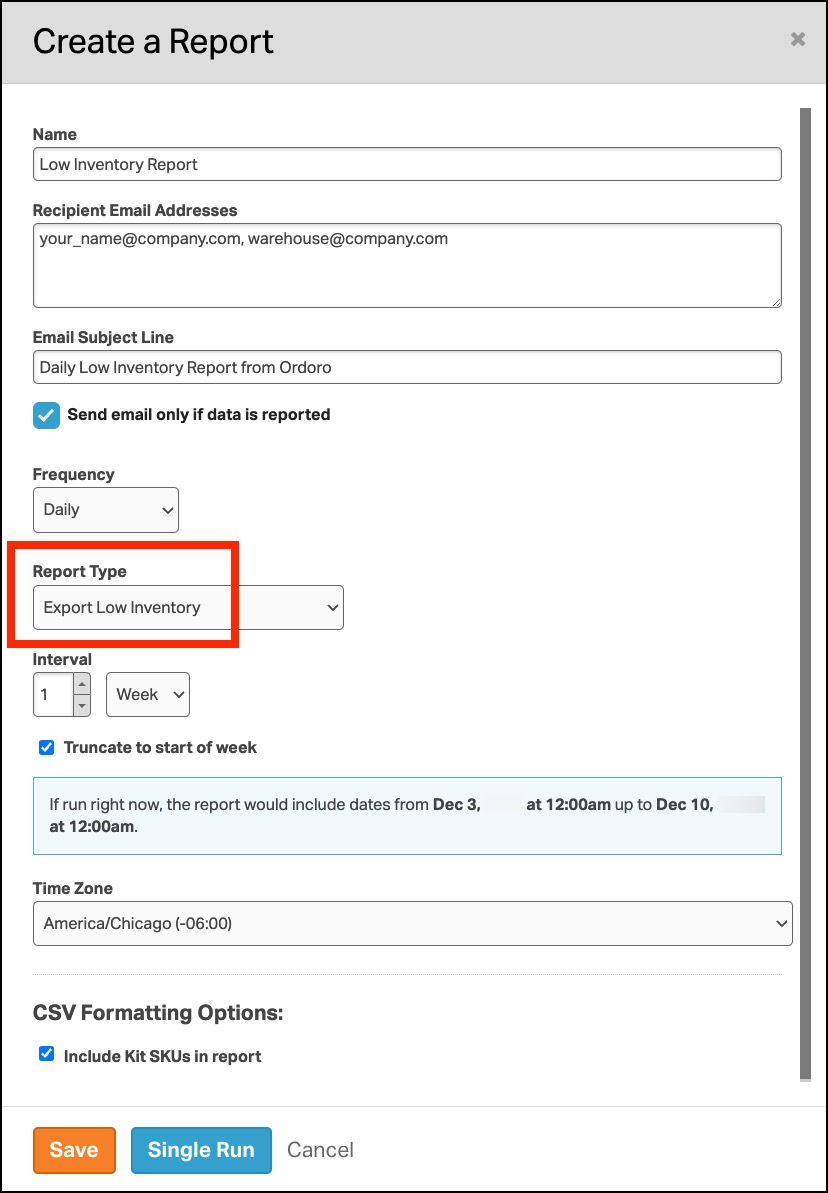
4. Fill in the following fields in the modal.
- Name
- Enter the name you’d like for this report.
- Example: Low Inventory Report
- Recipient Email Addresses
- Enter the email(s) to receive the report. For a list of emails, use a comma to separate them.
- Email Subject Line
- Customize the subject line of the report email.
- Send email only if data is reported
- If selected, an email will only be sent if there are report results.
- Example: If no orders shipped within the specified timeframe, the report won’t deliver as there aren’t any results.
- If you wish to receive a report, even if there are zero results, do not select the checkbox.
- Report Type
- Choose Export Low Inventory
- Frequency
- The reports will initiate at varying times within the hour, determined by the last digit of your Support pin.
- The list below shows when the report will begin generating:
- Support pin ends in 0 = minute 0 (e.g., 12:00)
- Support pin ends in 1 = minute 6 (e.g., 12:06)
- Support pin ends in 2 = minute 12 (e.g, 12:12)
- Support pin ends in 3 = minute 18 (e.g., 12:18)
- Support pin ends in 4 = minute 24 (e.g., 12:24)
- Support pin ends in 5 = minute 30 (e.g., 12:30)
- Support pin ends in 6 = minute 36 (e.g., 12:36)
- Support pin ends in 7 = minute 42 (e.g., 12:42)
- Support pin ends in 8 = minute 48 (e.g., 12:48)
- Support pin ends in 9 = minute 54 (e.g., 12:54)
- The list below shows when the report will begin generating:
- Frequency Options:
- Not Scheduled
- Hourly
- Daily
- The timing is based on 12:00am UTC.
- The report may run on the previous day, based on your time zone.
- Example: 12:00am UTC on Wednesday = 7:00pm CST on Tuesday.
- Weekly: runs on Sundays
- The timing is based on 12:00am UTC.
- The report may run on Saturday instead, based on your time zone.
- Example: 12:00am UTC on Sunday = 7:00pm CST on Saturday.
- Monthly: runs on the 1st of the month
- The timing is based on 12:00am UTC.
- The report may run on the final day of the previous month, based on your time zone.
- Example: 12:00am UTC on the 1st = 7:00pm CST on the last day of the previous month.
- The reports will initiate at varying times within the hour, determined by the last digit of your Support pin.
- Interval
- Interval Options:
- Specific Date Range
- Hour
- Day
- Week
- Month
- If you select Hour, Day, Week, or Month – then Ordoro uses your current time to run the report.
- Example: if the current time is 9:18am, selecting “Hour” will return results from 8:18am to 9:18am.
- Truncate to start of hour / day / week / month
- By selecting this option, the report will run from the start of the chosen interval (minute 0) to the end of the same interval (minute 0).
- Example: if the current time is 9:18pm, selecting the truncate option will return results from 8:00am to 9:00am.
- Interval Options:
- Time Zone
- CSV Formatting Options -> Include Kit SKUs in report
- If selected, then kits will appear in the report.
- If not selected, then kits will not be included in the report. This is helpful if you just want to see standard products and kit components in your results.
- Save / Single Run
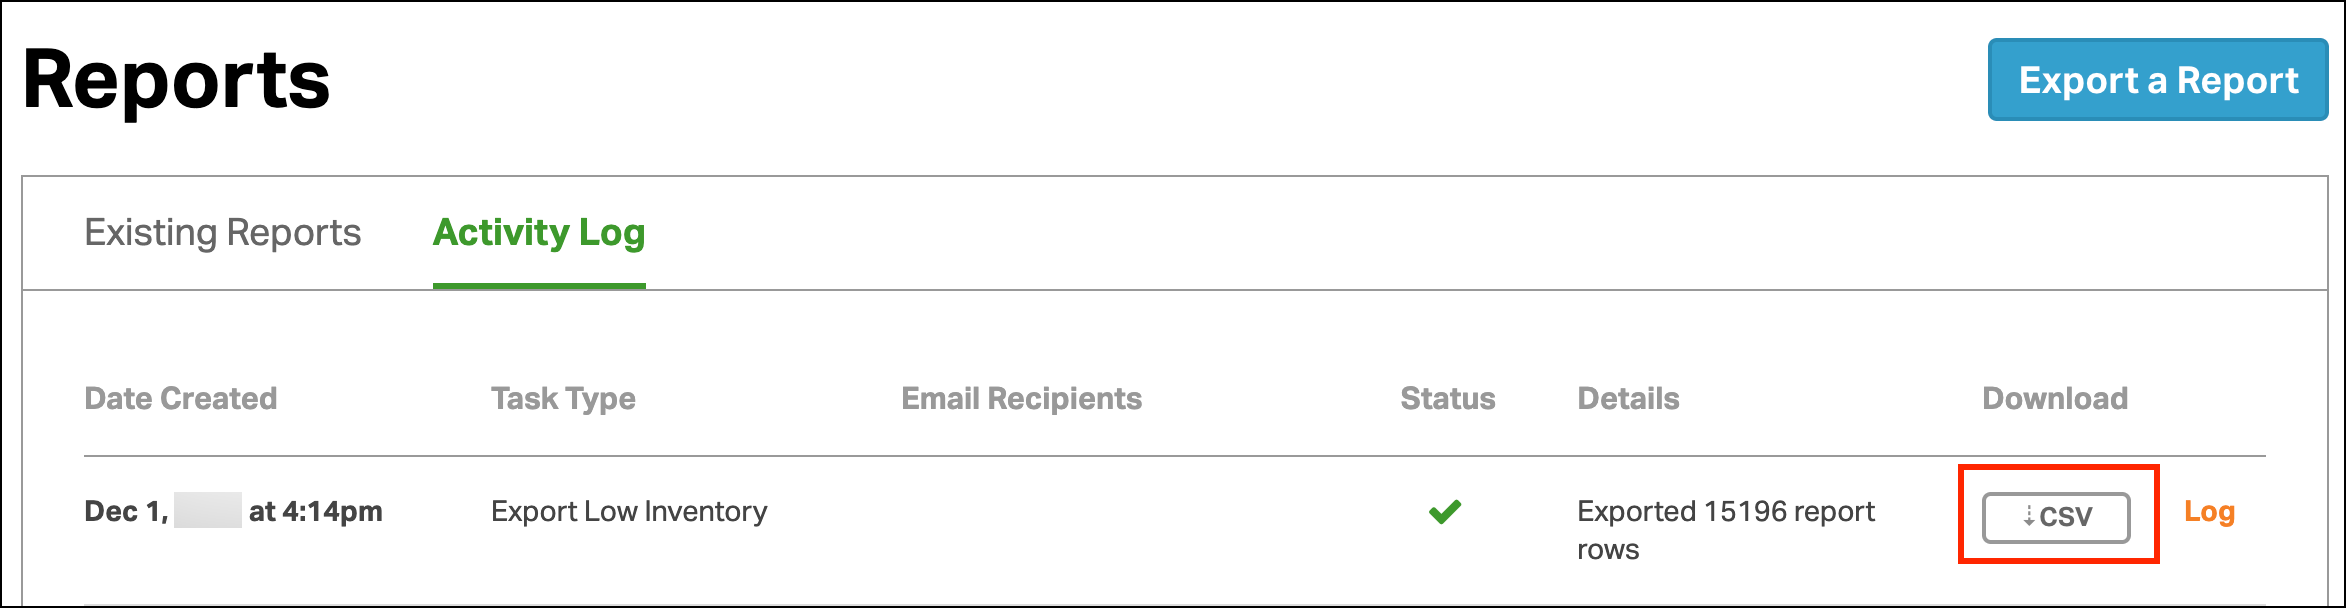
- If you select Single Run, go to the Reports Activity Log to download the report once generated.
- Otherwise, you can Save to schedule the report.
7. Once the report is complete, it is available in the Activity Menu -> Exports.
8. Click the CSV button. The file will automatically download to your computer.